Emergency Alerts
Demonstrates how to send emergency alert notifications with the group messaging API.
If you operate a TV service, you may be required to send emergency alerts to your viewers as part of the Emergency Alert System. This tutorial will show you how to use the Message Manager to send an alert message to your viewers.
- Source code: https://github.com/synamedia-senza/zombies
- Demo: https://senzadev.net/zombies

Video tutorial
Setup
Our demo will have three components:
- A dashboard that can be used to send emergency alerts.
- A copy of the Banner app that can display alerts.
- A
Node.jsapp that serves the web content and makes API calls.
To get started, download the source code so that you can follow along with the tutorial.
Each call to the Group Messaging API is targeted at devices associated with a particular tenant, and requires API keys associated with that tenant. You can create a client_id and client_secret by following the instructions in Making API Requests. Then you can configure the node app by entering them in the config.json file, along with the tenant ID:
{
  "tenantId": "your_tenant_id",
  "oauth": {
    "client_id": "your_client_id",
    "client_secret": "your_client_secret",
    "audience": "https://projects.synamedia.com",
    "grant_type": "client_credentials"
  }
}
Dashboard
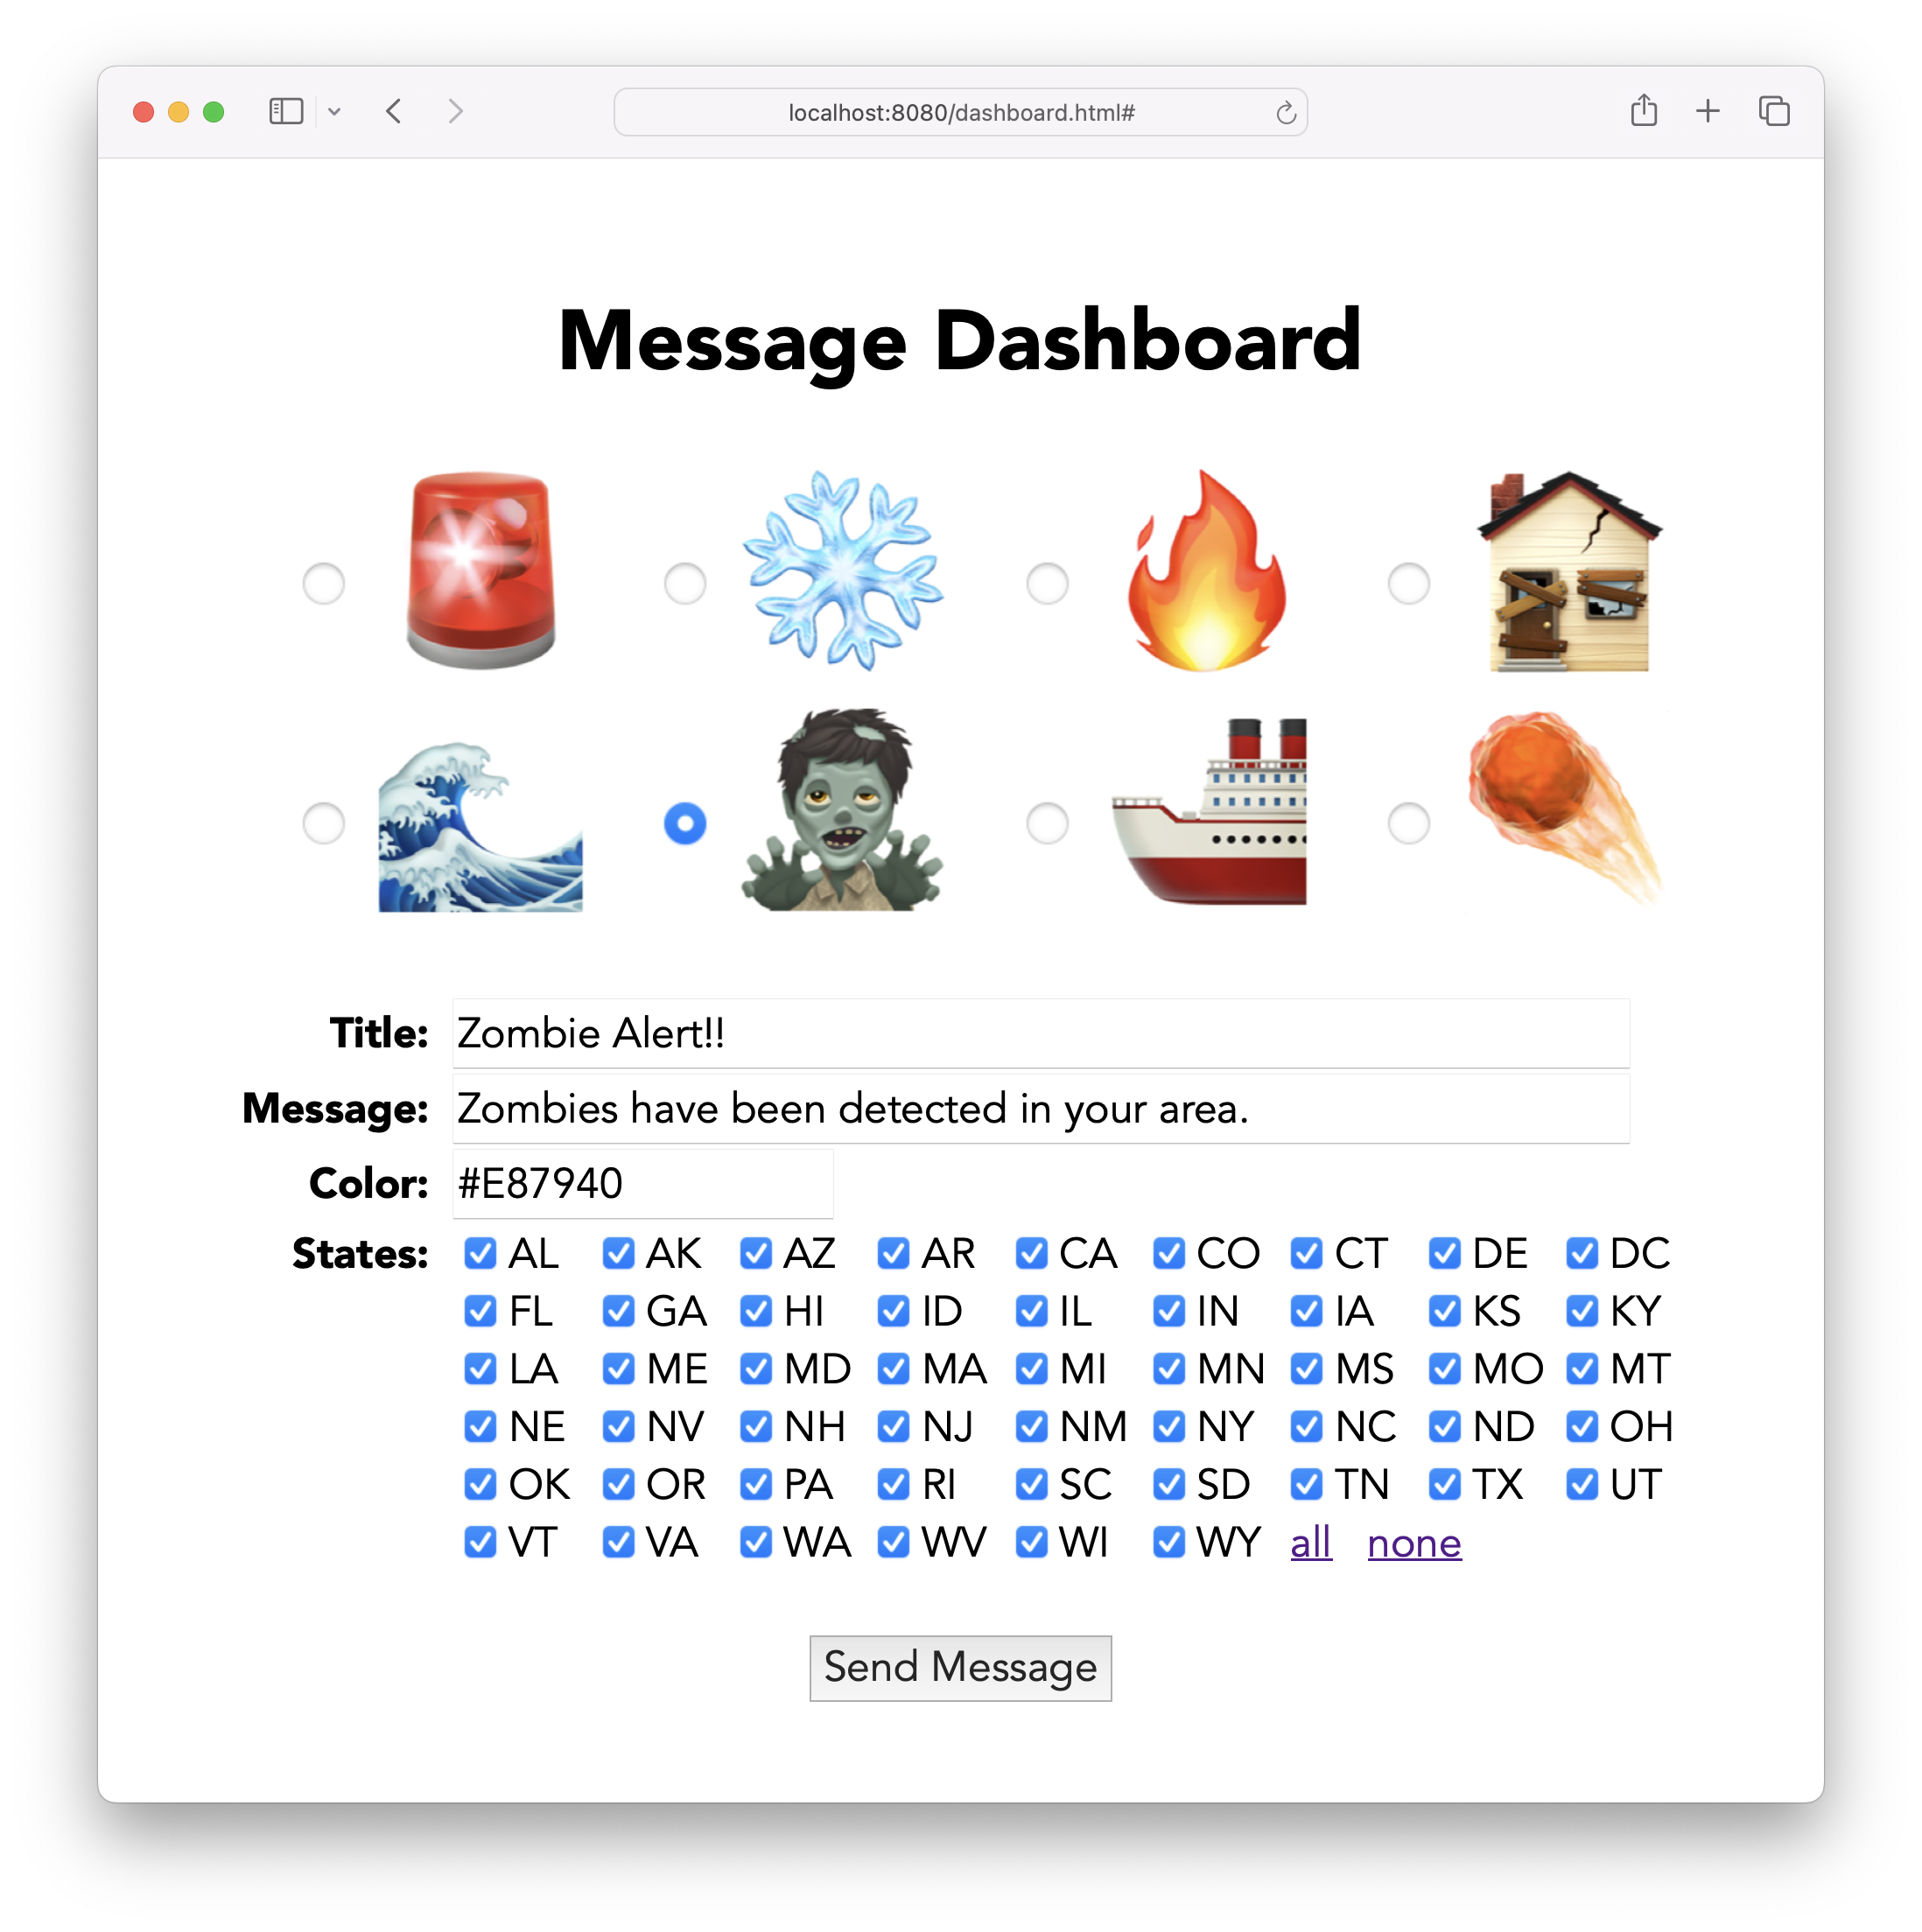
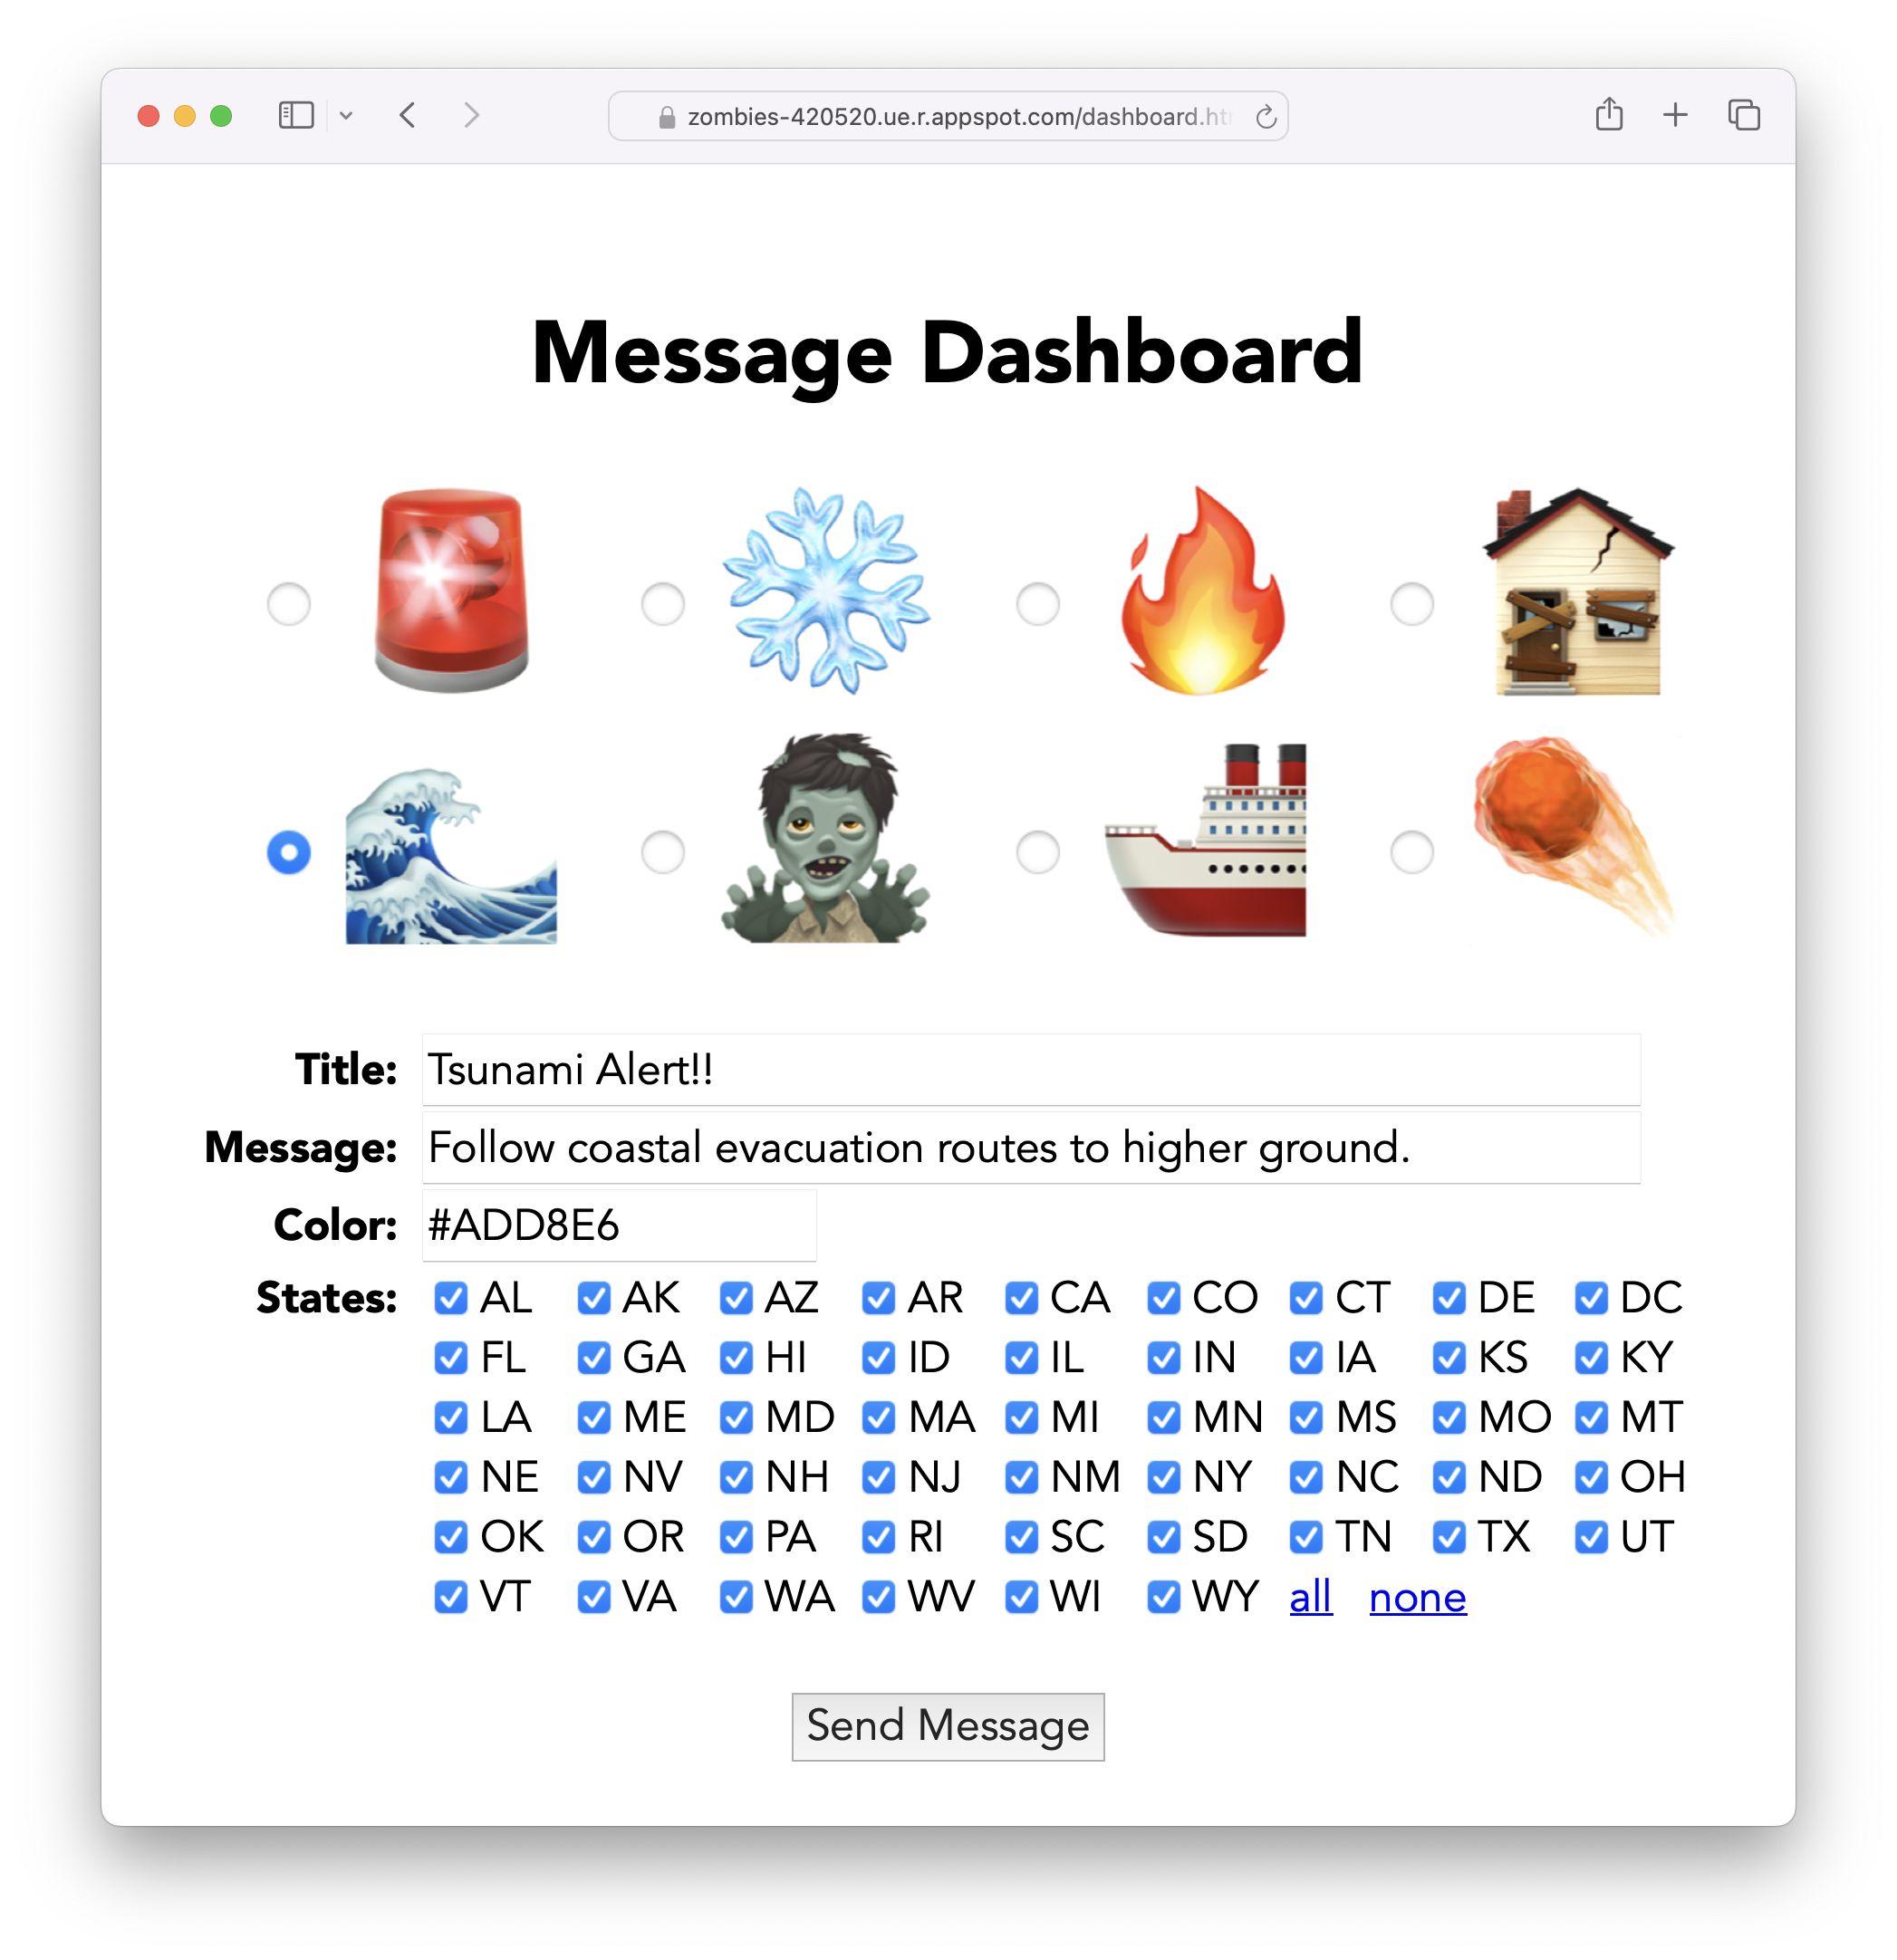
First, we'll create a dashboard for sending messages. Messages can contain a payload of JSON data, so we'll have a model that lets you specify the icon, title, message and color.
The Senza browser runs on a platform that doesn't have great emoji support, so we'll include some emoji icons as picture files.
You'll also be able to specify which groups you want to send the message to. Groups are simply strings that the Senza app can register for. For this demo we'll use the two-letter codes for US states.

Node serves the web content from the public folder. We'll create a dashboard.html file with a few form fields like this. We'll have some radio buttons for the icon, text fields for the tile, message and color, and checkboxes for the groups.
<!DOCTYPE html>
<html>
<head>
	<title>Message Dashboard</title>
	<meta charset="UTF-8">
	<meta name="viewport" content="width=480" />
	<link rel="stylesheet" href="dashboard.css">
</head>
<body>

<h1>Message Dashboard</h1>

<input type="radio" id="alarm" name="icon" value="alarm"><img class="icon" src="icons/alarm.png">
<input type="radio" id="snow" name="icon" value="snow"><img class="icon" src="icons/snow.png">
<input type="radio" id="fire" name="icon" value="fire"><img class="icon" src="icons/fire.png">
<input type="radio" id="earthquake" name="icon" value="earthquake"><img class="icon" src="icons/earthquake.png"><br>
<input type="radio" id="tsunami" name="icon" value="tsunami"><img class="icon" src="icons/tsunami.png">
<input type="radio" id="zombies" name="icon" value="zombies" checked="checked"><img class="icon" src="icons/zombies.png"> <input type="radio" id="ship" name="icon" value="ship"><img class="icon" src="icons/ship.png">
<input type="radio" id="ship" name="icon" value="ship"><img class="icon" src="icons/ship.png">
<input type="radio" id="asteroid" name="icon" value="asteroid"><img class="icon" src="icons/asteroid.png"><br>

<table>
  <tr>
    <td class="label"><label for="title">Title:</label></td>
    <td><input type="text" id="title" name="title" size="50" value="Zombie Alert!!"></td>
  </tr>
  <tr>
    <td class="label"><label for="message">Message:</label></td>
    <td><input type="text" id="message" name="message" size="50" value="Zombies have been detected in your area."></td>
  </tr>
  <tr>
    <td class="label"><label for="message">Color:</label></td>
    <td><input type="text" id="color" name="color" size="15" value="#E87940"></td>
  </tr>
  <tr>
    <td class="label" style="vertical-align: top"><label for="message">States:</label></td>
    <td id="groups">
       <input type="checkbox" id="AL" name="states" checked /><label class="states" for="states">AL</label>
       <input type="checkbox" id="AK" name="states" checked /><label class="states" for="states">AK</label>
       <input type="checkbox" id="AZ" name="states" checked /><label class="states" for="states">AZ</label>
       <!-- etc... -->
			 <a href="#" onclick="checkAll(true)">all</a>
       <a href="#" onclick="checkAll(false)">none</a>
     </td>
  </tr>
</table>

<br><button type="button" onclick="sendMessage()">Send Message</button>

</body>
<script src="dashboard.js"></script>
</html>
In the dashboard.js script we'll have a very short amount of code that makes a POST API request to the node app with the content we want to send.
function sendMessage() {
  fetch("/message", {
    method: "POST",
    body: JSON.stringify({
      payload: {
        icon: document.querySelector('input[name="icon"]:checked').value,
        title: title.value,
        message: message.value,
        color: color.value
      },
      groups: Array.from(groups.childNodes).filter((cb) => cb.checked).map(cb => cb.id)
    }),
    headers: {"Content-type": "application/json"}
  });
}
The body of the API request will contain a payload including the icon, title, message, and color. The icon is the id of the radio button element that is selected. It will also include a list of groups, which are the ids of the checkboxes that are checked. Here's a sample request:
{
  payload: {
    icon: 'zombies',
    title: 'Zombie Alert!!',
    message: 'Zombies have been detected in your area.',
    color: '#E87940'
  },
  groups: [
    'AL', 'AK', 'AZ', 'AR', 'CA', 'CO', 'CT',
    'DE', 'DC', 'FL', 'GA', 'HI', 'ID', 'IL',
    'IN', 'IA', 'KS', 'KY', 'LA', 'ME', 'MD',
    'MA', 'MI', 'MN', 'MS', 'MO', 'MT', 'NE',
    'NV', 'NH', 'NJ', 'NM', 'NY', 'NC', 'ND',
    'OH', 'OK', 'OR', 'PA', 'RI', 'SC', 'SD',
    'TN', 'TX', 'UT', 'VT', 'VA', 'WA', 'WV',
    'WI', 'WY'
  ]
}
For convenience, we also have some links that let the user check all or none of the checkboxes. Both links call this function, passing in a boolean that is used to set the checked attribute of all the checkboxes.
function checkAll(value) {
  Array.from(groups.childNodes).map((cb) => cb.checked = value);
}
Server app
The zombies.js file contains our Node.js app. We'll start with a bit of boilerplate:
import fetch from 'node-fetch';
import express from 'express';
import errorHandler from 'errorhandler';
import path from 'path';
import { fileURLToPath } from 'url';
import config from './config.json' with {type: "json"};

let app = express();
let hostname = process.env.HOSTNAME || 'localhost';
let port = parseInt(process.env.PORT, 10) || 8080;
let publicDir = path.dirname(fileURLToPath(import.meta.url)) + '/public';

app.use(express.static(publicDir));
app.use(express.json());
app.use(errorHandler({dumpExceptions: true, showStack: true}));
app.listen(port);

console.log("Zombies server running at " + hostname + ":" + port);
You can install the packages you need using npm install and then run the app using node zombies.js.
When the app starts up, we'll request an access token. Note that the body of the request comes from the config.json file, which you should update with your client id and client secret.
async function getAcesssToken() {
  let tokenResponse = await fetch("https://auth.synamedia.com/oauth/token", {
  	method: "post",
  	body: JSON.stringify(config.oauth),
  	headers: {"Content-Type": "application/json"}
  });
  let json = await tokenResponse.json();
  return json.access_token;
}

let accessToken = await getAcesssToken();
setTimeout(() => accessToken = getAccessToken(), 21600000);
When we receive the access token in the response, we'll save it in a global variable. Access tokens are valid for six hours, so we'll periodically refresh the access token.
The server will have a single POST endpoint called /message. It prints the message body to the console and then chains to the sendGroupMessage() function. Note that here we're passing the tenantId from the config file.
app.post('/message', function (req, res) {
  console.log(req.body);
  sendGroupMessage(config.tenantId, req.body.groups, req.body.payload, "ZombieAlert");
  res.end();
});
That function make an authenticated API request to Senza's Group Messaging API, using the tenantId, groups, payload and eventName. It prints the HTTP response code, such as 200 if the request is successful.
async function sendGroupMessage(tenantId, groups, payload, eventName) {
  let res = await fetch("https://hyperscale-message-broker-main.ingress.active.streaming.synamedia.com/" +
    "message-broker/1.0/messages/tenant/" + tenantId + "/groups/app", {
  	method: "post",
  	body: JSON.stringify({groups, payload, eventName}),
  	headers: {
      "Content-Type": "application/json",
      "Authorization": "Bearer " + accessToken
    }
  });
  console.log(res.status);
}
For completeness the zombies.js file also has a sendDeviceMessage()function, not used in this tutorial, which can be used to send a message to a single device.
Receiving alerts
The app for displaying alerts is based on the Banner app, as covered in the Seamless Switch tutorial. We'll modify the app to display an alert instead of an advertising banner.
The index.html file looks like this:
<!DOCTYPE html>
<html>
<head>
  <title>Zombies</title>
	<link rel="stylesheet" href="styles.css">
</head>
<body>
<div id="main">
  <video id="video" width="1920" height="1080" muted="muted"></video>

  <div id="banner">
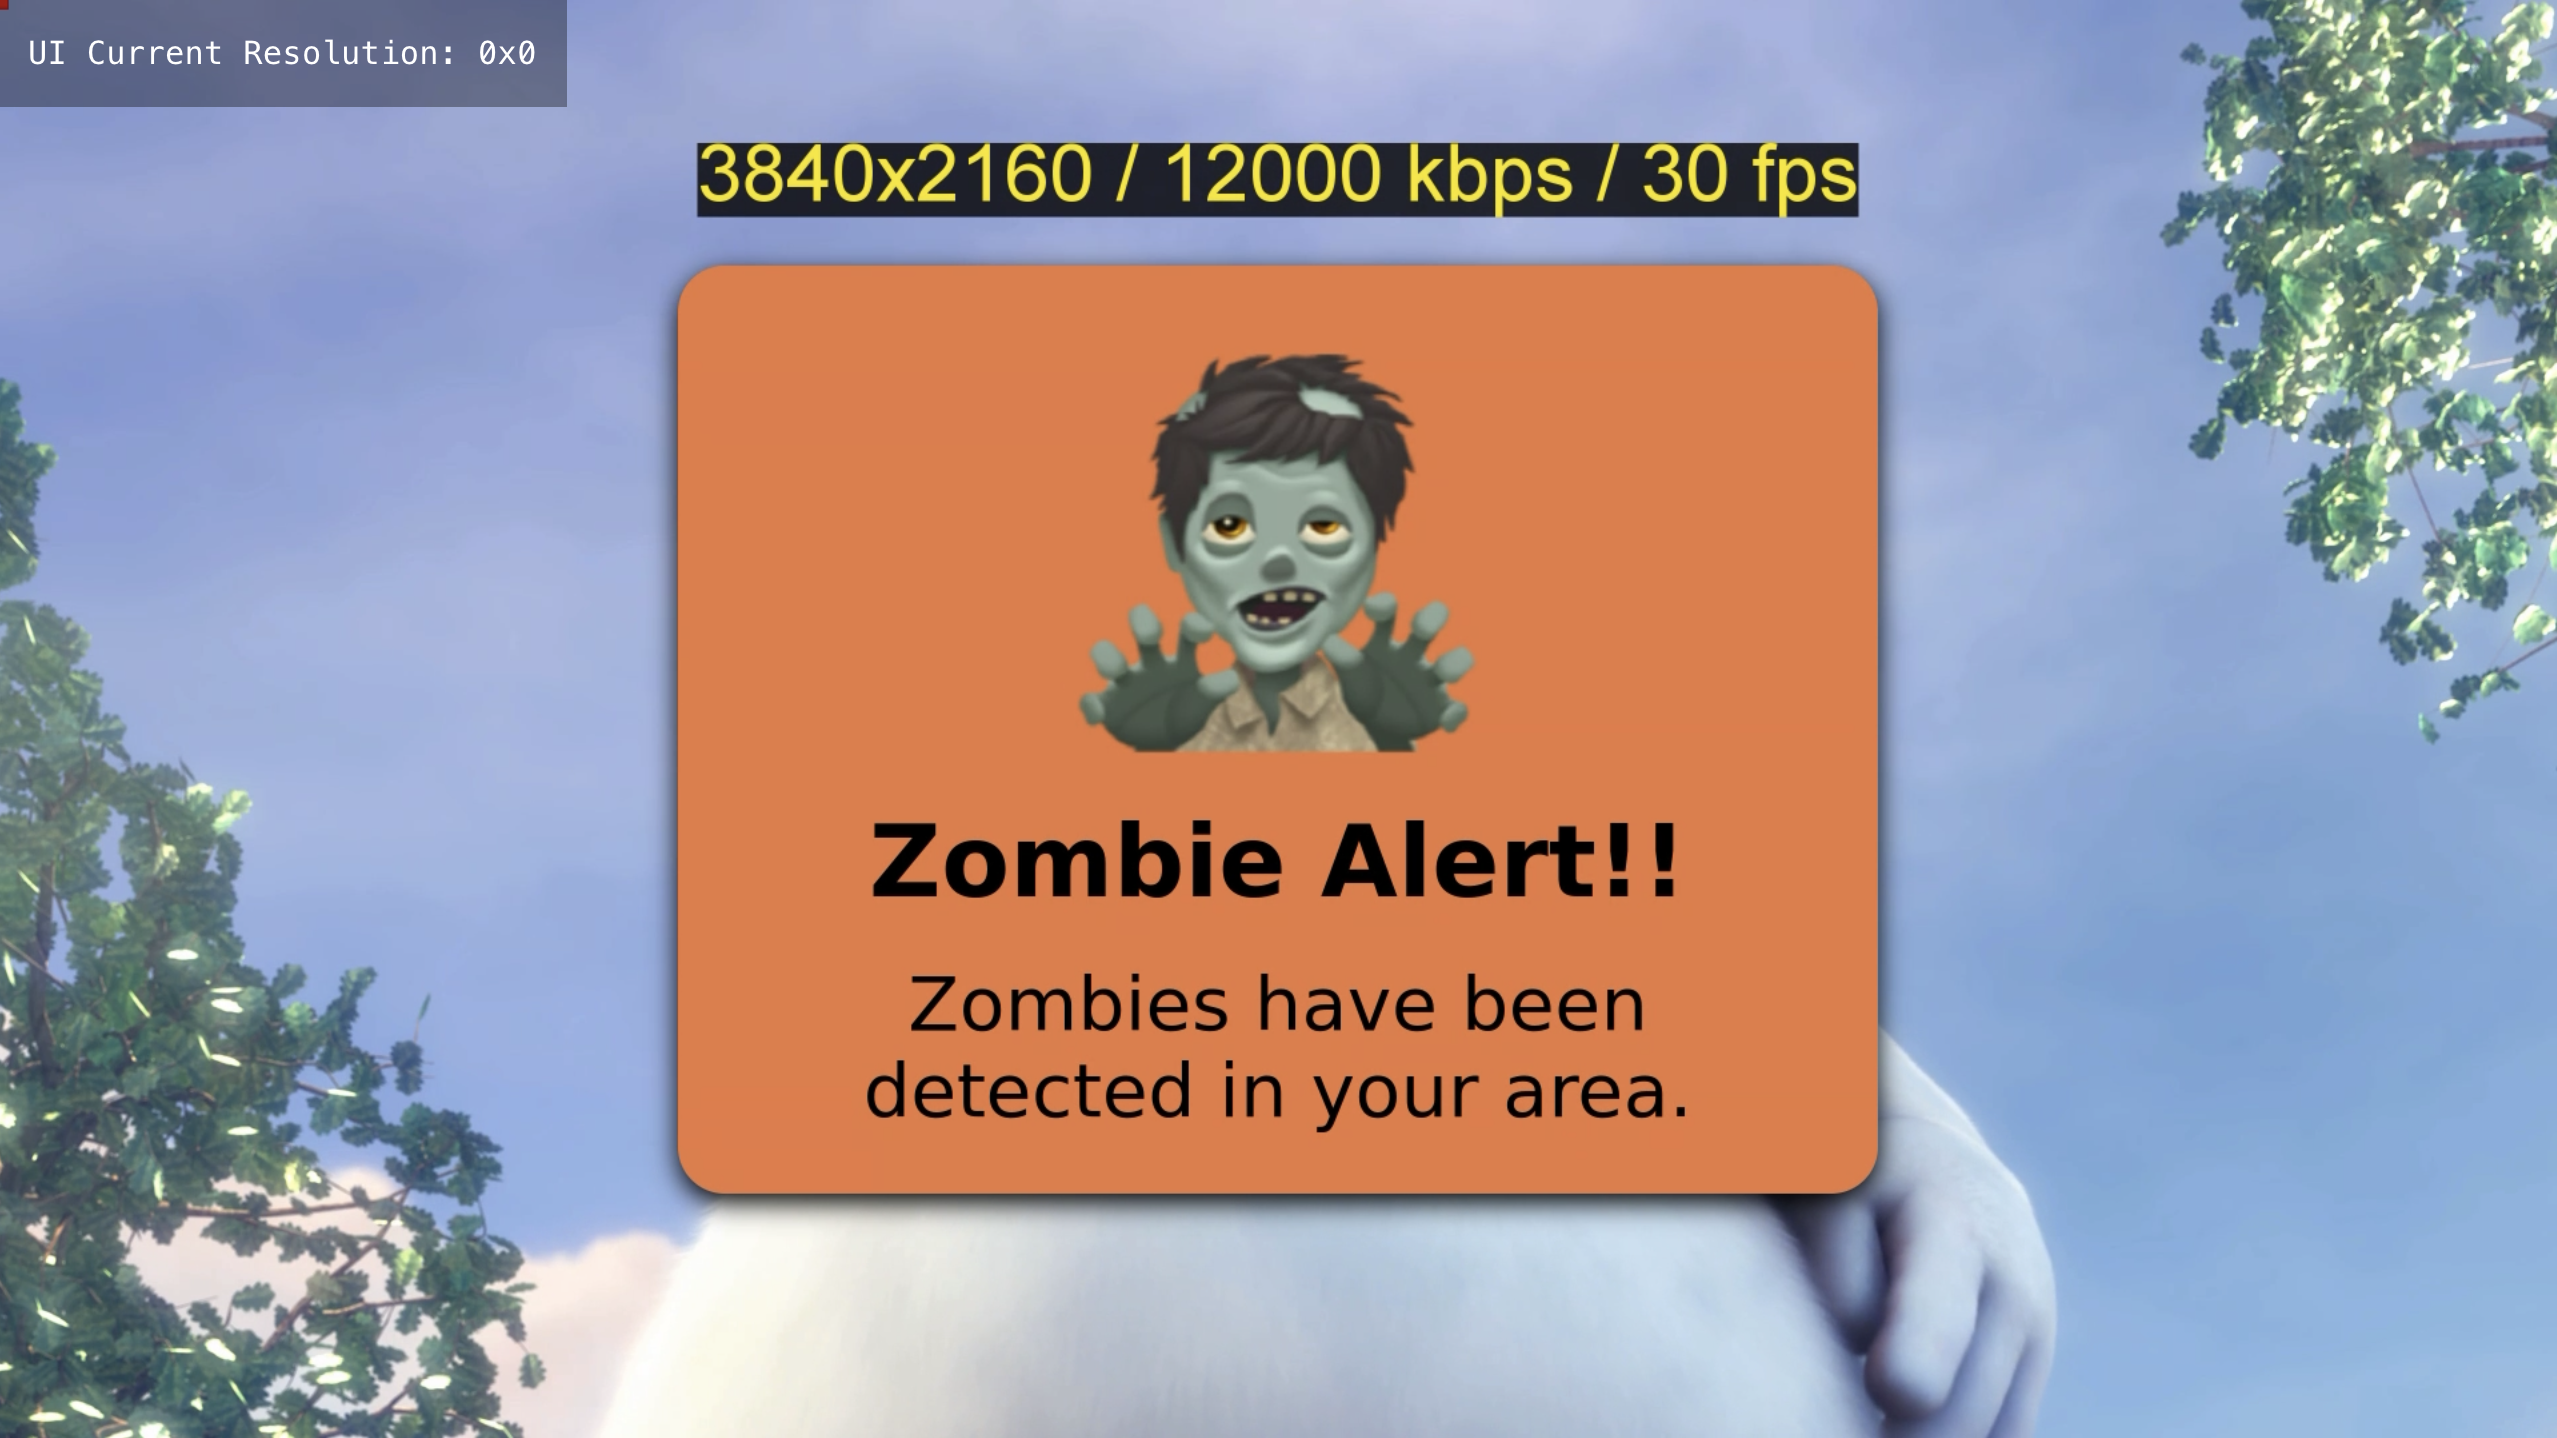
    <img id="icon" src="icons/zombies.png">
    <div id="title">Zombie Alert!!</div>
    <div id="message">Zombies have been<br>detected in your area.</div>
  </div>
</div>
</body>
<script src="https://cdnjs.cloudflare.com/ajax/libs/shaka-player/4.7.11/shaka-player.compiled.js"></script>
<script src="https://senza-sdk.streaming.synamedia.com/latest/bundle.js"></script>
<script type="text/javascript" src="videoManager.js"></script>
<script type="text/javascript" src="index.js"></script>
</html>
We'll have a div called banner that contains our icon, title and message.
To avoid having to install npm packages for the client code as well as the server, we'll load the client library and the Shaka player from the CDN for this tutorial. We'll also load the same videoManager.js from the Banner app, modified slightly so we can load it from a script tag.
The styles.css file contains styling for the alert. In particular note that the banner has some rounded corner and a drop shadow, and is hidden by default with zero opacity. It has a z-index of 2 so it will float above the video.
#banner {
  position: absolute;
  width: 900px;
	top: 200px;
  left: 510px;
  border-radius: 35px;
  background-color: #E87940;
  filter: drop-shadow(black 0px 7px 10px);
  color: black;
  padding-top: 20px;
  z-index: 2;
  opacity: 0.0;
}
In the index.js file, we'll modify the window load event listener with a call to the Message Manager's registerGroups() function. It takes an array of group names that the app wants to register to be a part of. These are defined on the fly, so if you include a string in this list and then send a message using the API with a list of groups that includes one or more of these strings, the message will be delivered.
In this example, we'll register for messages that are relevant for Connecticut, New Jersey or New York. You can use groups that work for whatever degree of granularity is appropriate for your use case, such as countries, states/provinces, zipcodes/postcodes, etc. If you want to send a message to all devices on your platform you can just use any string of your choice for sending and receiving all messages.
let videoManager = new VideoManager();

window.addEventListener("load", async () => {
  try {
    await senza.init();
    videoManager.init(new shaka.Player(video));
    await videoManager.load(TEST_VIDEO);
    videoManager.play();
    senza.uiReady();

    // register to receive messages sent to these groups
    senza.messageManager.registerGroups(["CT", "NJ", "NY"]);

  } catch (error) {
    console.error(error);
  }
});
Now when a message is sent to a group that this app has registered for, it will receive a callback like this:
senza.messageManager.addEventListener("message", async (event) => {
  const currentState = await senza.lifecycle.getState();
  if (currentState == "background" || currentState == "inTransitionToBackground") {
    senza.lifecycle.moveToForeground();
  }

  let payload = JSON.parse(event.detail.payload);
  console.log(payload);

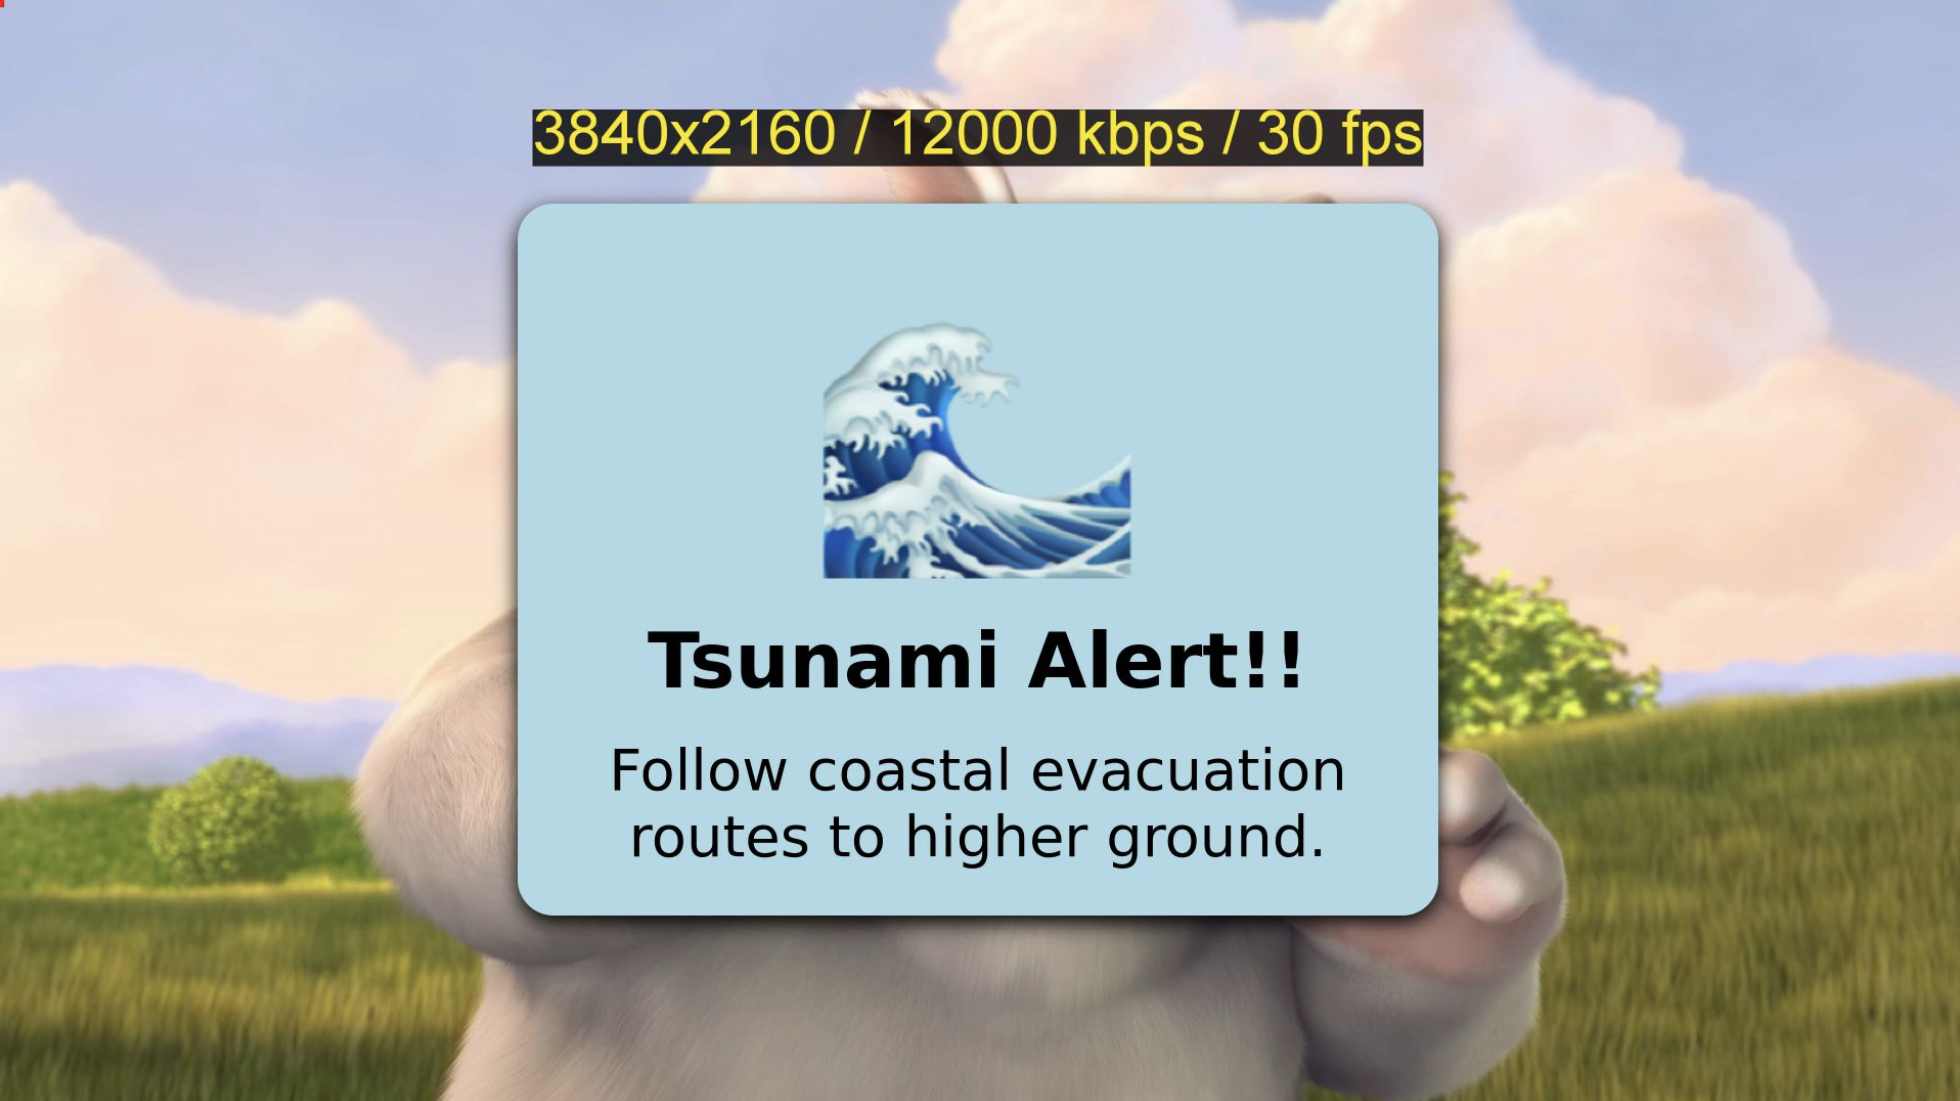
  banner.style.opacity = 1.0;
  icon.src = `icons/${payload.icon}.png`
  title.innerHTML = payload.title;
  message.innerHTML = payload.message;
  banner.style.backgroundColor = payload.color;
});
An important step is to check if we are currently playing video in background mode using the remote player. If so, the message manager will wake up the app enough for it to receive this callback, and we can then use the lifecycle object to move to the foreground.
Then we'll decode the payload and print it to the console to confirm that we've received it:
{
  icon: 'tsunami',
  title: 'Tsunami Alert!!',
  message: 'Follow coastal evacuation routes to higher ground.',
  color: '#ADD8E6'
}
We set the opacity to 1.0 to show the alert, and update the icon, title, message, and background color. That's it!


Now next time there's an ☄️ incoming asteroid, your viewers will be well informed.
Updated 10 months ago