Video Tutorials App
A tutorial about the tutorials app, how very meta.
Here's a short tutorial on how the Video Tutorials app works.
If all you want to do is watch the videos, see the Video Tutorials page.
- Source code: https://github.com/synamedia-senza/video-tutorials/
- Demo: https://senzadev.net/video-tutorials/
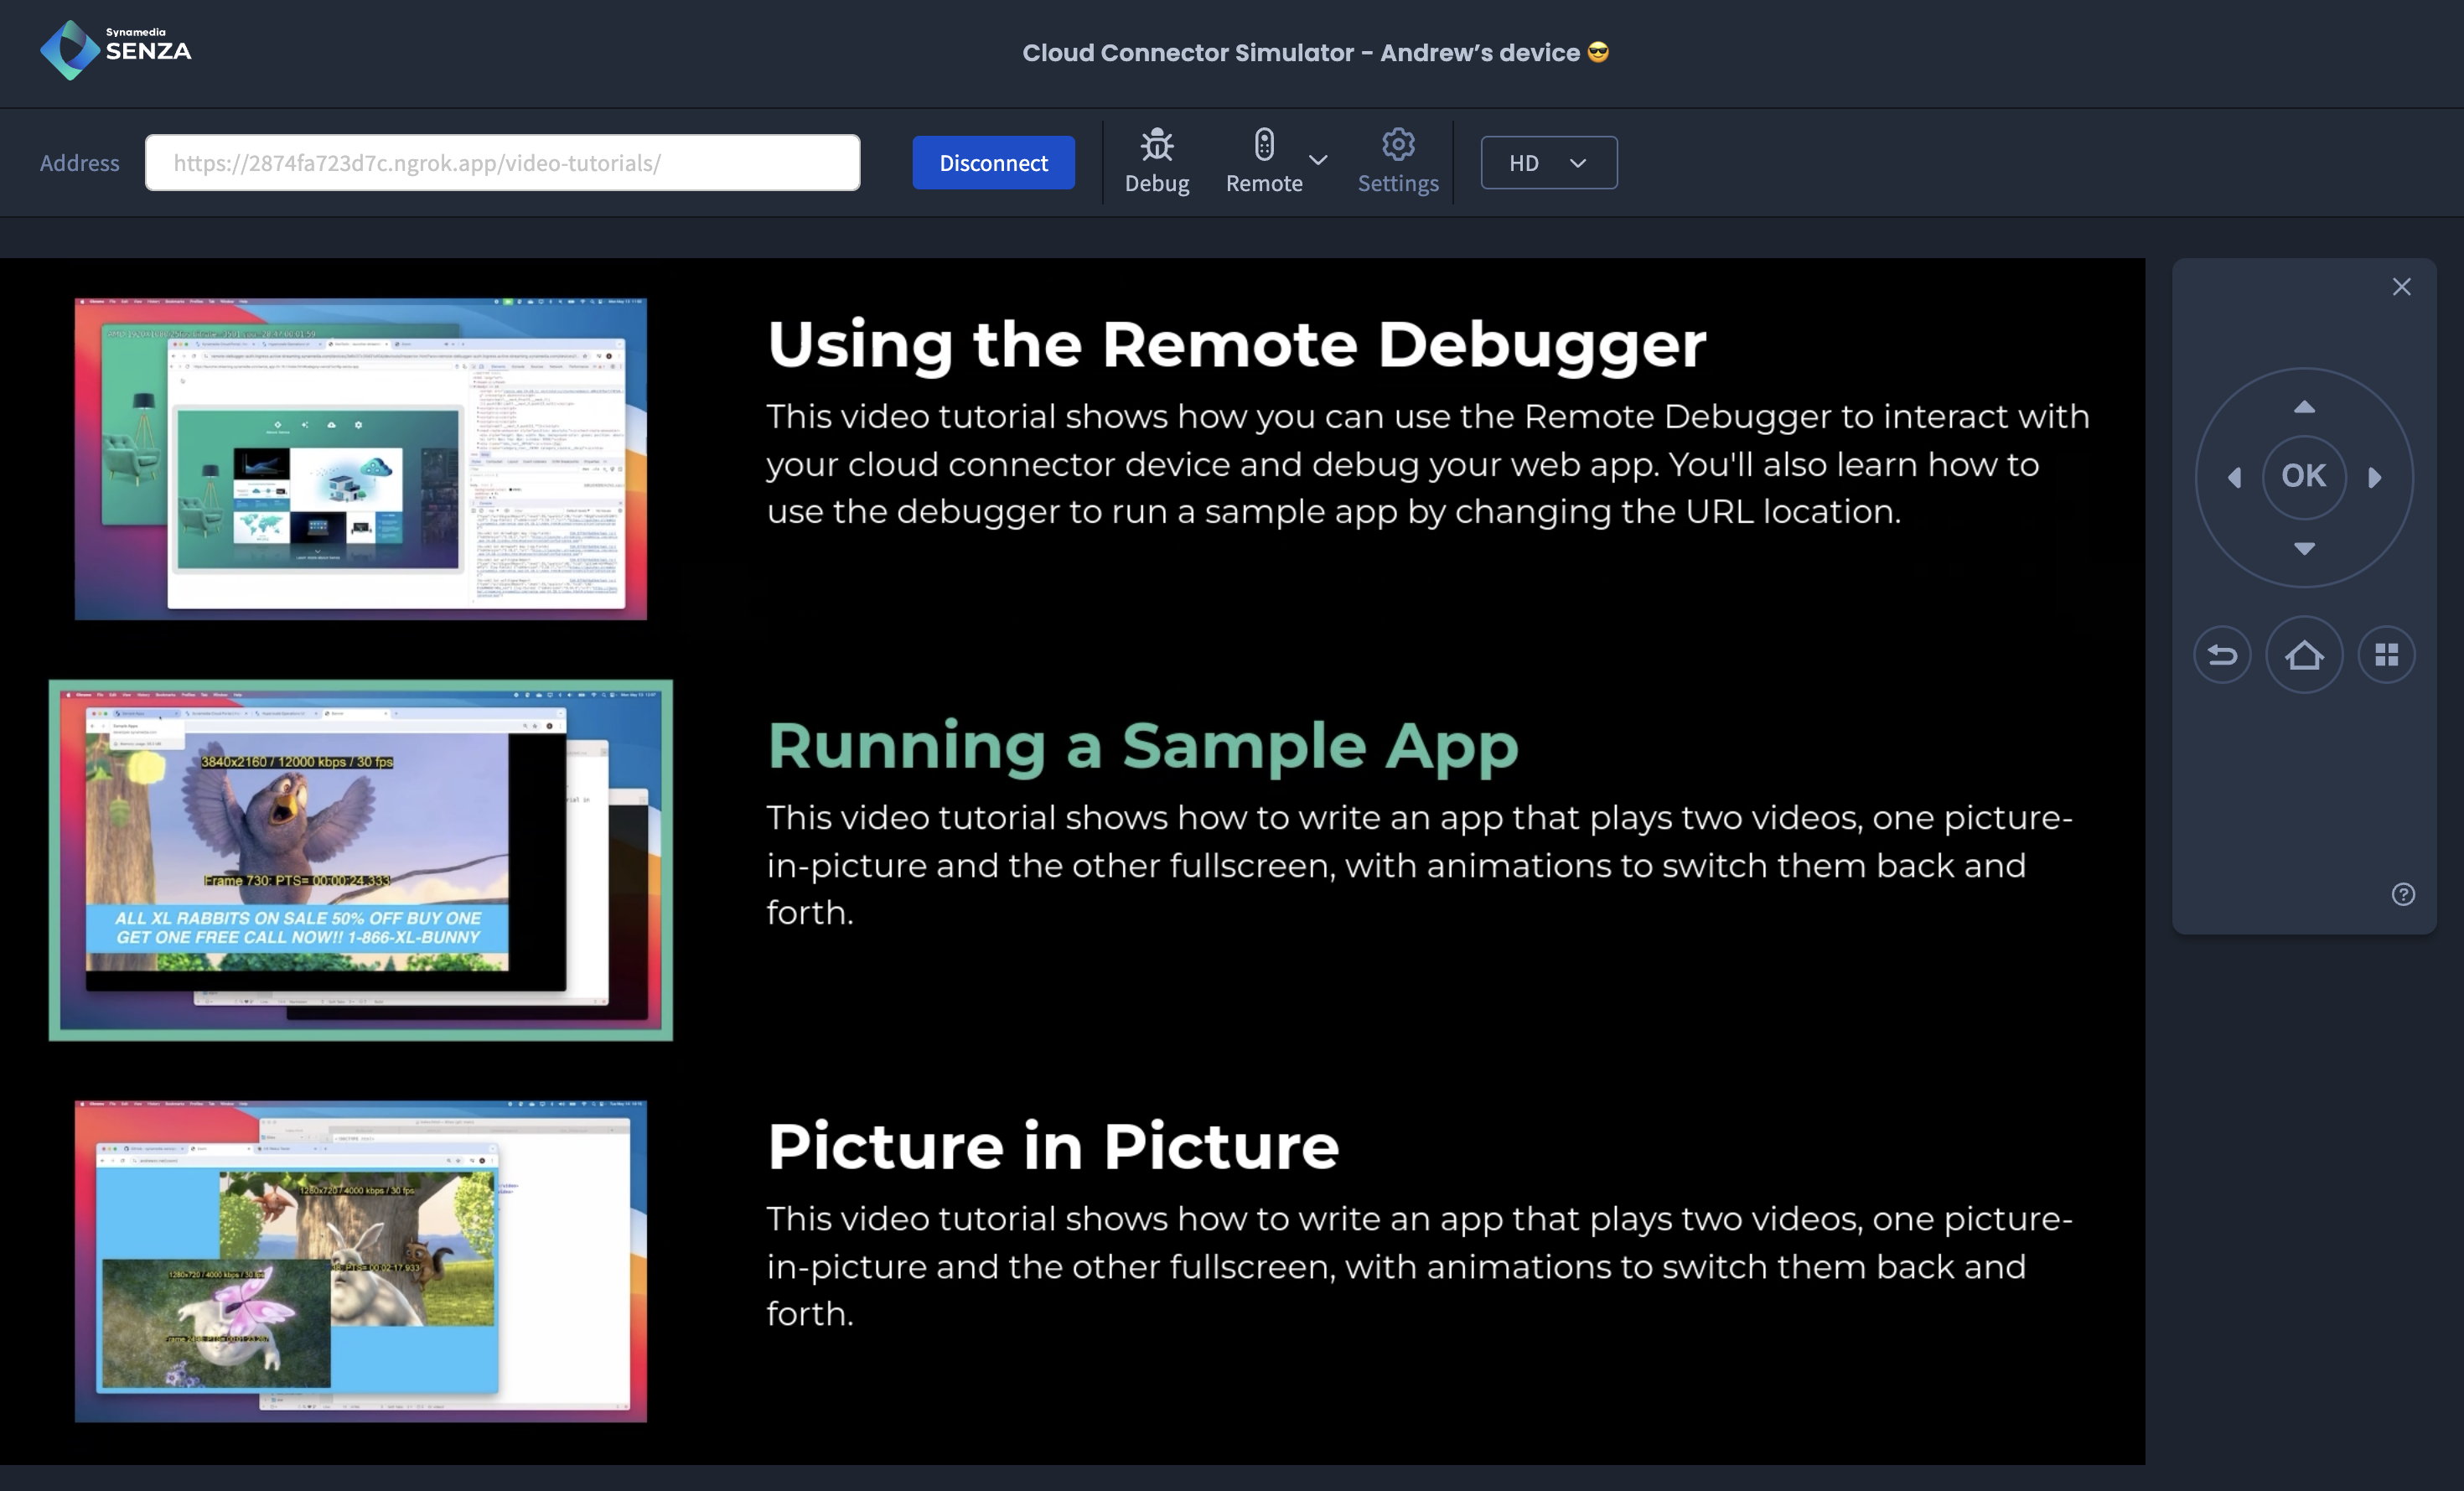
The app features a list of videos, each with a title, description and thumbnail. You can use the up and down arrows to select a video, and the OK button to play the selected video. It's a very simple app, but serves as a good example for implementing basic remote control navigation.

HTML App
Our index.html file is very simple, and has a body with an empty <table element. We'll build up the contents of the table dynamically.
<!DOCTYPE html>
<html>
<head>
  <title>Video Tutorials</title>
  <meta http-equiv="Content-Type" content="text/html; charset=utf-8" />
	<link rel="stylesheet" href="styles.css">
</head>
<body>
<div id="main">
<table id="table">
</table>
</div>
</body>
<script src="https://senza-sdk.streaming.synamedia.com/latest/bundle.js"></script>
<script type="text/javascript" src="videos.js"></script>
<script type="text/javascript" src="tutorials.js"></script>
</html>
The styles.css file has some basic styles for the page. The key styles that we want to focus on are the ones for indicating which elements on the page are selected. When an image is selected we'll add a colored border and make it 5% larger, and when the title text is selected we'll change the color as well.
.selected img {
  border: solid 10px #5ABDA2;
  transform: scale(1.05);
}

.selected .title {
  color: #5ABDA2;
}
Data Model
We'll create a videos.js file to store our data, with an array of objects. Each object will have an id, thumbnail image, video url, title and description.
const videos = [
  {
    "id": "simulator",
    "thumb": "thumbs/simulator.jpg",
    "url": "https://senza-developer.s3.amazonaws.com/streams/simulator/simulator.mpd",
    "title": "Using the Device Simulator",
    "description": "This video tutorial shows how you can use the device simulator to preview how your app will run on a physical cloud connector device."
  },
  {
    "id": "debugger",
    "thumb": "thumbs/debugger.jpg",
    "url": "https://senza-developer.s3.amazonaws.com/streams/debugger/debugger.mpd",
    "title": "Using the Remote Debugger",
    "description": "This video tutorial shows how you can use the Remote Debugger to interact with your cloud connector device and debug your web app. You'll also learn how to use the debugger to run a sample app by changing the URL location."
  },
  // ...
];
Page Content
We'll build up the content of the page dynamically. In the tutorials.js file, we'll start with a function that reads the data model and adds rows to the table:
let selected = 0;

window.addEventListener("load", async () => {
  try {
    await senza.init();

    updateVideos();

    senza.uiReady();
  } catch (error) {
    console.error(error);
  }
});

function updateVideos() {
  videos.forEach((video, index) => {
    let rowClass = index == selected ? "row selected" : "row";
    table.innerHTML += `<tr class="${rowClass}">
      <td class="thumb">
        <img src="${video.thumb}">
      </td>
      <td class="text">
        <div class="title">${video.title}</div>
        <div class="description">${video.description}</div>
      </td>
    </tr>`;
  });
}
For each video, the updateVideos() function creates a new table row with a cell for the image thumbnail and a cell for the title and description.
Selection
We can't click elements with the remote control, so instead we'll use the up and down arrows to select a video and then the OK button to play it.
We'll have a key listener that response to the up and down arrow keys and calls functions called up() and down(). Each of these will deselect the currently selected item by removing the selected class, increment or decrement the currently selected index, and then add the selected class to the new row.
document.addEventListener("keydown", async function(event) {
	switch (event.key) {
    case "Enter": toggleVideo(); break;
    case "Escape": toggleVideo(); break;
    case "ArrowUp": up(); break;
    case "ArrowDown": down(); break;
		default: return;
	}
	event.preventDefault();
});

function getRows() {
  return Array.from(document.getElementsByClassName("row"));
}

function up() {
  let rows = getRows();
  deselect(rows[selected]);
  selected = (selected - 1 + rows.length) % rows.length;
  select(rows[selected]);
 }

function down() {
  let rows = getRows();
  deselect(rows[selected]);
  selected = (selected + 1) % rows.length;
  select(rows[selected]);
}

function select(link) {
  link.classList.add("selected");
  scrollToMiddle(link);
  console.log('Selected: ' + link.innerHTML);
}

function deselect(link) {
  link.classList.remove("selected");
}

function scrollToMiddle(link) {
  link.scrollIntoView({behavior: "smooth", block: "center", inline: "center"});
}
When we select a row we'll call scrollIntoView() to scroll the page so that the selected element is as close to the middle of the screen as possible. In effect this keeps the selection in the same place and moves the content around, unless we are selecting the first or last item in the list and we can't scroll any more.
Playing Videos
When the user presses the OK button, we'll call the toggleVideo() function. If they are currently in the foreground mode (looking at the web page with the list of videos), we'll play the selected video. Otherwise if they're in the background mode (playing a video), we'll switch back to the foreground.
Here you can see that we pass the URL of the currently selected video to the playVideo() function, which will load it into the remote player and play it.
async function toggleVideo() {
  const currentState = await senza.lifecycle.getState();
  if (currentState == "background" || currentState == "inTransitionToBackground") {
    senza.lifecycle.moveToForeground();
  } else {
    await playVideo(videos[selected].url);
  }
}

async function playVideo(url) {
  try {
    await senza.remotePlayer.load(url);
  } catch (error) {
    console.log("Couldn't load remote player.");
  }
  senza.remotePlayer.play();
}
One more small detail, in the load event listener, we'll add a callback function that switches back to the foreground if the video finishes playing:
senza.remotePlayer.addEventListener("ended", () => {
  senza.lifecycle.moveToForeground();
});
Conclusion
That's it! This short tutorial showed how you can use the arrows to select items in a list, and how to play videos in the remote player.
What if you want to make your own videos that you can play on Senza? The screen capture videos in this app were created in MP4 format using QuickTime Player. See the Encoding Video page to learn how you can use AWS MediaConvert to encode your own videos into DASH format.
Updated over 1 year ago