Device Gateway
All devices in a tenant load the same application URL when they first connect. That's great if you want everyone to see the same thing, but what if you want different devices to load different web pages? That could be useful if:
- You're part of a team developing apps, and developers want to load different versions of their apps
- In a deployment scenario where you want to pass device-specific configuration in the URL, such as user credentials
In the Overriding Device URLs guide, we learned a few options for creating static redirect services where the tenant's application URL can be set to a gateway that routes traffic differently according to the device ID. With solutions based on browser scripts, PHP and Nginx, they're all simple and reliable—but totally static.
During development it can be useful to use Ngrok to make a tunnel from the cloud to your computer so that the browser running on the Senza platform can load apps from your local development environment. You can also prevent the browser from cacheing your app by reconnecting Ngrok to generate a different URL.
But that raises the issue of having to maintain the device mapping, which is not practical if the mapping is static. In this tutorial, we'll learn how to make a dynamic device gateway with a REST API that lets you update the contents. We'll also write a script that lets you restart Ngrok and update the mapping all in one go.
- Source code: https://github.com/synamedia-senza/gateway
- Demo: https://senzadev.net/gateway/
- API: https://gateway-455317.ue.r.appspot.com
Node.js app
First, we'll write a Node.js app to act as our gateway service. In the spirit of vibe coding, we'll ask ChatGPT to do most of the work for us:
Write a Node.js script using express called gateway.js that acts as a redirection service. It maintains two in-memory mappings called "tenants" and "devices" whose default values are loaded from a config file called config.js. Tenants maps tenant IDs to URLs, and devices maps device IDs to URLs. It should have a REST API to get the redirection URL for a device ID and tenant ID: if the device is found in the list of device mappings it returns the associated URL, otherwise it looks up the tenant ID and returns the associated URL. It should expose REST APIs that let you list the tenant and device records, add an entry with a POST request, or delete an entry. When making a GET request to the top level, it should return a web page that runs a script that calls the API to get the redirection URL passing a tenant ID and device ID, and then when it receives the response it should redirect to that URL.
The purpose of our app is to allow the mappings to be set dynamically. The app will use an in-memory data store, so if you need to restart it the mappings will be cleared. We will however put some static data into a config.js file that we can use to initialize the mappings. And if the device and tenant are not found when doing a lookup, we'll fall back to using a default URL from the settings.
export const devices = {
  device123: { name: 'Device 123', url: 'https://device123.example.com' },
  device456: { name: 'Device 456', url: 'https://device456.example.com' },
};

export const tenants = {
  tenant1: { name: 'Tenant One', url: 'https://tenant1.example.com' },
  tenant2: { name: 'Tenant Two', url: 'https://tenant2.example.com' },
};

export const defaultUrl = 'https://launcher.streaming.synamedia.com/redirect/senza-app/stable/index.html';
Here's the basic structure of our app in the gateway.js file that serves web content from the public folder using express, and loads the default settings from the config file.
import express from 'express';
import bodyParser from 'body-parser';
import path from 'path';
import { fileURLToPath } from 'url';
import { tenants as defaultTenants, devices as defaultDevices, defaultUrl } from './config.js';

// Setup __dirname for ES modules
const __filename = fileURLToPath(import.meta.url);
const __dirname = path.dirname(__filename);

const app = express();
const port = 8080;

app.use(bodyParser.json());

// Serve static files from "public" folder
app.use(express.static(path.join(__dirname, 'public')));

let tenants = { ...defaultTenants };
let devices = { ...defaultDevices };

app.listen(port, () => {
  console.log(`Gateway service running at http://localhost:${port}`);
});
The app will have REST APIs for getting a list of tenants and devices, adding/updating one, or deleting one. This is a simplified version of the code, see the gateway.jssource code for the implementations with error handling.
app.get('/api/tenants', (req, res) => res.json(tenants));
app.get('/api/devices', (req, res) => res.json(devices));

app.post('/api/tenants', (req, res) => {
  const { tenantId, name, url } = req.body;
  tenants[tenantId] = { name, url };
  res.status(201).json({ message: 'Tenant added/updated' });
});

app.post('/api/devices', (req, res) => {
  const { deviceId, name, url } = req.body;
  devices[deviceId] = { name, url };
  res.status(201).json({ message: 'Device added/updated' });
});

app.delete('/api/tenants/:tenantId', (req, res) => {
  const { tenantId } = req.params;
  if (tenants[tenantId]) {
    delete tenants[tenantId];
    res.json({ message: 'Tenant deleted' });
  }
});

app.delete('/api/devices/:deviceId', (req, res) => {
  const { deviceId } = req.params;
  if (devices[deviceId]) {
    delete devices[deviceId];
    res.json({ message: 'Device deleted' });
  }
});
And here's the interesting API that we'll use to get the URL for a given device and tenant. First it sees if there is an entry in the device mapping, then it checks the tenant mapping, then it falls back to the default URL.
app.get('/api/redirect', (req, res) => {
  const { deviceId, tenantId } = req.query;

  if (devices[deviceId]) {
    return res.json({ url: devices[deviceId].url });
  }

  if (tenants[tenantId]) {
    return res.json({ url: tenants[tenantId].url });
  }

  return res.json({ url: defaultUrl });
});
Redirect page
When you set the URL of your tenant to point to the app, it will load the index.html page from the public folder. The page loads the Senza Client Library, and uses the Device Manager to get the device ID and tenant name. You can also override these for testing purposes by including them as device and tenant URL parameters.
The page will then query the redirect API with the device and tenant to look up the URL to use. It then redirects to the URL in the response. (Again, error handling omitted for brevity.)
<!DOCTYPE html>
<html>
  <head><title>Gateway</title></head>
  <body>
    <script src="https://senza-sdk.streaming.synamedia.com/latest/bundle.js"></script>
    <script>
      window.addEventListener("load", async () => {
        try {
          await senza.init();

          const params = new URLSearchParams(window.location.search);
          const deviceId = params.get('device') || senza.deviceManager.deviceInfo.deviceId;
          const tenantId = params.get('tenant') || senza.deviceManager.deviceInfo.tenant;

          let redirectApi = `/api/redirect?deviceId=${deviceId}&tenantId=${tenantId}`;
          let res = await fetch(redirectApi);
          let data = await res.json();

          window.location.href = data.url;
        } catch (error) {
          document.body.innerText = "Error: " + error.message;
        }
      });
    </script>
  </body>
</html>
Admin page
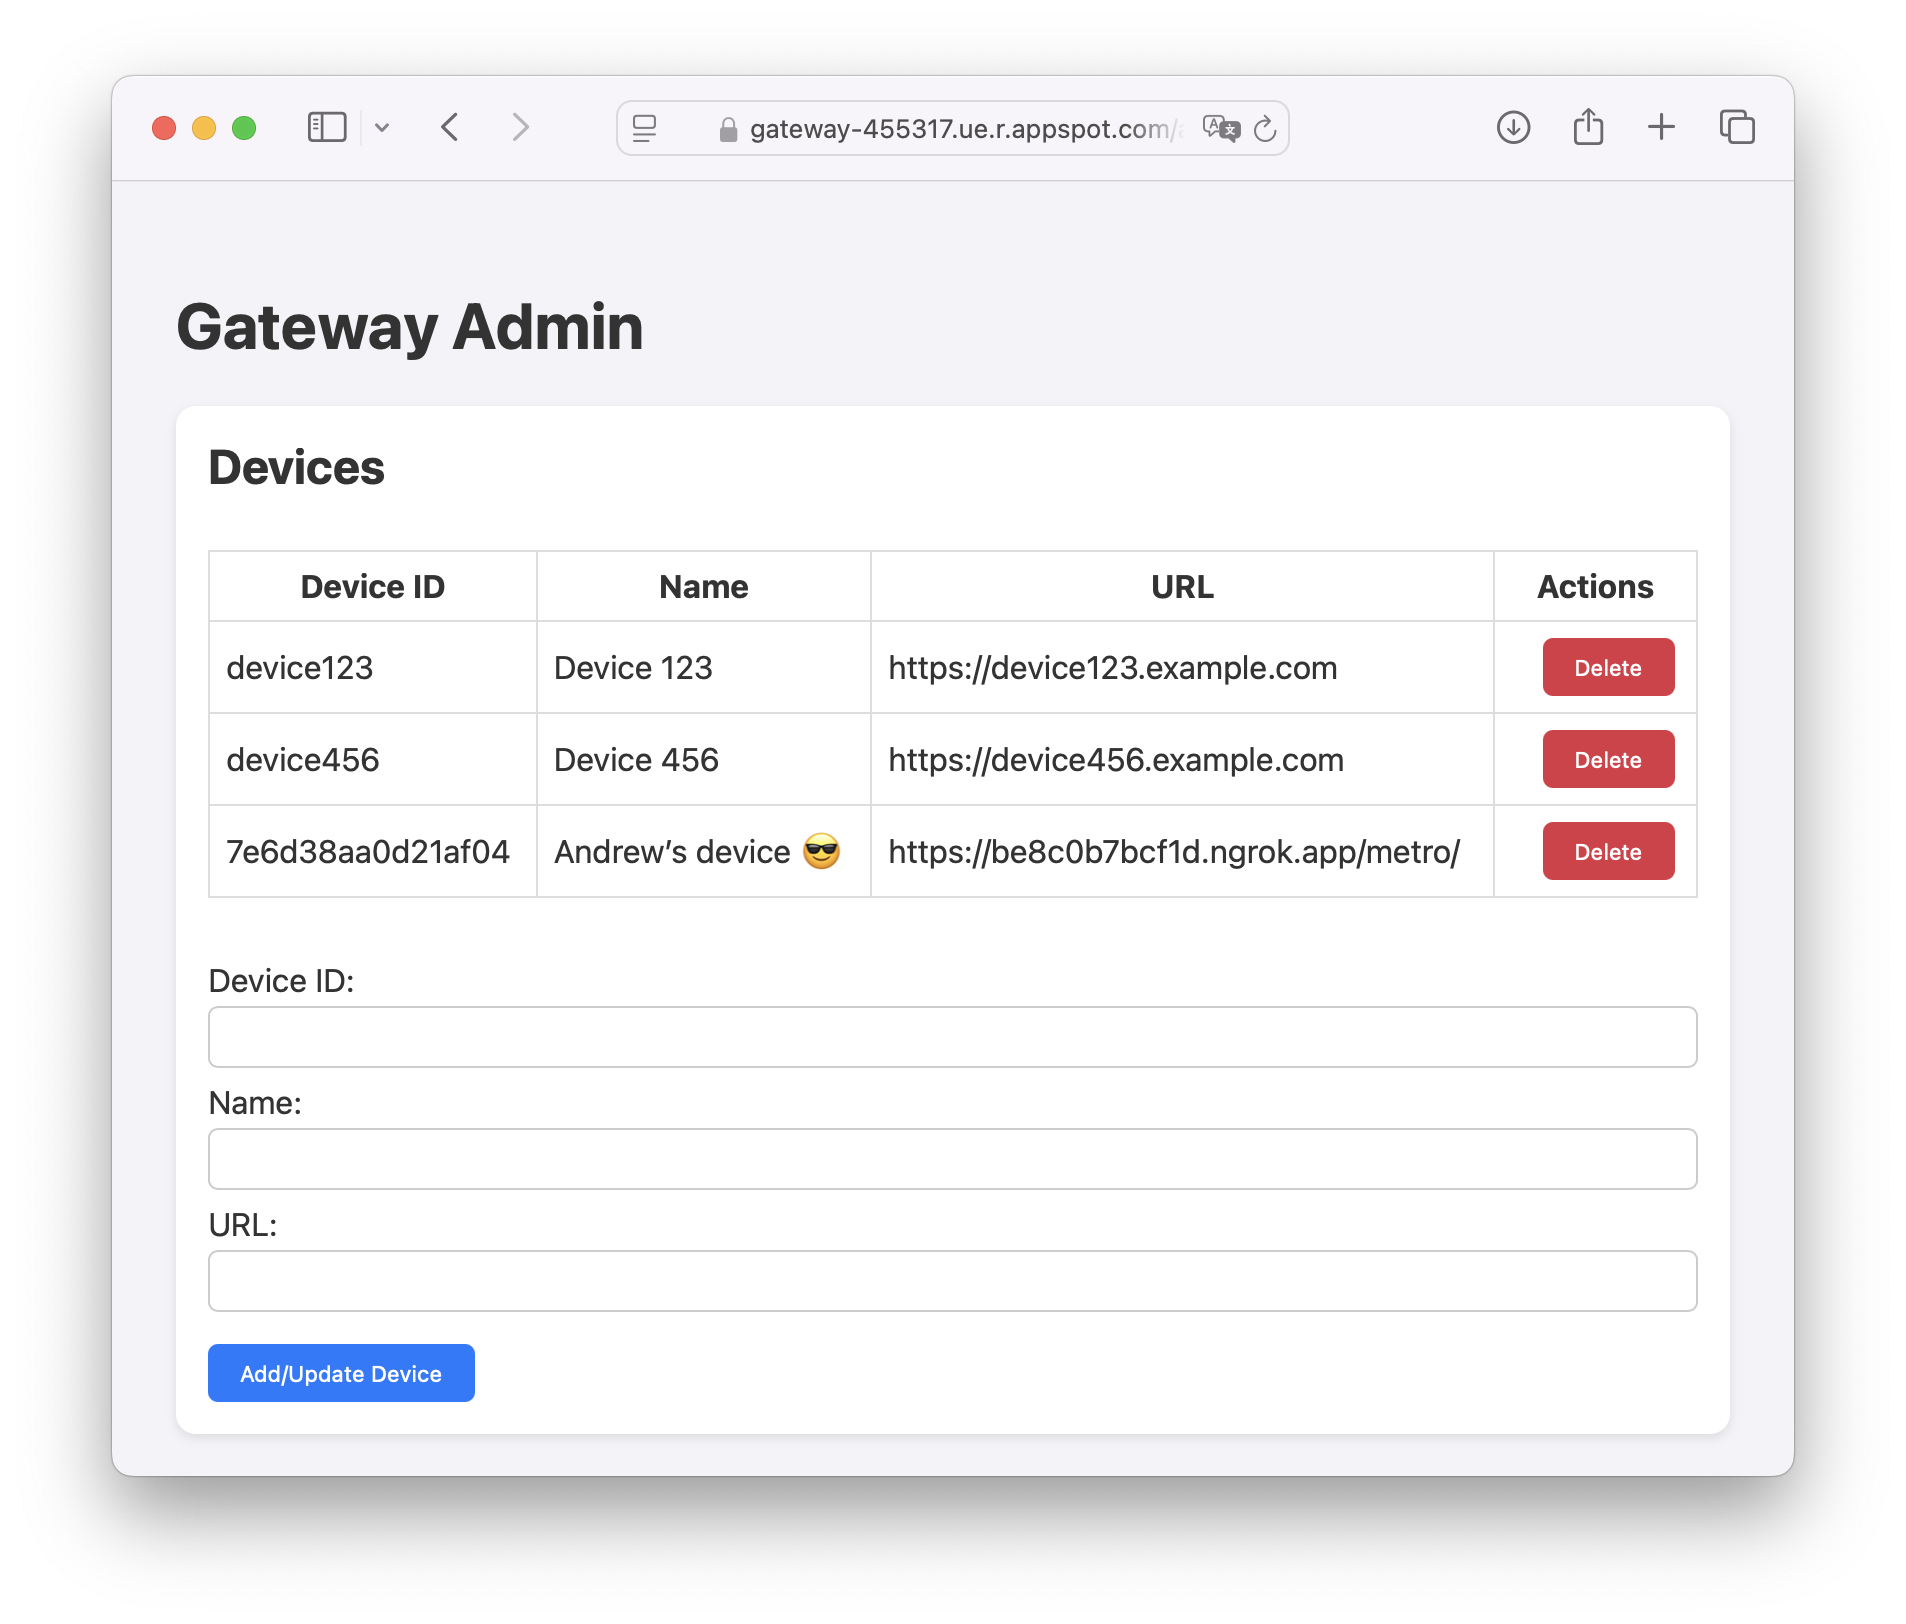
It would be great if we had a simple admin page to view and edit the mappings. Sometimes it's not worth the effort to write a pretty looking admin page, but ChatGPT changes the game and comes to the rescue again:
Now can you make another page called admin.html that lets you view the lists of devices and tenants, add a new device or tenant entry, or delete an entry? It should have a simple but modern looking interface.
It did a great job making a nice admin page with tables that list the device and tenant mappings. There's a form that lets you add a new record, and buttons that let you delete existing ones.

Here's the HTML code for admin.html :
<!DOCTYPE html>
<html lang="en">
<head>
  <meta charset="UTF-8" />
  <meta name="viewport" content="width=device-width, initial-scale=1.0"/>
  <title>Admin Panel</title>
	<link rel="stylesheet" href="styles.css">
</head>
<body>
  <h1>Gateway Admin</h1>

  <div class="section">
    <h2>Devices</h2>
    <table id="device-table">
      <thead>
        <tr>
          <th>Device ID</th>
          <th>Name</th>
          <th>URL</th>
          <th>Actions</th>
        </tr>
      </thead>
      <tbody></tbody>
    </table>
    <form id="device-form">
      <label>Device ID: <input type="text" id="deviceId" required /></label>
      <label>Name: <input type="text" id="deviceName" required /></label>
      <label>URL: <input type="url" id="deviceUrl" required /></label>
      <button type="submit" class="submit">Add/Update Device</button>
    </form>
  </div>

  <div class="section">
    <h2>Tenants</h2>
    <table id="tenant-table">
      <thead>
        <tr>
          <th>Tenant ID</th>
          <th>Name</th>
          <th>URL</th>
          <th>Actions</th>
        </tr>
      </thead>
      <tbody></tbody>
    </table>
    <form id="tenant-form">
      <label>Tenant ID: <input type="text" id="tenantId" required /></label>
      <label>Name: <input type="text" id="tenantName" required /></label>
      <label>URL: <input type="url" id="tenantUrl" required /></label>
      <button type="submit" class="submit">Add/Update Tenant</button>
    </form>
  </div>
  <script type="text/javascript" src="admin.js"></script>
</body>
</html>
The code in admin.js makes calls to the API endpoints for loading, creating and deleting the tenant and device resources:
async function fetchAndRender(endpoint, tableId, deleteFn) {
  const res = await fetch(endpoint);
  const data = await res.json();
  const tableBody = document.querySelector(`#${tableId} tbody`);
  tableBody.innerHTML = '';
  for (const id in data) {
    const { name, url } = data[id];
    const row = document.createElement('tr');
    row.innerHTML = `
      <td>${id}</td>
      <td>${name}</td>
      <td>${url}</td>
      <td>
        <button class="delete-button" onclick="${deleteFn}('${id}')">Delete</button>
      </td>`;
    tableBody.appendChild(row);
  }
}

async function deleteTenant(id) {
  await fetch(`/api/tenants/${id}`, { method: 'DELETE' });
  loadAll();
}

async function deleteDevice(id) {
  await fetch(`/api/devices/${id}`, { method: 'DELETE' });
  loadAll();
}

document.getElementById('tenant-form').addEventListener('submit', async (e) => {
  e.preventDefault();
  const tenantId = document.getElementById('tenantId').value;
  const tenantName = document.getElementById('tenantName').value;
  const tenantUrl = document.getElementById('tenantUrl').value;

  await fetch('/api/tenants', {
    method: 'POST',
    headers: { 'Content-Type': 'application/json' },
    body: JSON.stringify({ tenantId, name: tenantName, url: tenantUrl })
  });

  e.target.reset();
  loadAll();
});

document.getElementById('device-form').addEventListener('submit', async (e) => {
  e.preventDefault();
  const deviceId = document.getElementById('deviceId').value;
  const deviceName = document.getElementById('deviceName').value;
  const deviceUrl = document.getElementById('deviceUrl').value;

  await fetch('/api/devices', {
    method: 'POST',
    headers: { 'Content-Type': 'application/json' },
    body: JSON.stringify({ deviceId, name: deviceName, url: deviceUrl })
  });

  e.target.reset();
  loadAll();
});

function loadAll() {
  fetchAndRender('/api/tenants', 'tenant-table', 'deleteTenant');
  fetchAndRender('/api/devices', 'device-table', 'deleteDevice');
}

// Initial load
loadAll();
Ngrok integration
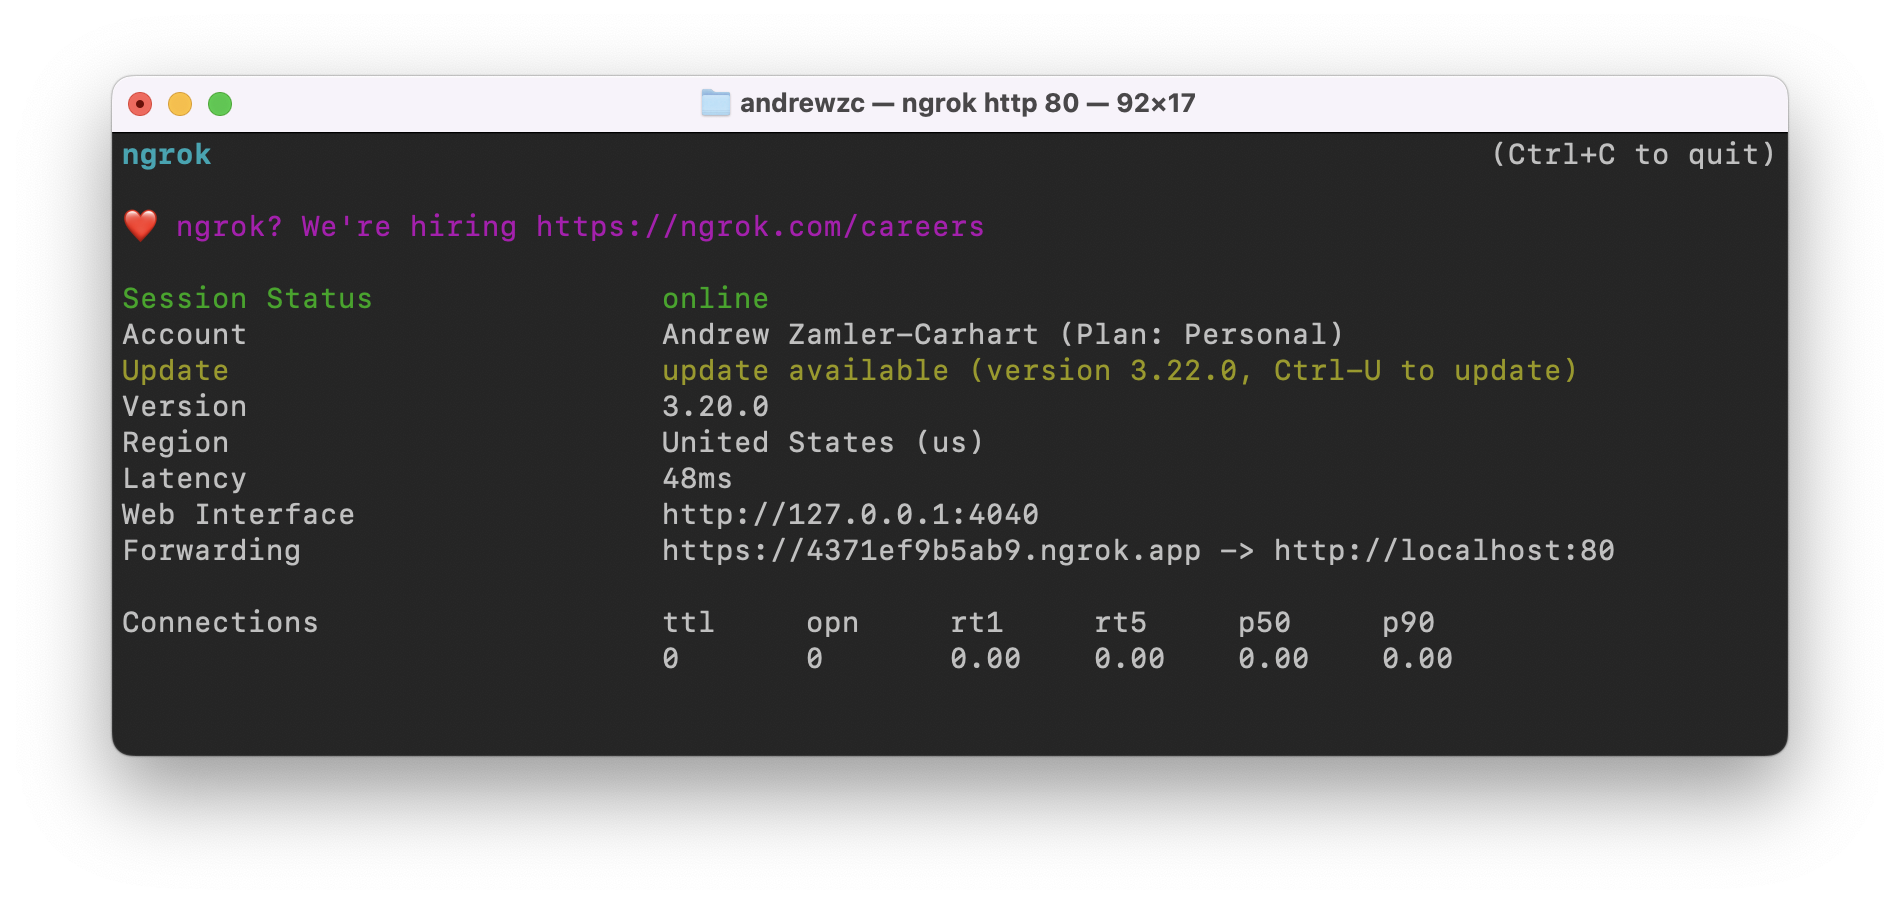
Normally, when you use Ngrok to create a tunnel, you use a terminal command like this:
`ngrok http 80`
Then you typically copy the URL from the interface and paste it into the simulator or the debugger. If you're making lots of changes to your app, you may disconnect with Control-C and repeat the process over and over.

We can save a number of repetitive steps by writing a script that you can run locally with Node.js that will restart the tunnel and send the new URL to the gateway. We'll use the Ngrok REST API which connects to the local ngrok daemon at http://localhost:4040/api/ .
Note
You must start ngrok using the normal way the first time. The script won't be able to connect to the ngrok API if the ngrok process isn't running!
First we'll add a few more values to our config.js file to store the link to our gateway server, the port where your app runs on your local server, and some default info for updating the device record in the gateway.
export const gatewayApi = 'https://gateway-455317.ue.r.appspot.com';

export const tunnelPort = 80;

export const defaultDevice = {
  id: 'device123',
  name: 'Device 123',
  urlPath: '/'
}
To get started with our ngrok.js script, we'll set a few things up. For the device ID, device name and URL path, you have the option of using the values from the config file or overriding by including them on the command line in that order when you run the script.
import fetch from 'node-fetch';
import punycode from 'punycode/punycode.js';
import { gatewayApi, tunnelPort, defaultDevice } from './config.js';

const ngrokLocalApi = "http://localhost:4040/api/tunnels";
const tunnelName = "command_line";

let device = { ...defaultDevice };
const args = process.argv.slice(2);
if (args.length > 0) device.id = args[0];
if (args.length > 1) device.name = args[1];
if (args.length > 2) device.urlPath = args[2];
Here are a few methods for calling the ngrok API to get the tunnels, stop a tunnel and start a tunnel. Because we're connecting on localhost, it doesn't require any authentication. (Error handling omitted for brevity.)
async function getTunnels() {
  const response = await fetch(ngrokLocalApi, {
    method: 'GET',
    headers: {'Content-Type': 'application/json'}
  });
  let data = await response.json();
  return data.tunnels;
}

async function stopTunnel(name) {
  const response = await fetch(ngrokLocalApi + '/' + name, {
    method: 'DELETE',
  });
}

async function startTunnel(port) {
  const response = await fetch(ngrokLocalApi, {
    method: 'POST',
    headers: {'Content-Type': 'application/json'},
    body: JSON.stringify({addr: port, proto: "http", name: tunnelName})
  });
  let data = await response.json();
  return data;
}
And here's a method that will call our gateway API to update the record for the current device:
async function updateDevice(tunnelUrl, localUrl) {
  let url = tunnelUrl + device.urlPath;
  const response = await fetch(gatewayApi + '/api/devices', {
    method: 'POST',
    headers: { 'Content-Type': 'application/json' },
    body: JSON.stringify({ deviceId: device.id, name: device.name, url })
  });
  if (response.ok) {
    console.log(`${device.name} (${device.id}): ${url} => ${localUrl}${device.urlPath}`);
  }
}
When the script runs, we'll put it all together with a few function calls. We stop the current tunnel, start a new one, get the new list of tunnels, and then update the device.
await stopTunnel(tunnelName);
await startTunnel(tunnelPort);

let tunnels = await getTunnels();
if (tunnels.length) {
  await updateDevice(tunnels[0].public_url, tunnels[0].config.addr);
}
Deployment
You can use the shared instance of the service at https://senzadev.net/gateway/, which is hosted using Google Cloud and has the API available at https://gateway-455317.ue.r.appspot.com.
Warning
This is a shared server, so your data can be seen or modified by anyone. It may also be deleted if the app is restarted. Use at your own risk.
You should deploy the app yourself if you want better security and privacy. You could improve the security by adding authentication, or add persistence by connecting the data model to a database.
Testing
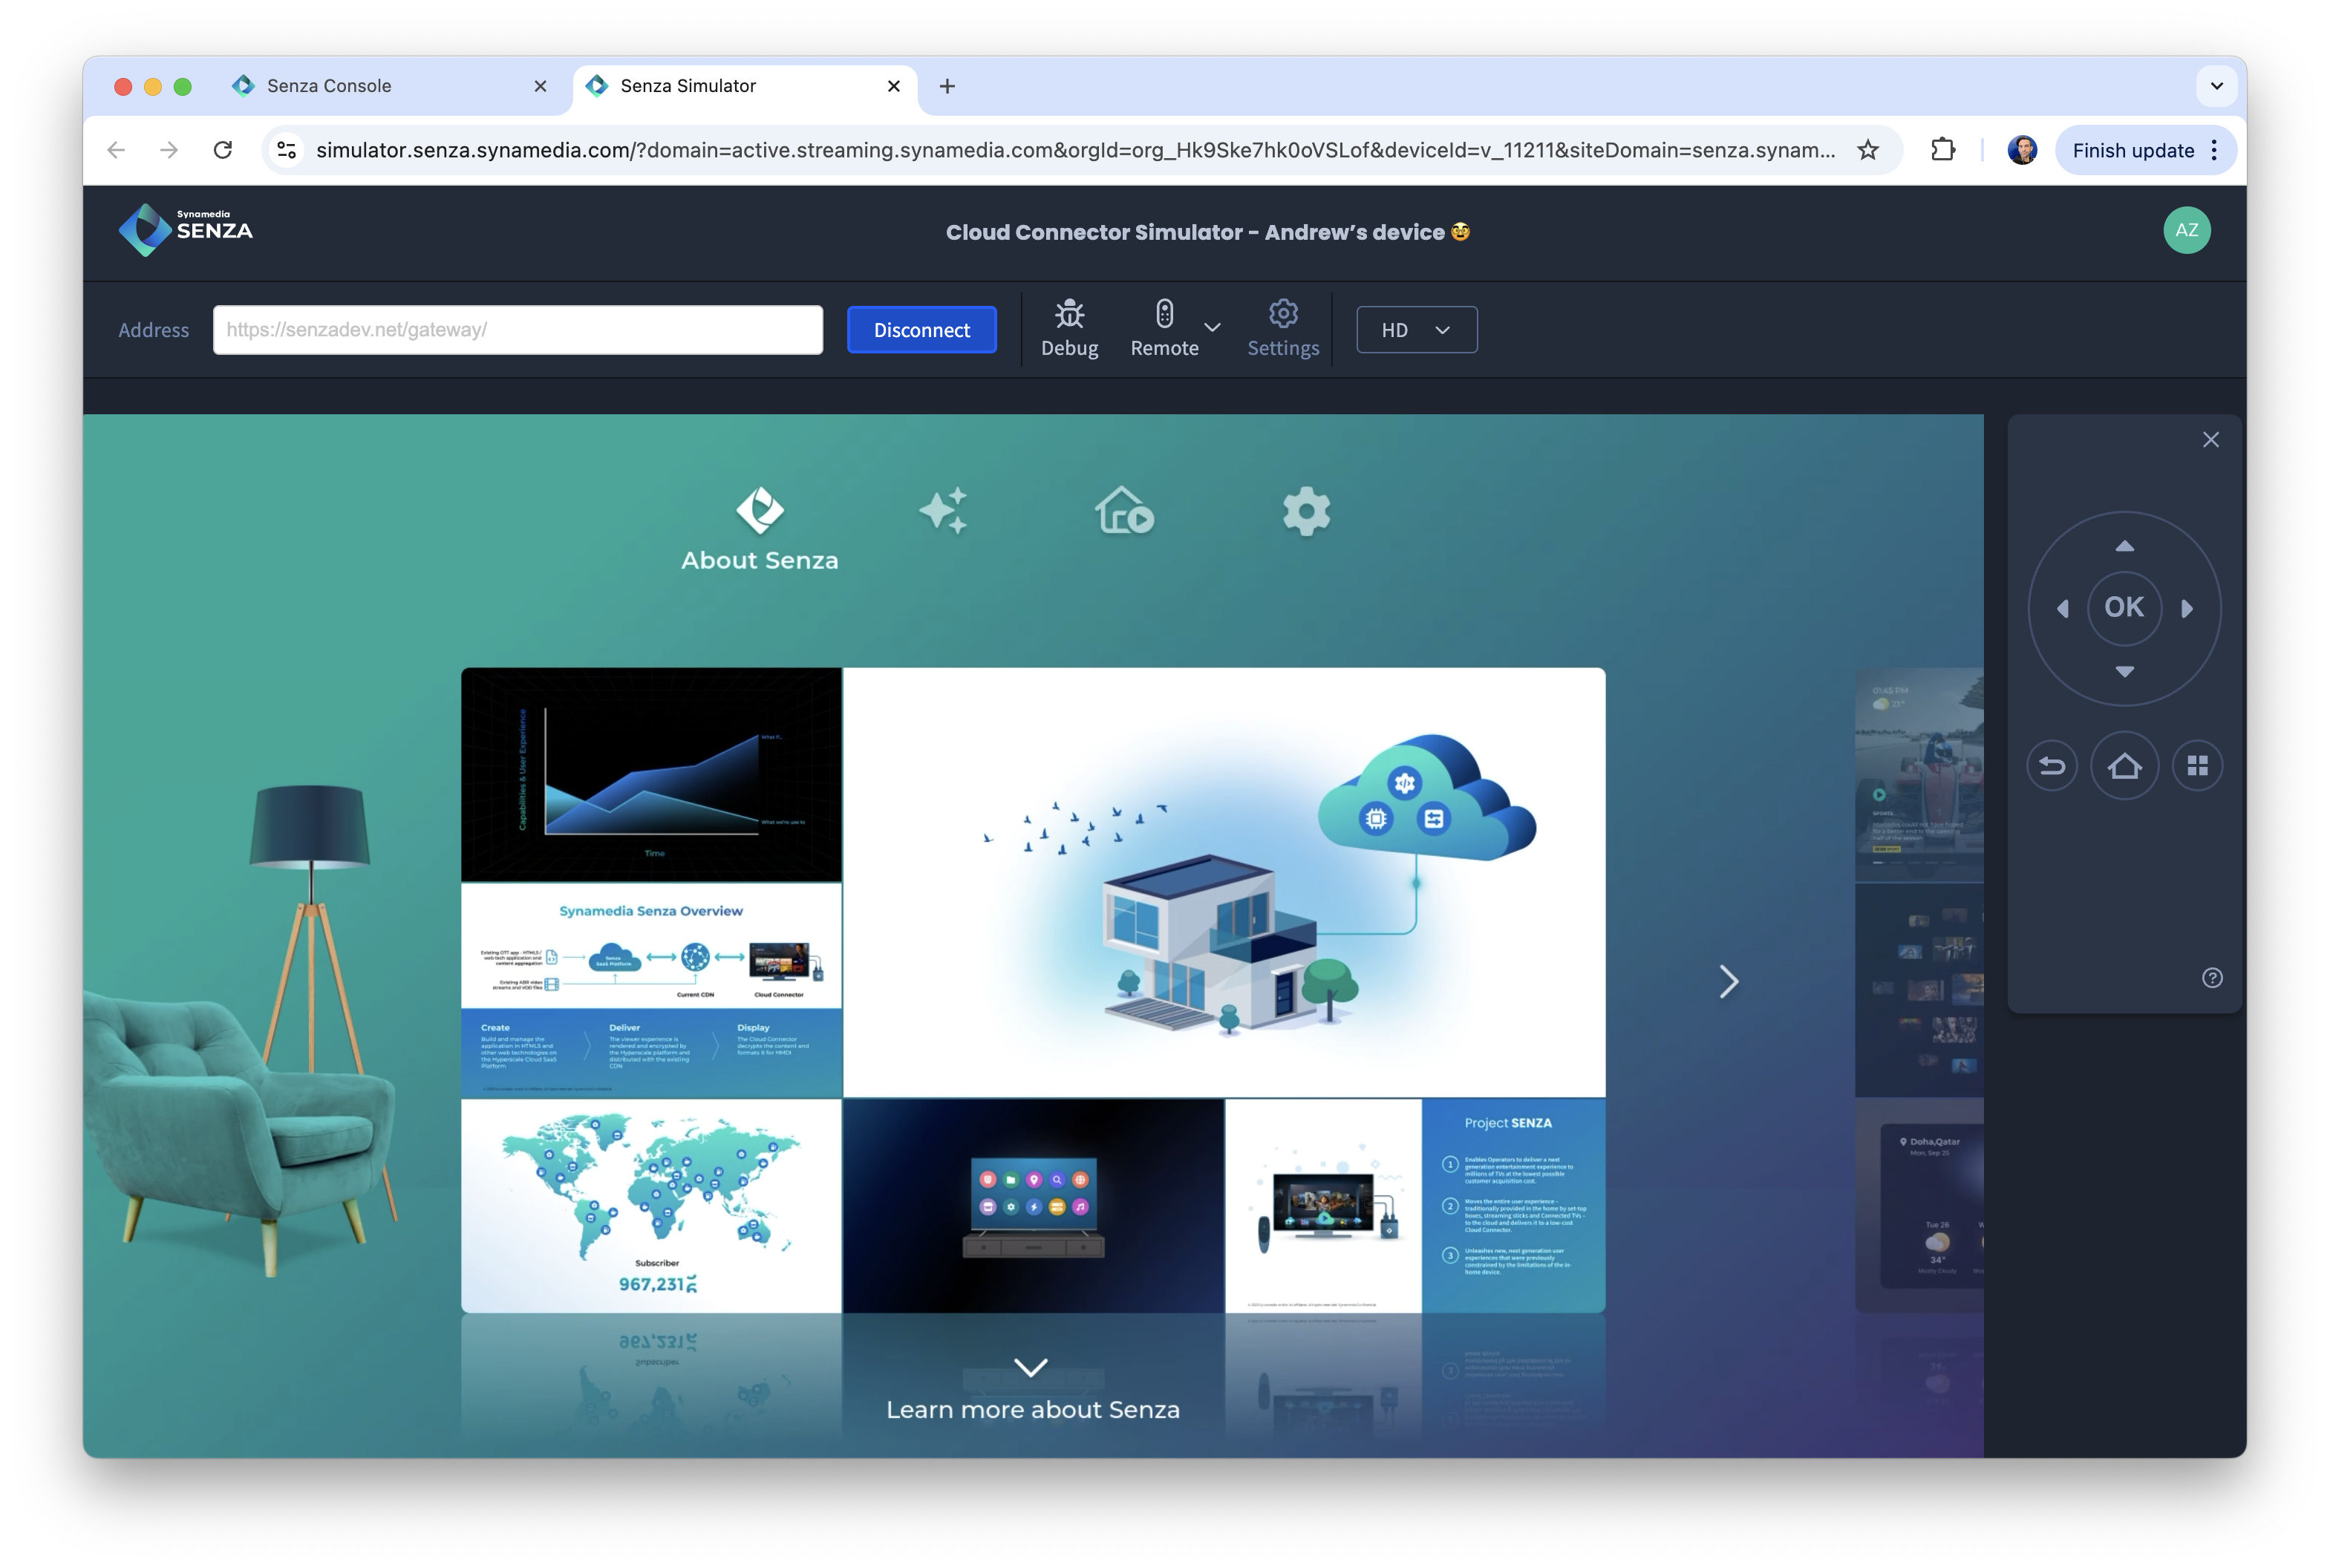
Try setting the application URL to https://senzadev.net/gateway/ or your own instance of the app. You'll see that when you haven't configured it for a device, it will show the Senza App by default.

Make sure that Ngrok is running using this terminal command:
ngrok http 80
Now we'll run the script we wrote above to restart ngrok and update the URL with the gateway. You can include the device ID, device name and URL path arguments on the command line, or edit the config file to change the default values.
node ngrok.js 7e6d37370e21af04 "My device" /metro/
The response will show the name and ID of your device, the ngrok link with your URL path appended that is now associated with your device, and the local URL that the tunnel connects to. If you go to the admin.html page, you'll see it listed in the table as well.
My device (7e6d37370e21af04): https://706f2edcc202.ngrok.app/metro/ => http://localhost:80/metro/
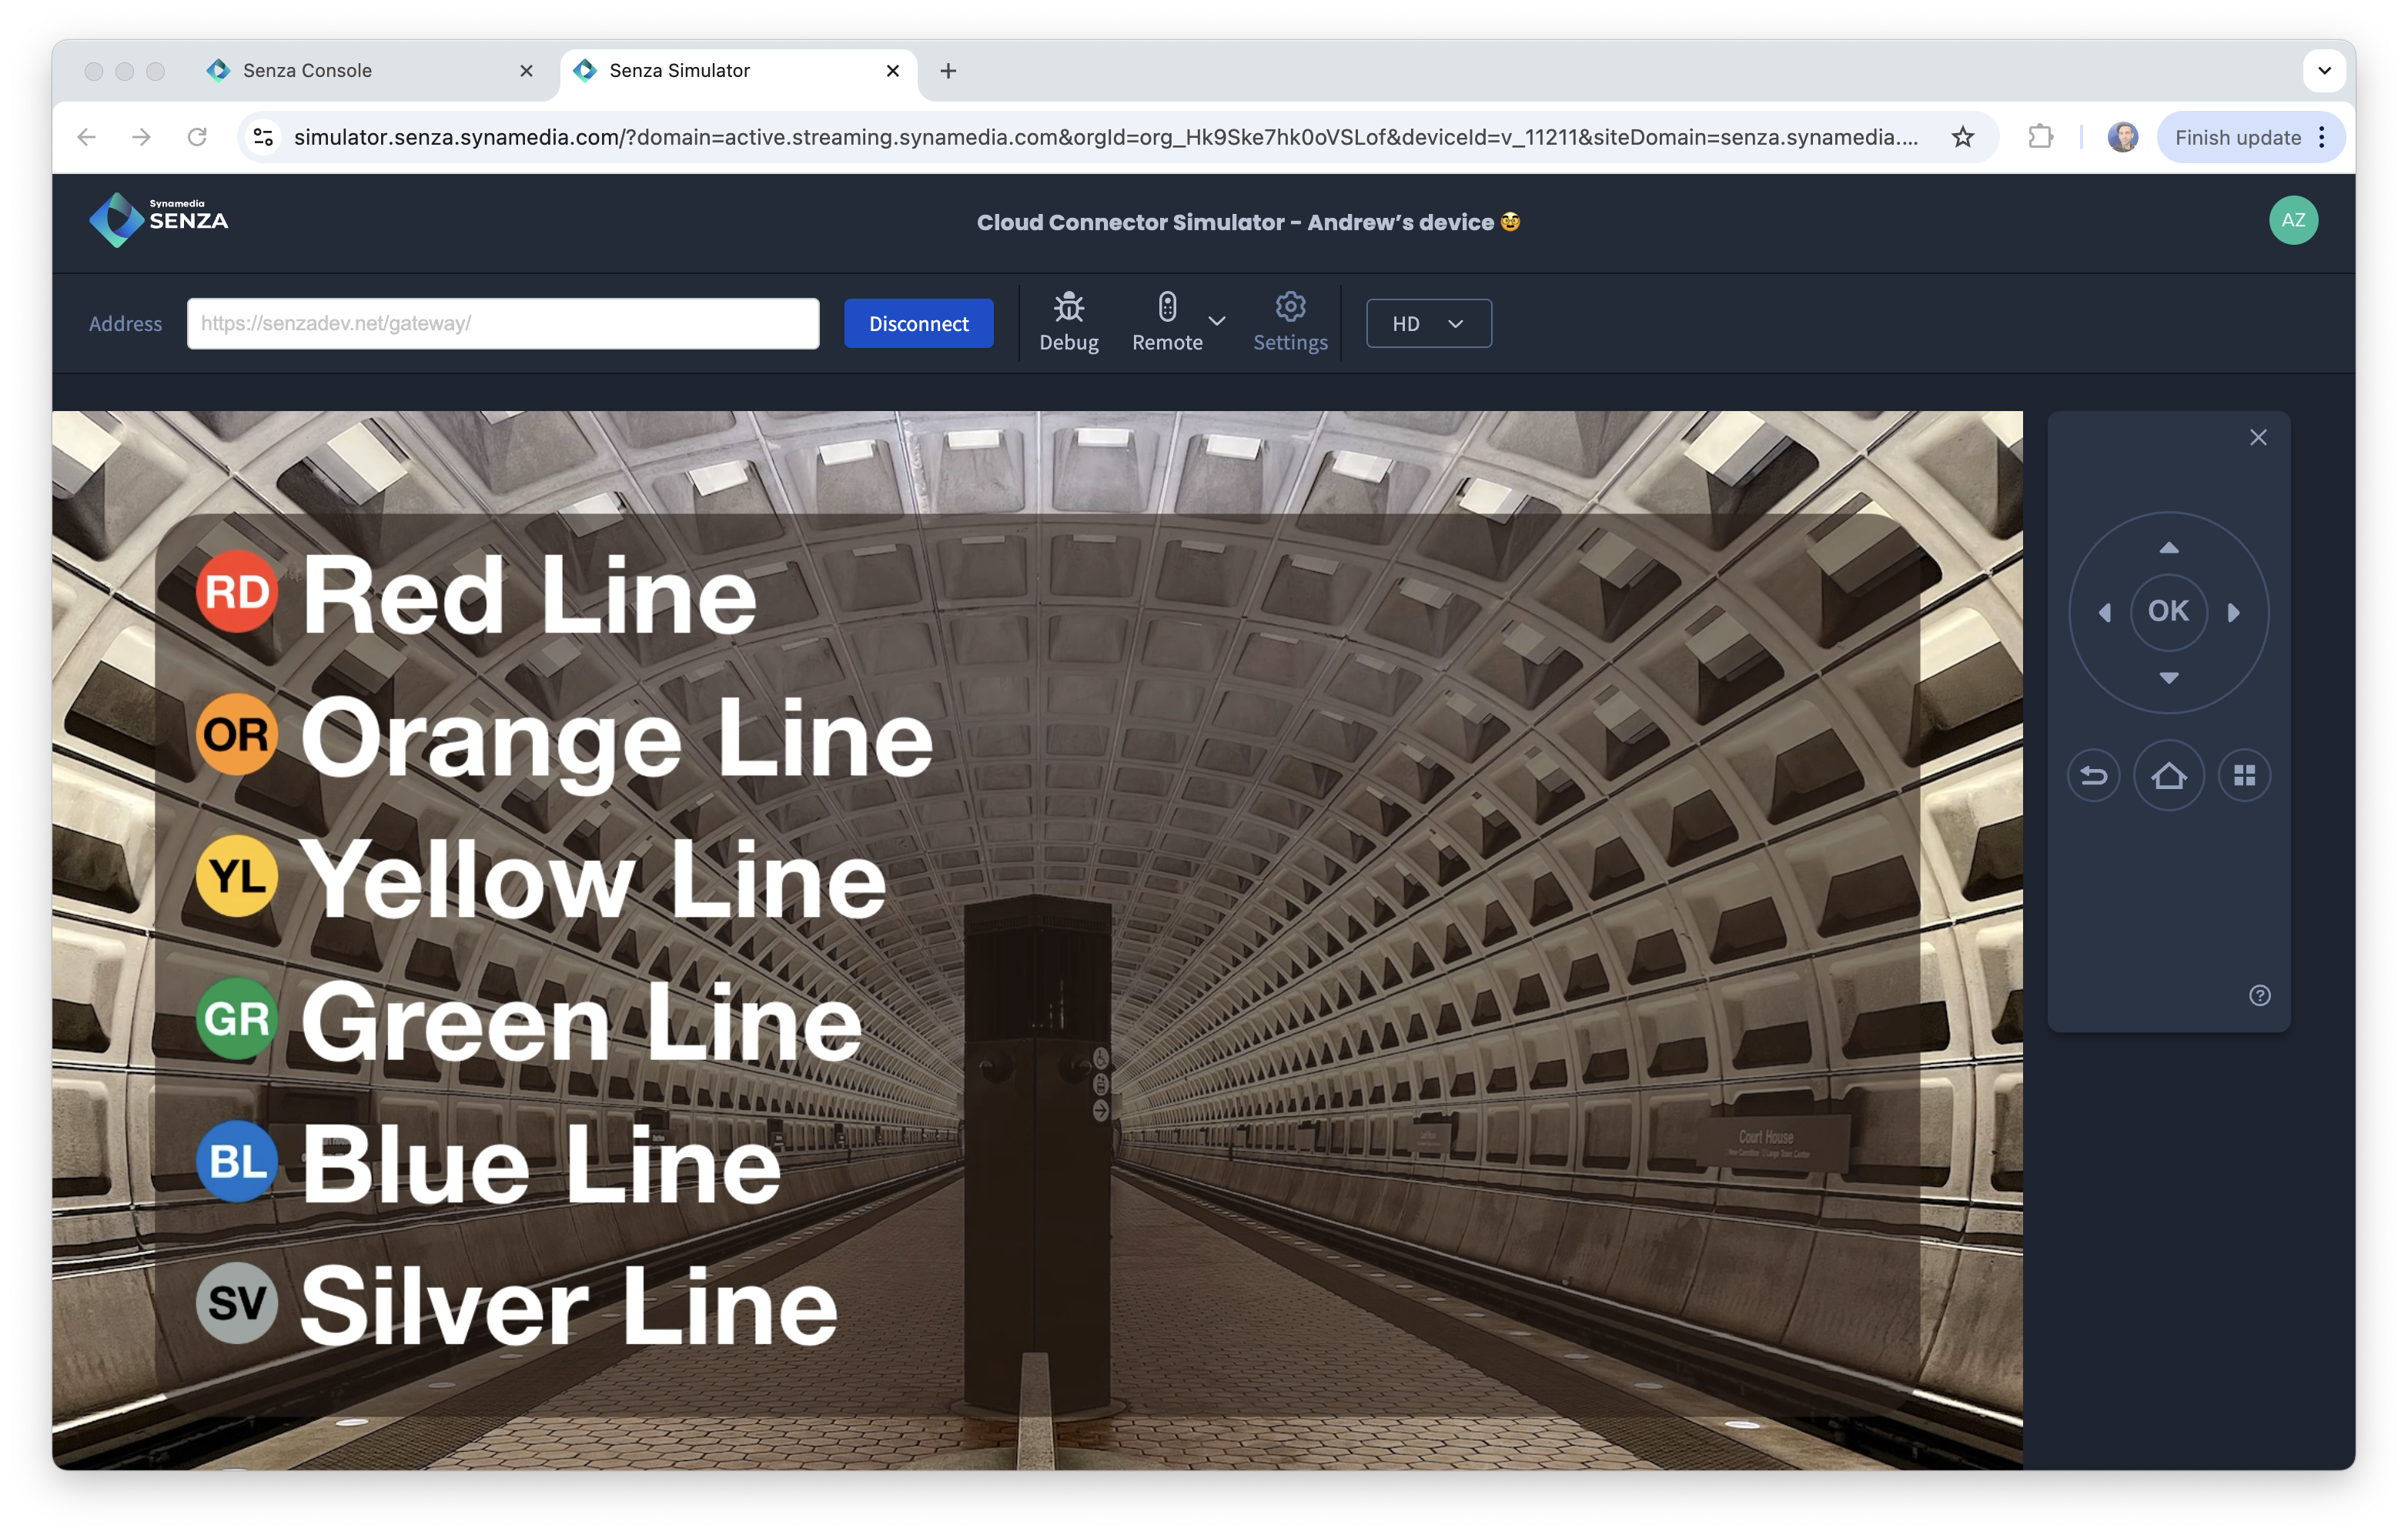
Now for the moment of truth... press the Home button, and it will now load your app!

Now for the payoff. Make a change to your app, run the ngrok.js script again, press the Home button, and you'll see the changes running on Senza.
Even better, if you set the tenant's application URL to the gateway, all the developers on your team can have their own devices connected to their local development environments without ever having to copy and paste a URL. You won't need to use the Remote Debugger to override the URL for your device anymore.
Updated 10 months ago