Capturing HDMI Video
Displaying video from a cloud connector on your computer
Would you like to plug a cloud connector into your computer so that you can play video on your computer screen? Perhaps you don't have a TV handy, or want to develop using your laptop while on the go. It's quite easy using a few steps!
Can I just plug it in?
The short answer is, probably not. You need a way to capture the HDMI signal from the device. As it turns out, even if your computer has an HDMI port you won't be able to use it to capture video. The HDMI protocol works in one direction, it's not bi-directional like USB or Thunderbolt. That port is for output only, so this isn't going to work:
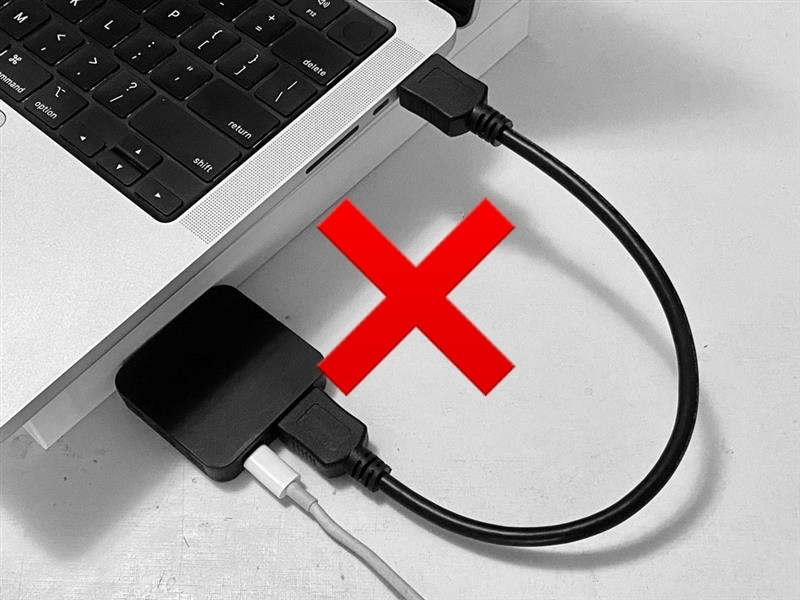
USB HDMI video capture
What you need is a way to add HDMI input to your computer. The easiest way to do that is with a dongle that supports video capture from USB.
Search your favorite electronics website for USB HDMI video capture and you'll find a range of adapters that all do basically the same thing. The going rate is about twenty dollars. Make sure to double-check that you're getting one with the correct plug that is supported by your operating system.
Here's how it looks when it's plugged in:
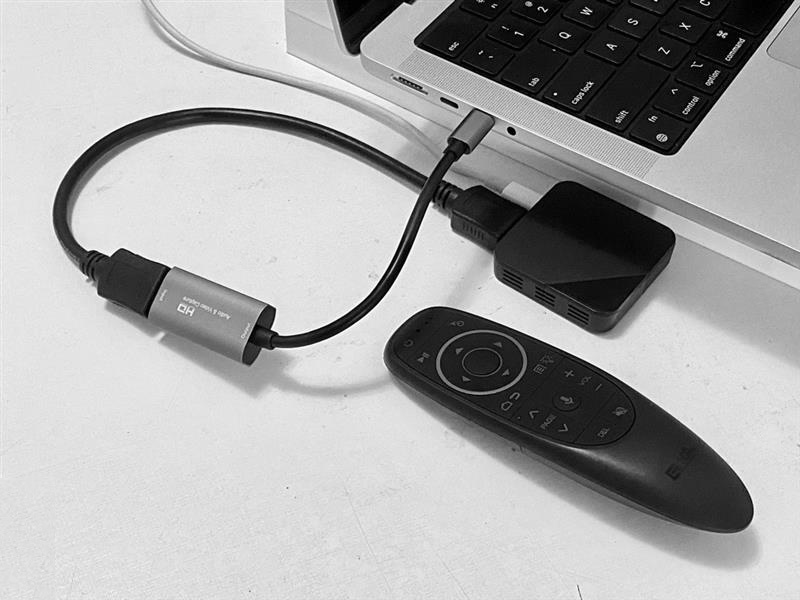
You will still need to connect the USB cable of the device to a power source. The device ships with a short cable that connects to the USB-A port on a TV, so you may want to use your own USB-C cable if you want to pull power directly from your computer. Then you'll effectively be using two of your computer's USB ports, one for data and one for power.
Displaying video
This device basically gives your computer a new video input source. Normally it doesn't require any drivers. Practically it works the same as if you'd just plugged in a webcam, and will show up in any apps that work with video input.
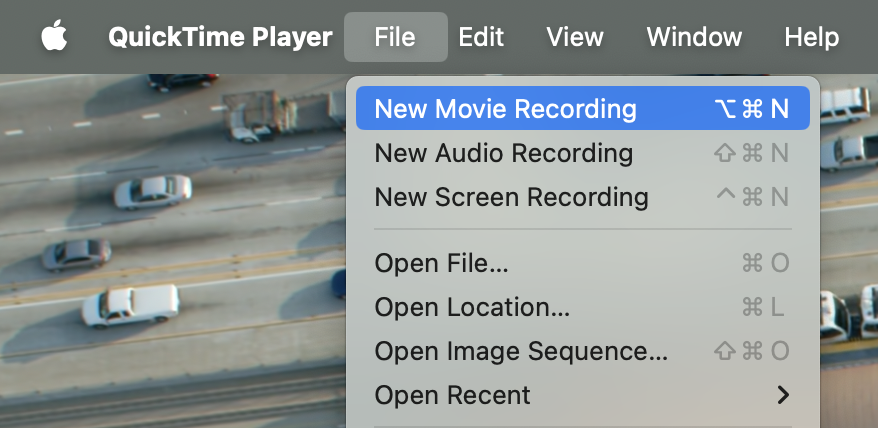
If you have a Mac, the easiest way to see the video is using QuickTime Player. From the File menu, choose New Movie Recording. You'll see a video window pop up, probably showing video from your computer's built-in webcam.
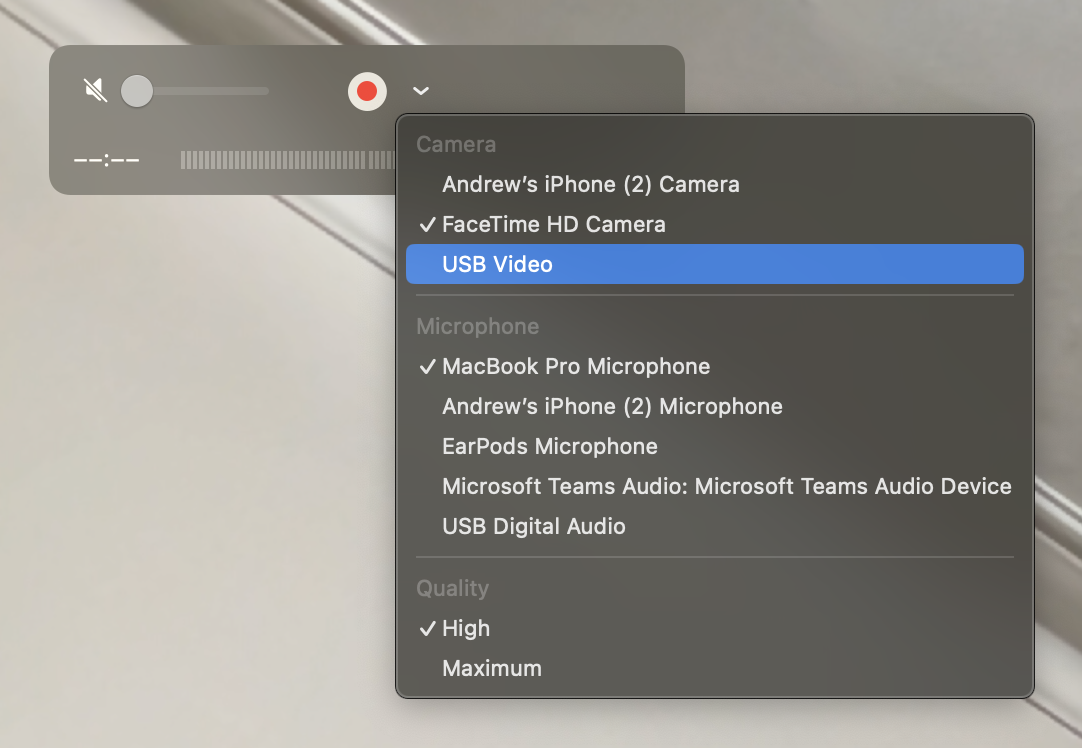
If you click on the caret next to the record button, you'll see a popup menu that allows you to change the video source. Just choose USB Video.
Et voila! You're now watching TV on your computer. That's all there is to it.

You can just leave it in preview mode without starting a recording. Of course, if you do want to record video from your cloud connector just hit that record button and away you go.
Sharing video
You can also share your video with other people using your favorite video conferencing app such as FaceTime, Zoom, Teams or Google Meet. It's a great way to demonstrate Senza for your friends and colleagues. Again, it works just as if you'd plugged in an external webcam.
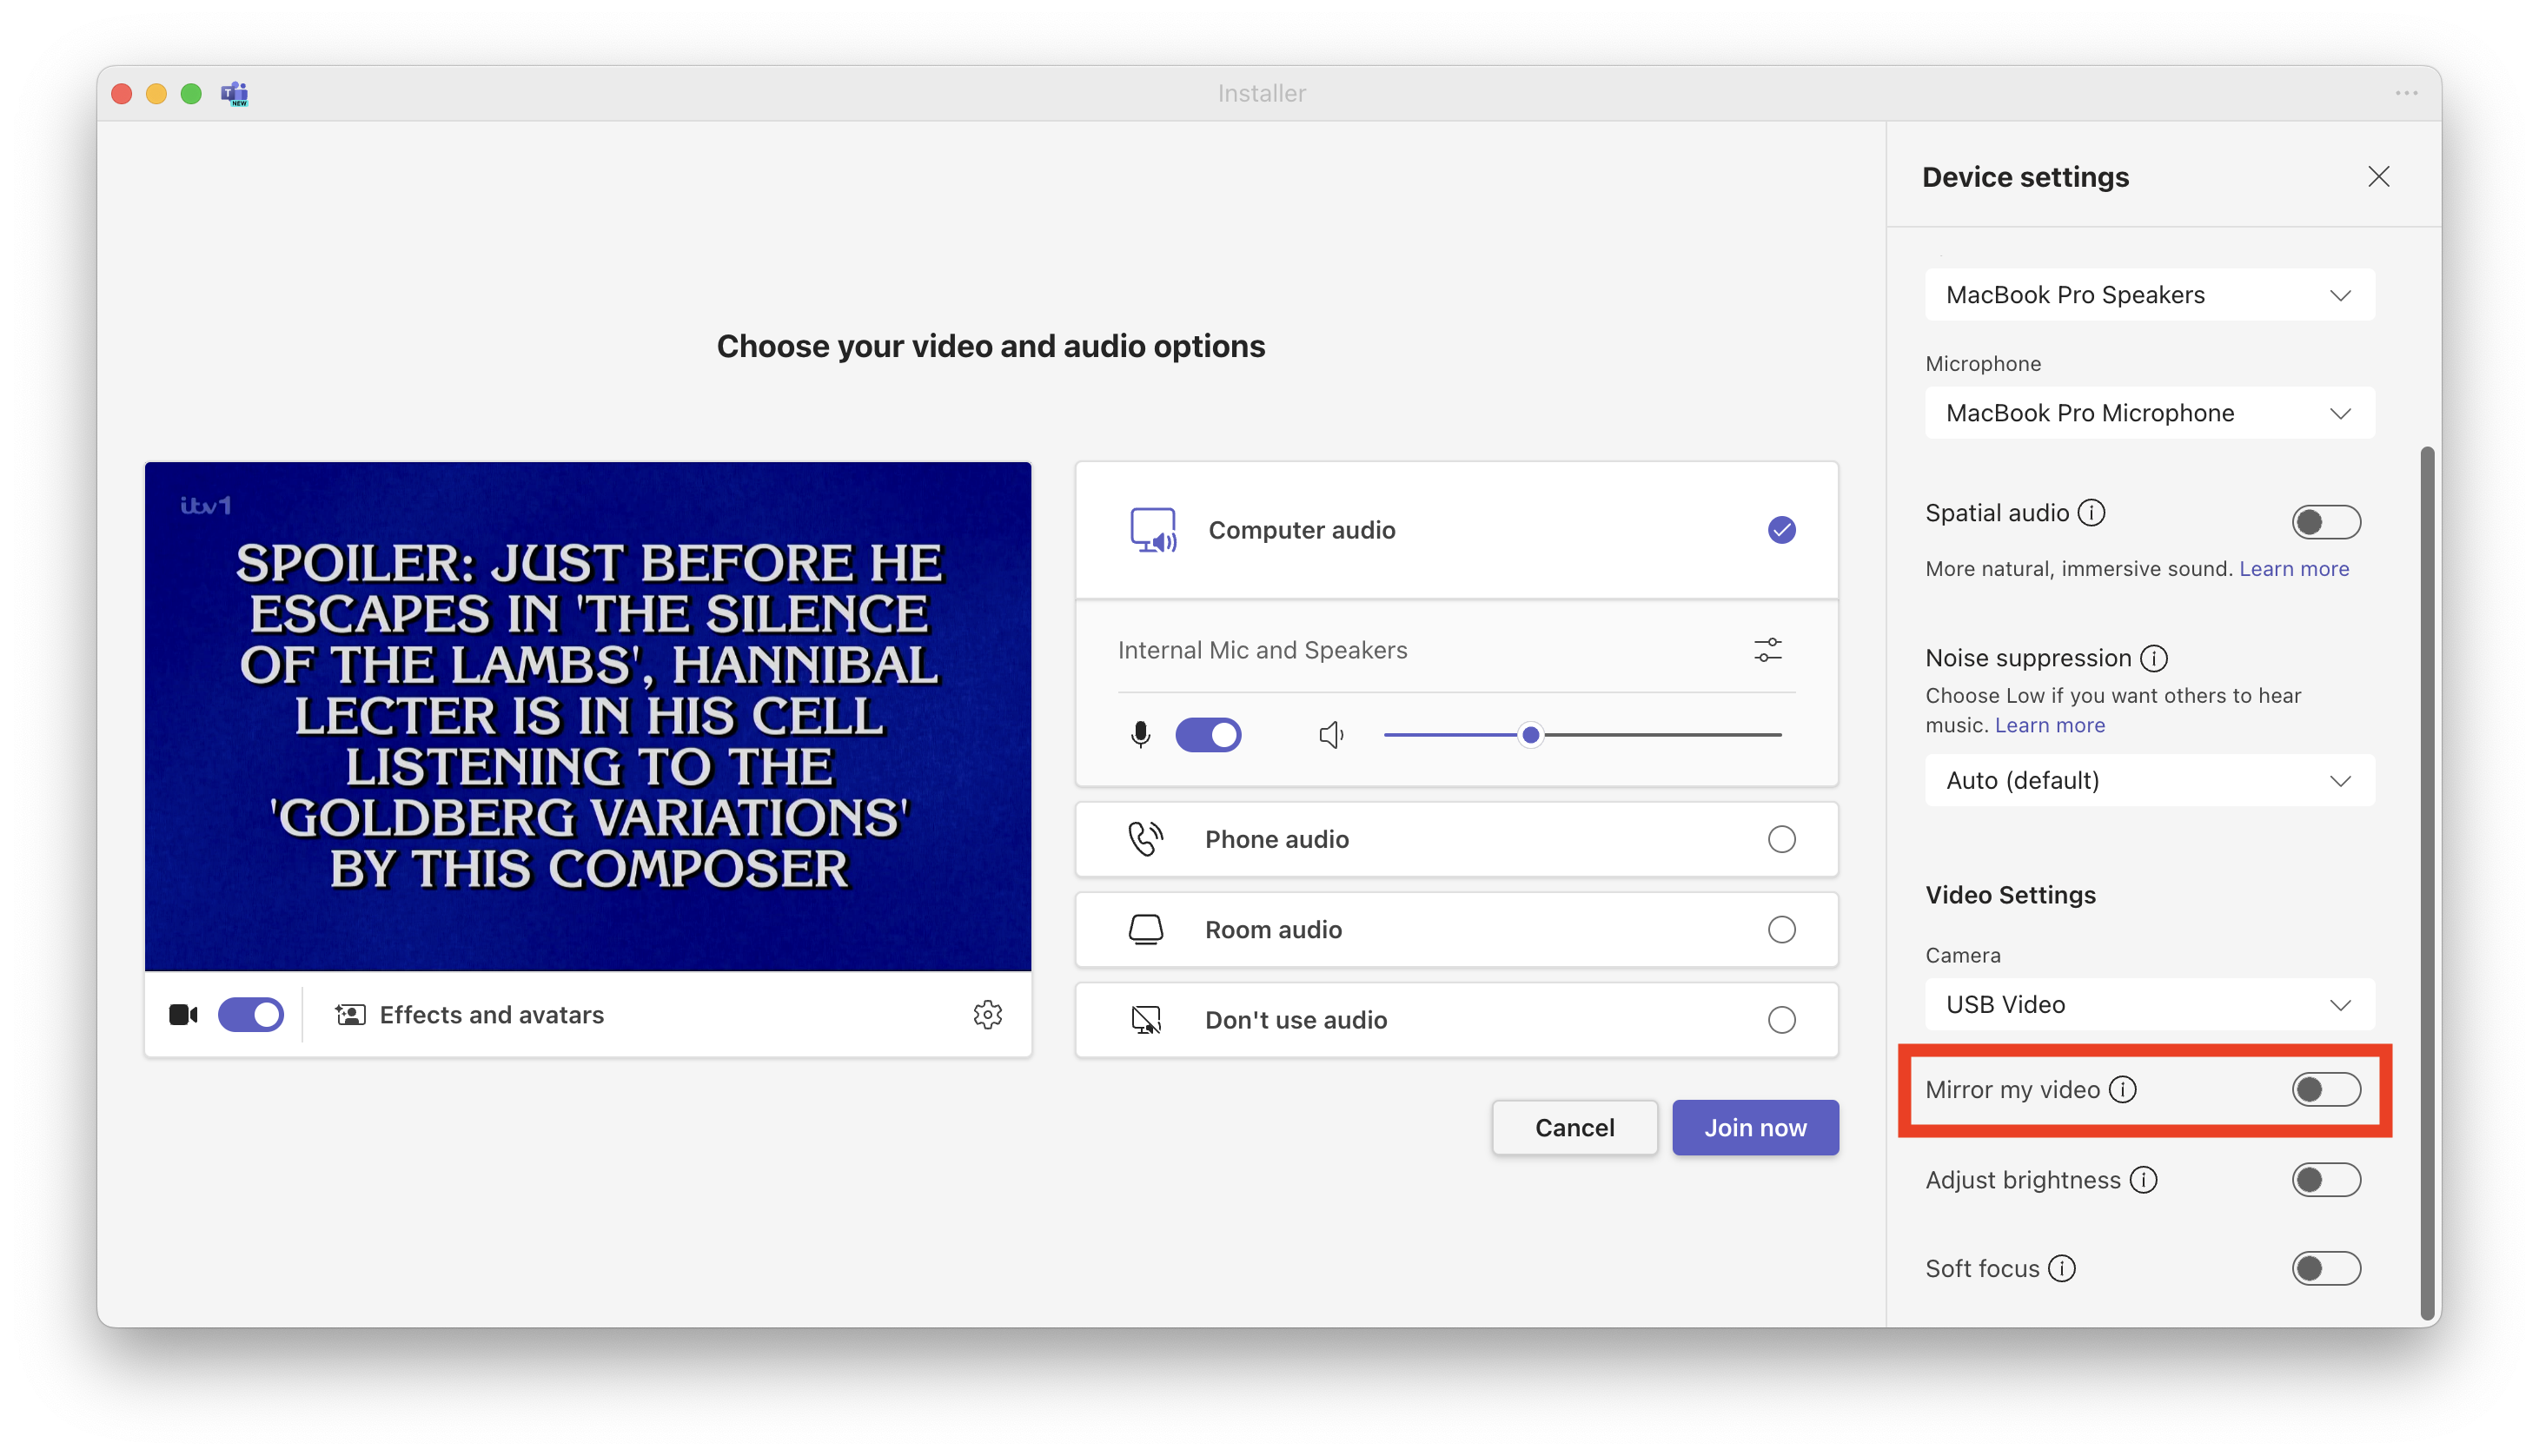
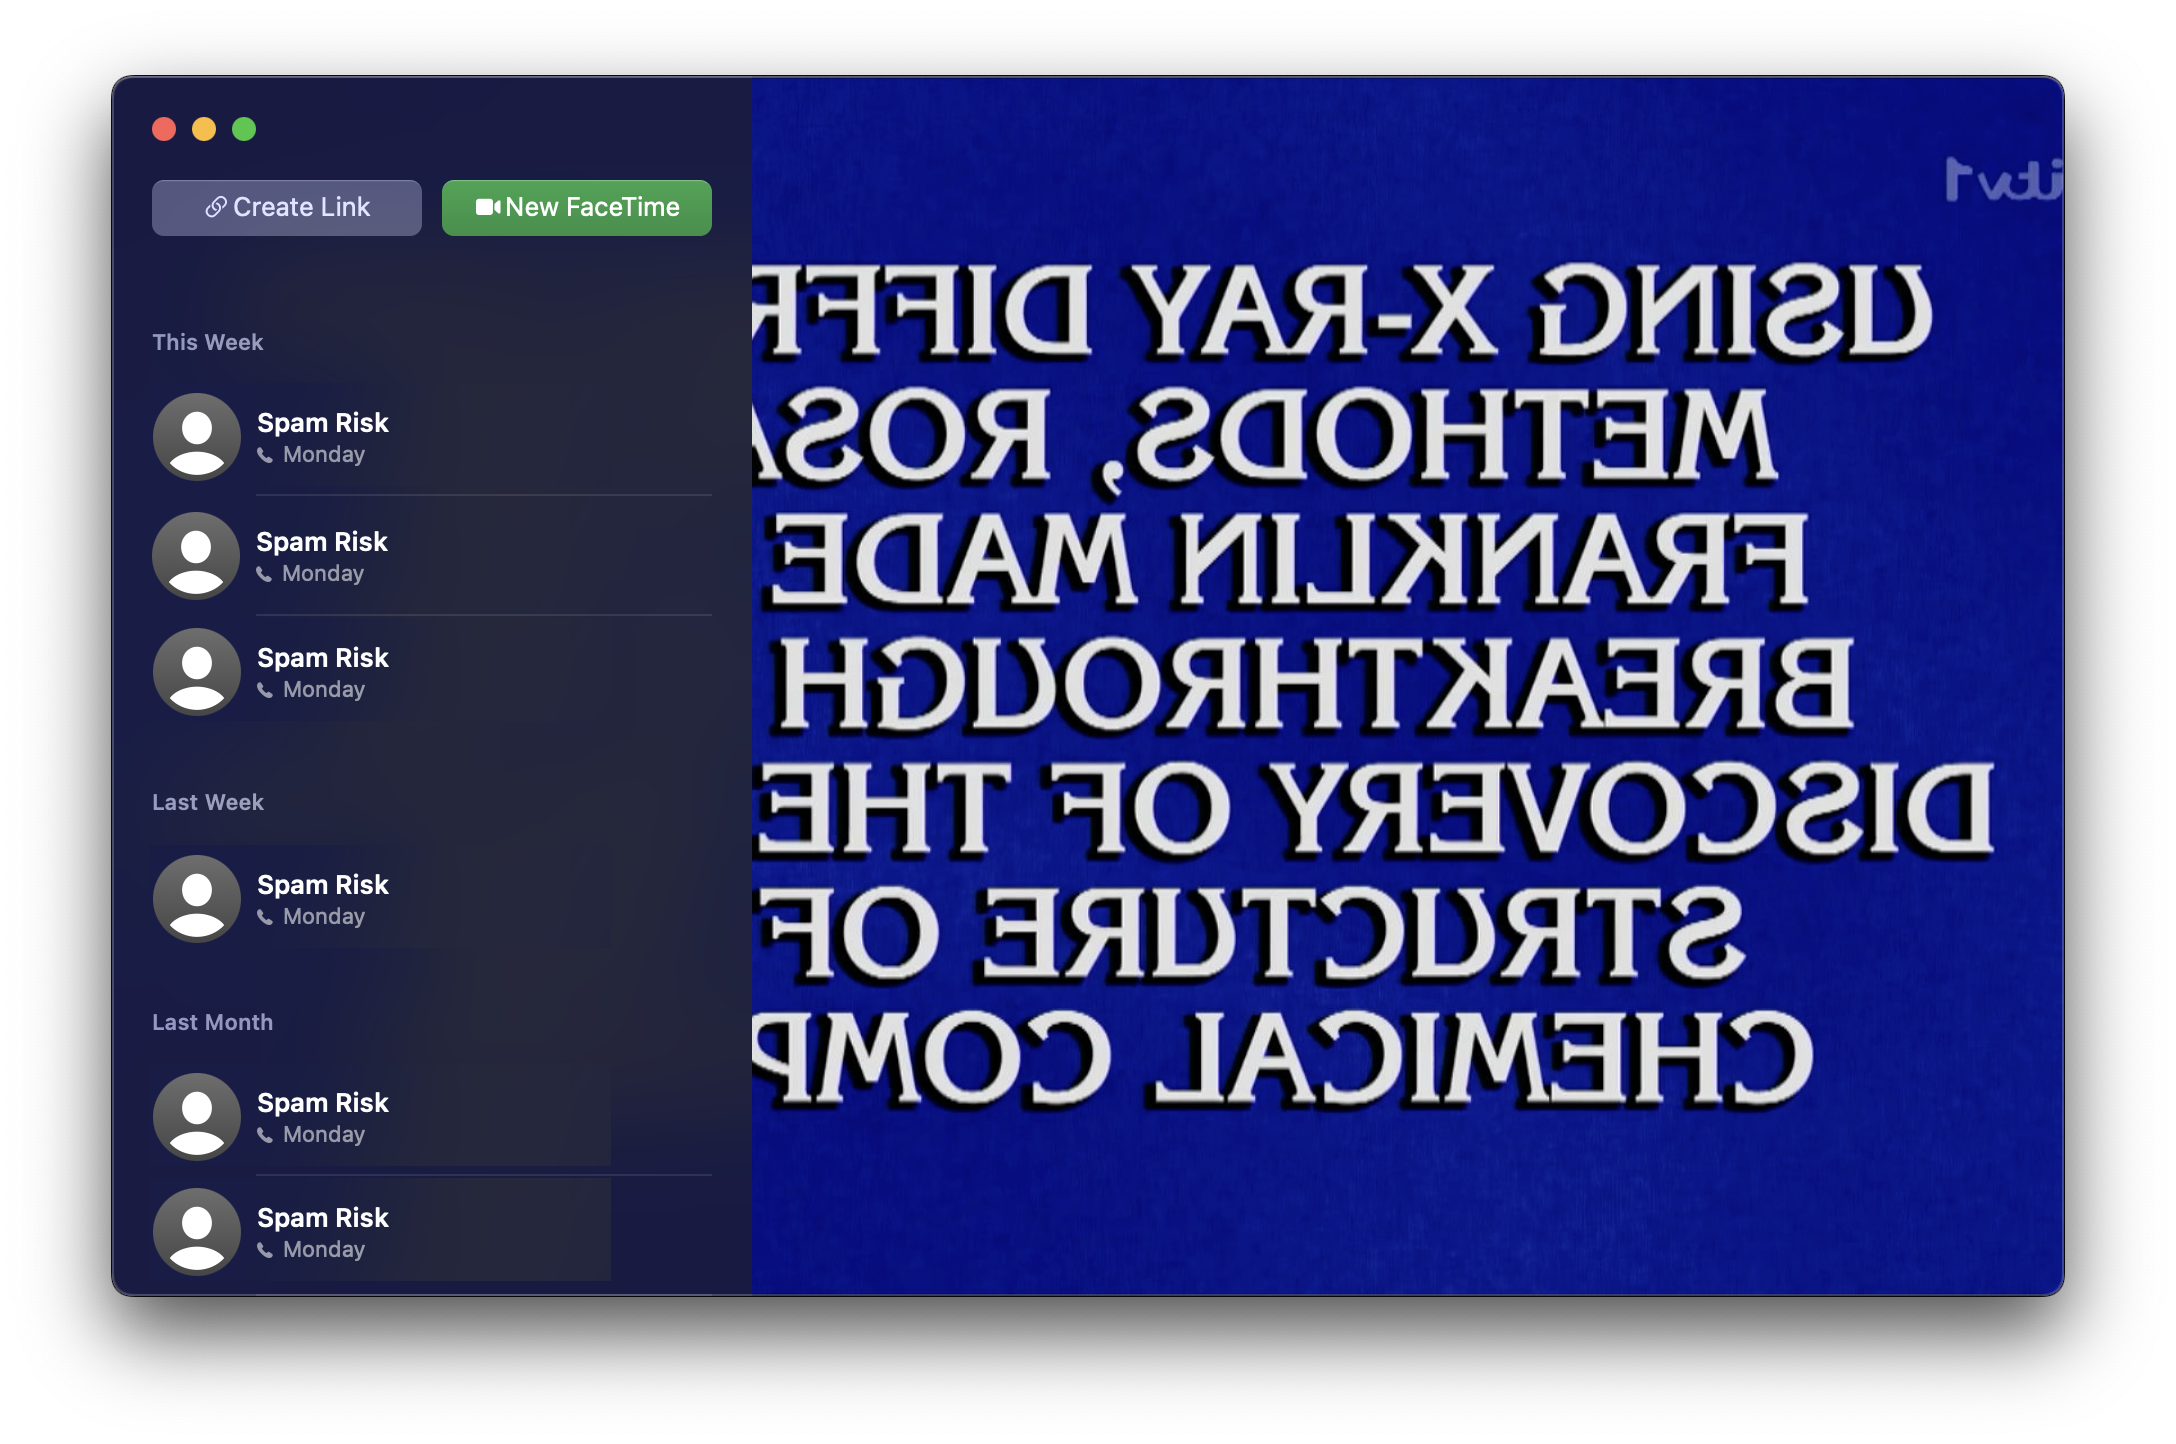 Note that by default, conferencing apps usually mirror your video signal. If possible you'll want to turn off mirroring so that text will display correctly. For example, here's how to do that in Microsoft Teams:
Updated over 1 year ago