Video Wall
Display one video tiled across multiple screens
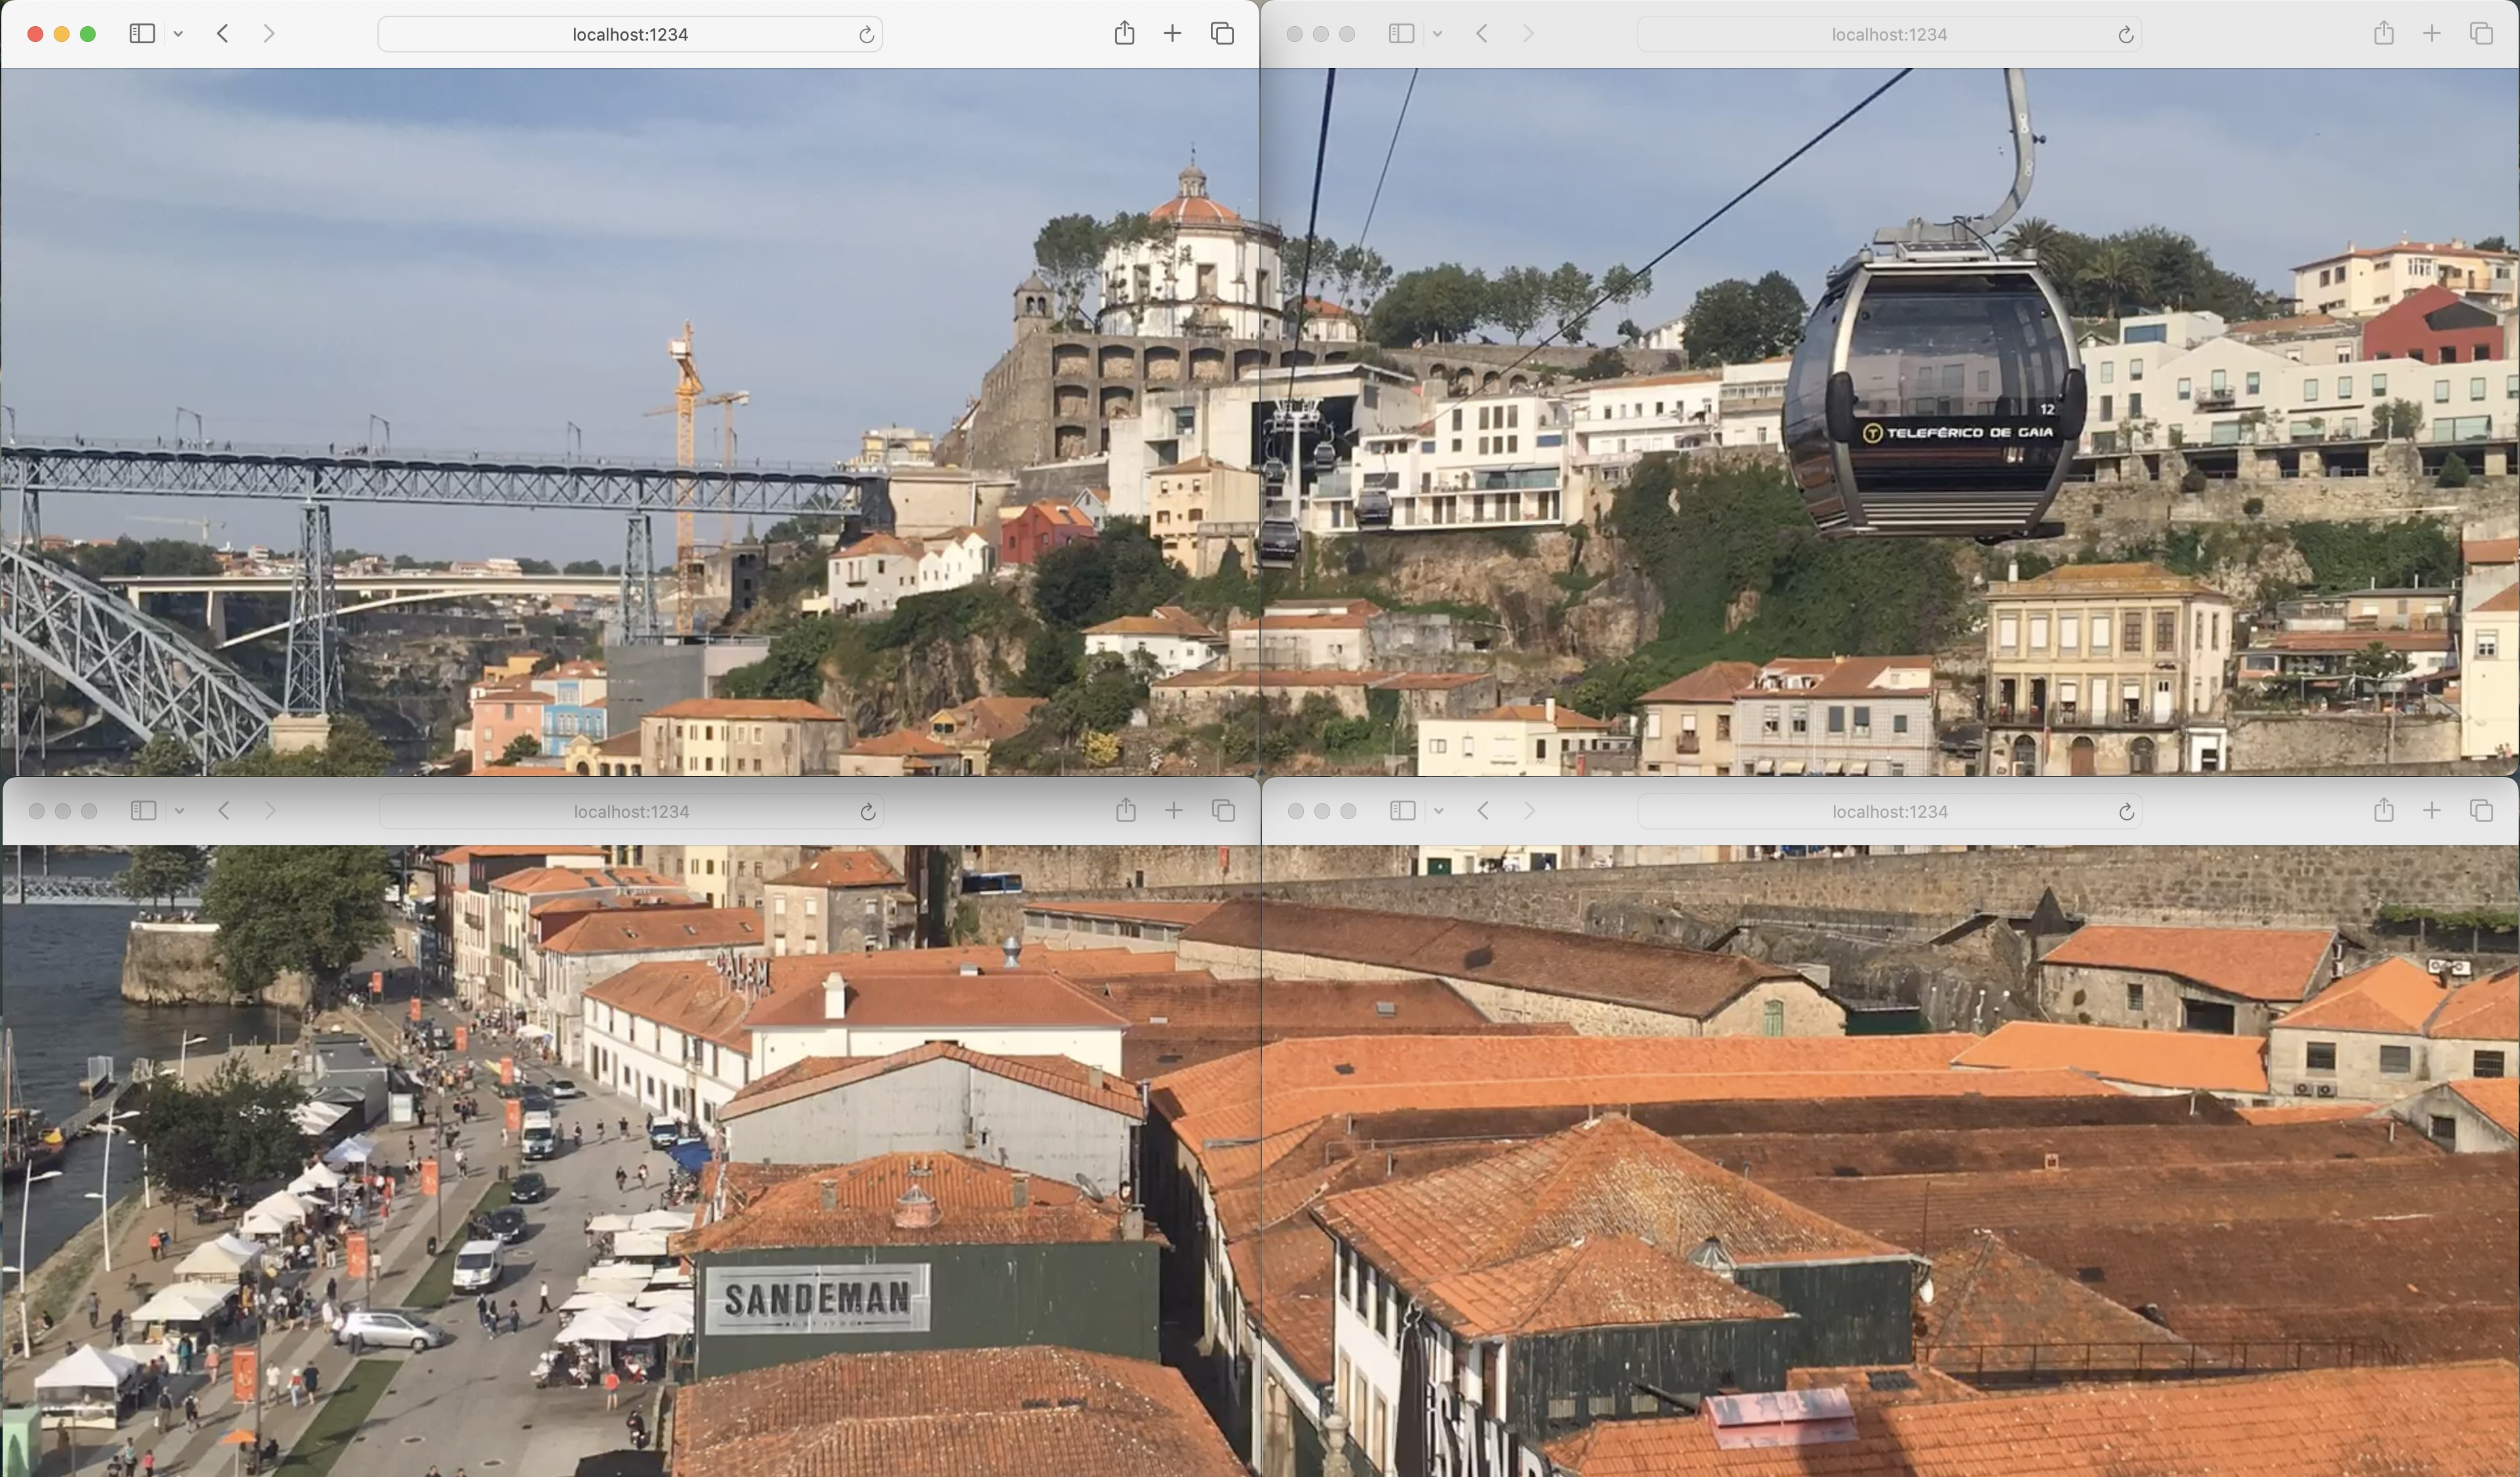
Now that we've learned how to display multiple videos on one screen, let's do the opposite: we're going to use multiple screens to display a single video. This would be a great solution for digital signage in a public place, in which you could use multiple TVs and cloud connectors to make a larger than life video wall.
For the purposes of this demo we're going to assume that we will tile a video across four screens (If you're a rock band like U2 and need to build the world's largest video wall, you might need a different solution).
What we're going to do is use Senza to take one video stream and reformat it into four video streams. Believe it or not that's actually much simpler than it sounds, because each browser will simply zoom in on one quarter of the video, and then stream that down to the client like any other web content. Effectively we could use this setup to take one 4K video stream and convert it to four HD video streams.
- Source code: https://github.com/synamedia-senza/fresco
- Demo: https://senzadev.net/fresco/
Here's what it looks like in four browser windows on a computer:

HTML and CSS
For this project we'll just use a very small amount of hardcoded HTML, with no need to dynamically generate anything.
In order to zoom in on part of the video, the web page will contain a div at HD resolution (1920 x 1080) and inside that a video element that's twice as big (3840 x 2160). Literally all we're going to do is move the larger video around inside the smaller div, depending upon which part we want to capture.
You can replace the video source in the HTML with a link to your favorite video.
<!DOCTYPE html>
<html>
<head>
    <title>Fresco</title>
    <meta charset="UTF-8">
    <link rel="stylesheet" href="styles.css">
</head>
<body>
<div id="main">
  <video id="video" width="3840" height="2160" loop="">
    <source id="source" src="video/gaia.mp4" type="video/mp4">
  </video>
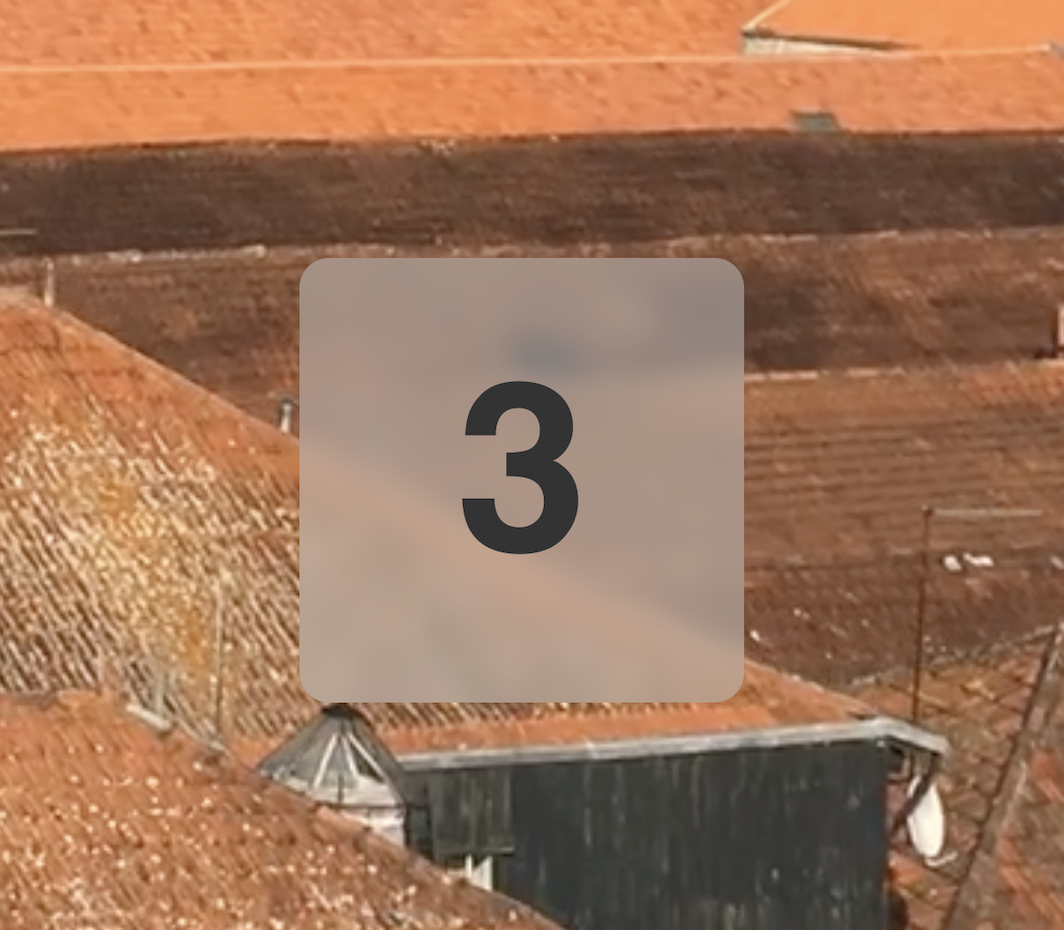
  <div class="overlay" id="toast">1</div>
</div>
</body>
<script src="js/socket.io-1.0.0.js"></script>
<script src="client.js"></script>
</html>
And here's a little bit of CSS. The important parts are that our video has absolute positioning inside a div with relative position, and that the overflow is hidden so that we crop the part of the video that extends outside of the div.
body {
  width: 1920px;
  height: 1080px;
  margin: 0px;
  background-color: black;
  overflow: hidden;
}

# main {
  overflow: hidden;
  position: relative;
  width: 1920px;
  height: 1080px;
  background-color: white;
  text-align: center;
}

.video {
  position: absolute;
}
Here are some constants to get us started with the JavaScript:
const width = 1920;
const height = 1080;
const main = document.getElementById("main");
const video = document.getElementById("video");
const source = document.getElementById("source");
const toast = document.getElementById("toast");
If you load the page now you should see the top left quarter of the video.
Changing channel
We will use the up/down keys on the remote control to let each screen decide which corner of the video it will display. This will work pretty much like tuning to a different channel on a regular TV. The screens are logically arranged as follows:
- Screen 0: top left
- Screen 1: top right
- Screen 2: bottom left
- Screen 3: bottom right
This is where we move the video around to zoom in on a different quadrant. Depending upon which screen we're showing, the top and left of the video will either be aligned with the top and left of the container, or moved offscreen with a negative margin.
let screen = 0;

function updateScreen() {
  video.style.marginTop  = (screen == 0 || screen == 1) ? "0px" : "-1080px";
  video.style.marginLeft = (screen == 0 || screen == 2) ? "0px" : "-1920px";
}
Here's our key listener:
document.addEventListener("keydown", function(event) {
  switch (event.key) {
    case "ArrowUp": up(); break;
    case "ArrowDown": down(); break;
    case "ArrowLeft": left(); break;
    case "ArrowRight": right(); break;
    case "Enter": enter(); break;
    case "Escape": escape(); break;
    default: return;
  }
  event.preventDefault();
});

function up() {
  screen = (screen + 1) % 4;
  showToast(screen);
  updateScreen();
}

function down() {
  screen = (screen + 3) % 4;
  showToast(screen);
  updateScreen();
}
To make it easier to see which channel we're on, we'll show a little toast with the channel number (similar to what's displayed when you change the volume or brightness on a Mac). Most of the code here is for making it fade out with a pleasing animation.
toast.style.opacity = 0.0;

let toastInterval = null;
function showToast(value) {
  toast.innerHTML = value;
  toast.style.opacity = 1.0;

  clearInterval(toastInterval);
  toastInterval = setTimeout(() => {
    let steps = 100;
    let count = 0;
    let step = 0.01;
    let opacity = 1.0;

    clearInterval(toastInterval);
    toastInterval = setInterval(() => {
      opacity -= step;
      count++;

      toast.style.opacity = opacity;

      if (count == steps) {
        clearInterval(toastInterval);
        toast.style.opacity = 0.0;
      }
    }, 10);
  }, 3000);
}
And here's the CSS for the toast:
.overlay {
  background-color: rgba(200,200,200,0.5);
  border-radius: 20px;
  margin:50px;
  position: absolute;
  backdrop-filter: blur(10px);
  -webkit-backdrop-filter: blur(10px);
  color: #333;
  text-align: center;
}

#toast {
  padding-top: 50px;
  height: 250px;
  width: 300px;
  top: 500px;
  left: 810px;
  font: 120pt Helvetica;
  font-weight: bold;
}
Now if you reload, you should be able to use the up and down arrow keys to change channel, and you'll see the page alternate which corner of the video is shown.

Setting up Node.js
Now we need a way to coordinate playback on all the screens. For the effect to work, we'd like to get as close as possible to showing the same frame at the same time on each screen. We'll create a little script that can run with Node.js, and use the Socket.IO library to push messages to the client. For more background on Socket.IO, see the post on creating a multi-screen slideshow.
To get started, move all the work so far into a folder called public.
Create a file called package.json with the following contents. This will include a few libraries, Socket.IO being the important one. In the terminal, use the command npm install to install the libraries.
{
  "name": "fresco",
  "version": "1.0.0",
  "description": "Fresco packages",
  "main": "fresco.js",
  "dependencies": {
    "errorhandler": "^1.3.5",
    "express": "^4.10.4",
    "request": "^2.64.0",
    "socket.io": "^1.0.0"
  },
  "devDependencies": {},
  "author": "Andrew Zamler-Carhart",
  "license": "ISC"
}
Create a file for the server called fresco.js. Here's some boilerplate for the top of that file:
let fresco = this;
let express = require("express"),
    app = express(),
    errorHandler = require('errorhandler'),
    state = require('./config.json'),
    hostname = process.env.HOSTNAME || 'localhost',
    port = parseInt(process.env.PORT, 10) || 1234,
    publicDir = process.argv[2] \|\| \_\_dirname + '/public',
    io = require('socket.io').listen(app.listen(port)),
globalSocket = null;

app.use(express.static(publicDir));
app.use(errorHandler({
    dumpExceptions: true,
    showStack: true
}));

console.log("Fresco server running at " + hostname + ":" + port);
Synchronizing the state
Our server will be very simple. It will have a model that stores the current state, which it will push to all the clients when they need to be updated.
Create a file called config.json with the following contents:
{
  "videos": [
    {
      "src": "http://commondatastorage.googleapis.com/gtv-videos-bucket/sample/BigBuckBunny.mp4",
      "duration": 596
    }
  ],
  "index": 0,
  "time": 0,
  "playing": true
}
The data model for our server contains the following properties:
- a list of videos (update with the src URL and duration in seconds of the videos you want to use)
- the index of the current video
- the current time
- whether the video is playing
We'll add some code to listen to messages from the client and broadcast messages to all clients as follows:
io.sockets.on('initialload', function (socket) {
    socket.emit('video', state);
});

io.sockets.on('connection', (socket) => {
  socket.on('hello', (message) => {
    socket.emit('video', state);
  });

  socket.on('playing', (message) => {
    state.playing = message.playing;
    state.playing ? play() : pause();
    io.sockets.emit('playing', state);
  });

  socket.on('time', (message) => {
    state.time = message.time;
    io.sockets.emit('time', state);
  });
});
Here's what that code will do:
- When a client first loads, it says hello and the server sends a video message with the entire state.
- If a client pauses or plays the video, it sends a playing message which modifies the state and broadcasts it to all clients.
- If a client skips forward or backward, it sends a time message which modifies the state and broadcasts it to all clients.
Keeping time
The server will have a loop that keeps time with the video. Every 100 milliseconds we'll advance the time by a tenth of a second.
function play() {
  interval = setInterval(() => {
    state.time += 0.1;

		if (state.time >= state.videos[state.index || 0].duration) {
  		state.index = (state.index + 1) % state.videos.length;
 		 state.time = 0;
  		console.log(state);
  		io.sockets.emit('video', state);
		}
  }, 100);
}

function pause() {
  clearInterval(interval);
}

play();
If there is more than one video in the list, whenever the server thinks that we've gotten to the end of a video (because the time has passed the video's duration), we'll advance to the next video and start the playback from the beginning.
We call the play() function when the server loads, and the playing handler calls play() or pause() as needed. These simply start and stop the counter.
You can now run the server using the command npm fresco.js.
Receiving messages from the server
Now that the server is broadcasting the messages, we need to set up the client to receive them. First, let's set up the client to use Socket.IO. Download the socket.io-1.0.0.js library and save it in a folder called js in the public folder. In the index.html file, load the library like this:
<script src="js/socket.io-1.0.0.js"></script>
We'll add a few commands to exchange info with the server:
socket.emit('hello', '');

socket.on('video', (message) => {
  video.setAttribute("src", message.videos[message.index || 0].src);
  video.volume = 0.0;
  video.load();
  video.currentTime = message.time;
  playing = message.playing;
  playPause();
});

socket.on('playing', (message) => {
  playing = message.playing;
  video.currentTime = message.time;
  playPause();
});

socket.on('time', (message) => {
  video.currentTime = message.time;
});

function playPause() {
  playing ? video.play() : video.pause();
}
When the page loads, we'll say hello which asks the server to send us a message with the current state.
When we receive a video message, we'll update the video source taking into account the index of the current video. There's two gotchas when programmatically changing the video source:
- After changing the video source, you have to call
video.load()for it to take effect. - Modern browsers will only autoplay programmatically loaded videos if they are muted! That's to avoid being really annoying. So it's critical to set the volume to zero or the video won't play.
When setting the video, we also sync the time and playback state, and then call the playPause() function to play or pause the video.
When receiving a playing message, we call playPause(). We also sync the time in this case; that way if the videos are slightly out of sync then pausing the video will sync them up perfectly.
When receiving a time message, we just change the timecode. This is useful when skipping forwards and backwards.
Sending messages to the server
We can use the remote control of any connected client to change the playback state for all the clients.
function left() {
  socket.emit('time', {"time": video.currentTime - 0.5});
}

function right() {
  socket.emit('time', {"time": video.currentTime + 0.5});
}

function enter() {
  socket.emit('playing', {"playing": !playing});
}
When you hit the right and left buttons, it will scrub forwards and backwards by half a second. What happens here is that the client receiving the command looks at the current time, and then sends a message to the server with the proposed new time. When the server receives the message, it updates the state and broadcasts the message to all the clients.
Similarly when you hit enter it will pause or play the video. It just sends a message to the server with the opposite of the current playback state, and the server broadcasts the new state to all the clients.
In both cases, the client that receives the remote control command doesn't directly modify its own internal state. Rather, it just forwards the command to the server and receives the command along with all the other clients. The turnaround is so fast that you don't experience a significant delay.
Conclusion
Et voila! Now we've built a simple app that plays a list of videos and lets the viewer use the remote to play/pause and scrub back and forth, except instead of doing this on just one screen, we spread the video across four screens. Before we wrote this app if I'd told you that we could split a stream of 4K video into four streams of HD video with just a few lines of code, you'd have said I was crazy! But that's a testament to the power of Senza.

Updated over 1 year ago