Popup Ads
This tutorial shows how you can display web content superimposed on top of video while it is playing. We'll show some contextual popup ads that are synchronized to particular timecodes in the video.
- Source code: https://github.com/synamedia-senza/popup-ads
- Demo: https://senzadev.net/popup-ads/
- Video tutorial: Popup Ads
The code is a fork of the Banner app featured in the Reference Implementation guide and the Playing Video tutorial, so learn about that app first. Instead of displaying a banner all the time when in foreground mode, this version shows different banners at different times.
Video tutorial
Popups
The app displays a series of popups at specific times during the video. The popups.js module contains a JSON object with data for the popups, including the id, start and end times, title and subtitle. For example:
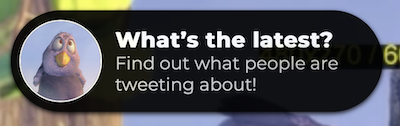
{
"id": "bunny",
"start": "1:00",
"end": "1:13",
"title": "XL rabbits now available!",
"subtitle": "Call now 1-866-XL-BUNNY"
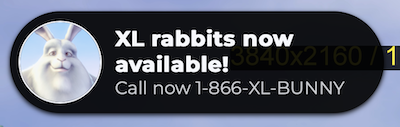
}Here is a handy reference so that you can find the popups in the video. As you're watching, you can use the left and right arrow keys to skip backwards and forwards by 10 seconds at a time.
| Preview | ID | Start | End |
|---|---|---|---|
 | birds | 0:20 | 0:27 |
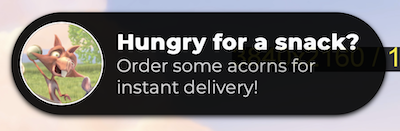
 | bunny | 1:00 | 1:13 |
 | butterfly | 1:50 | 2:05 |
 | nuts | 2:50 | 3:05 |
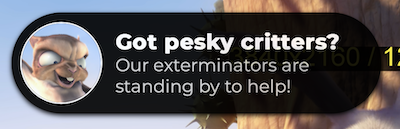 | critters | 3:52 | 4:15 |
HTML & CSS
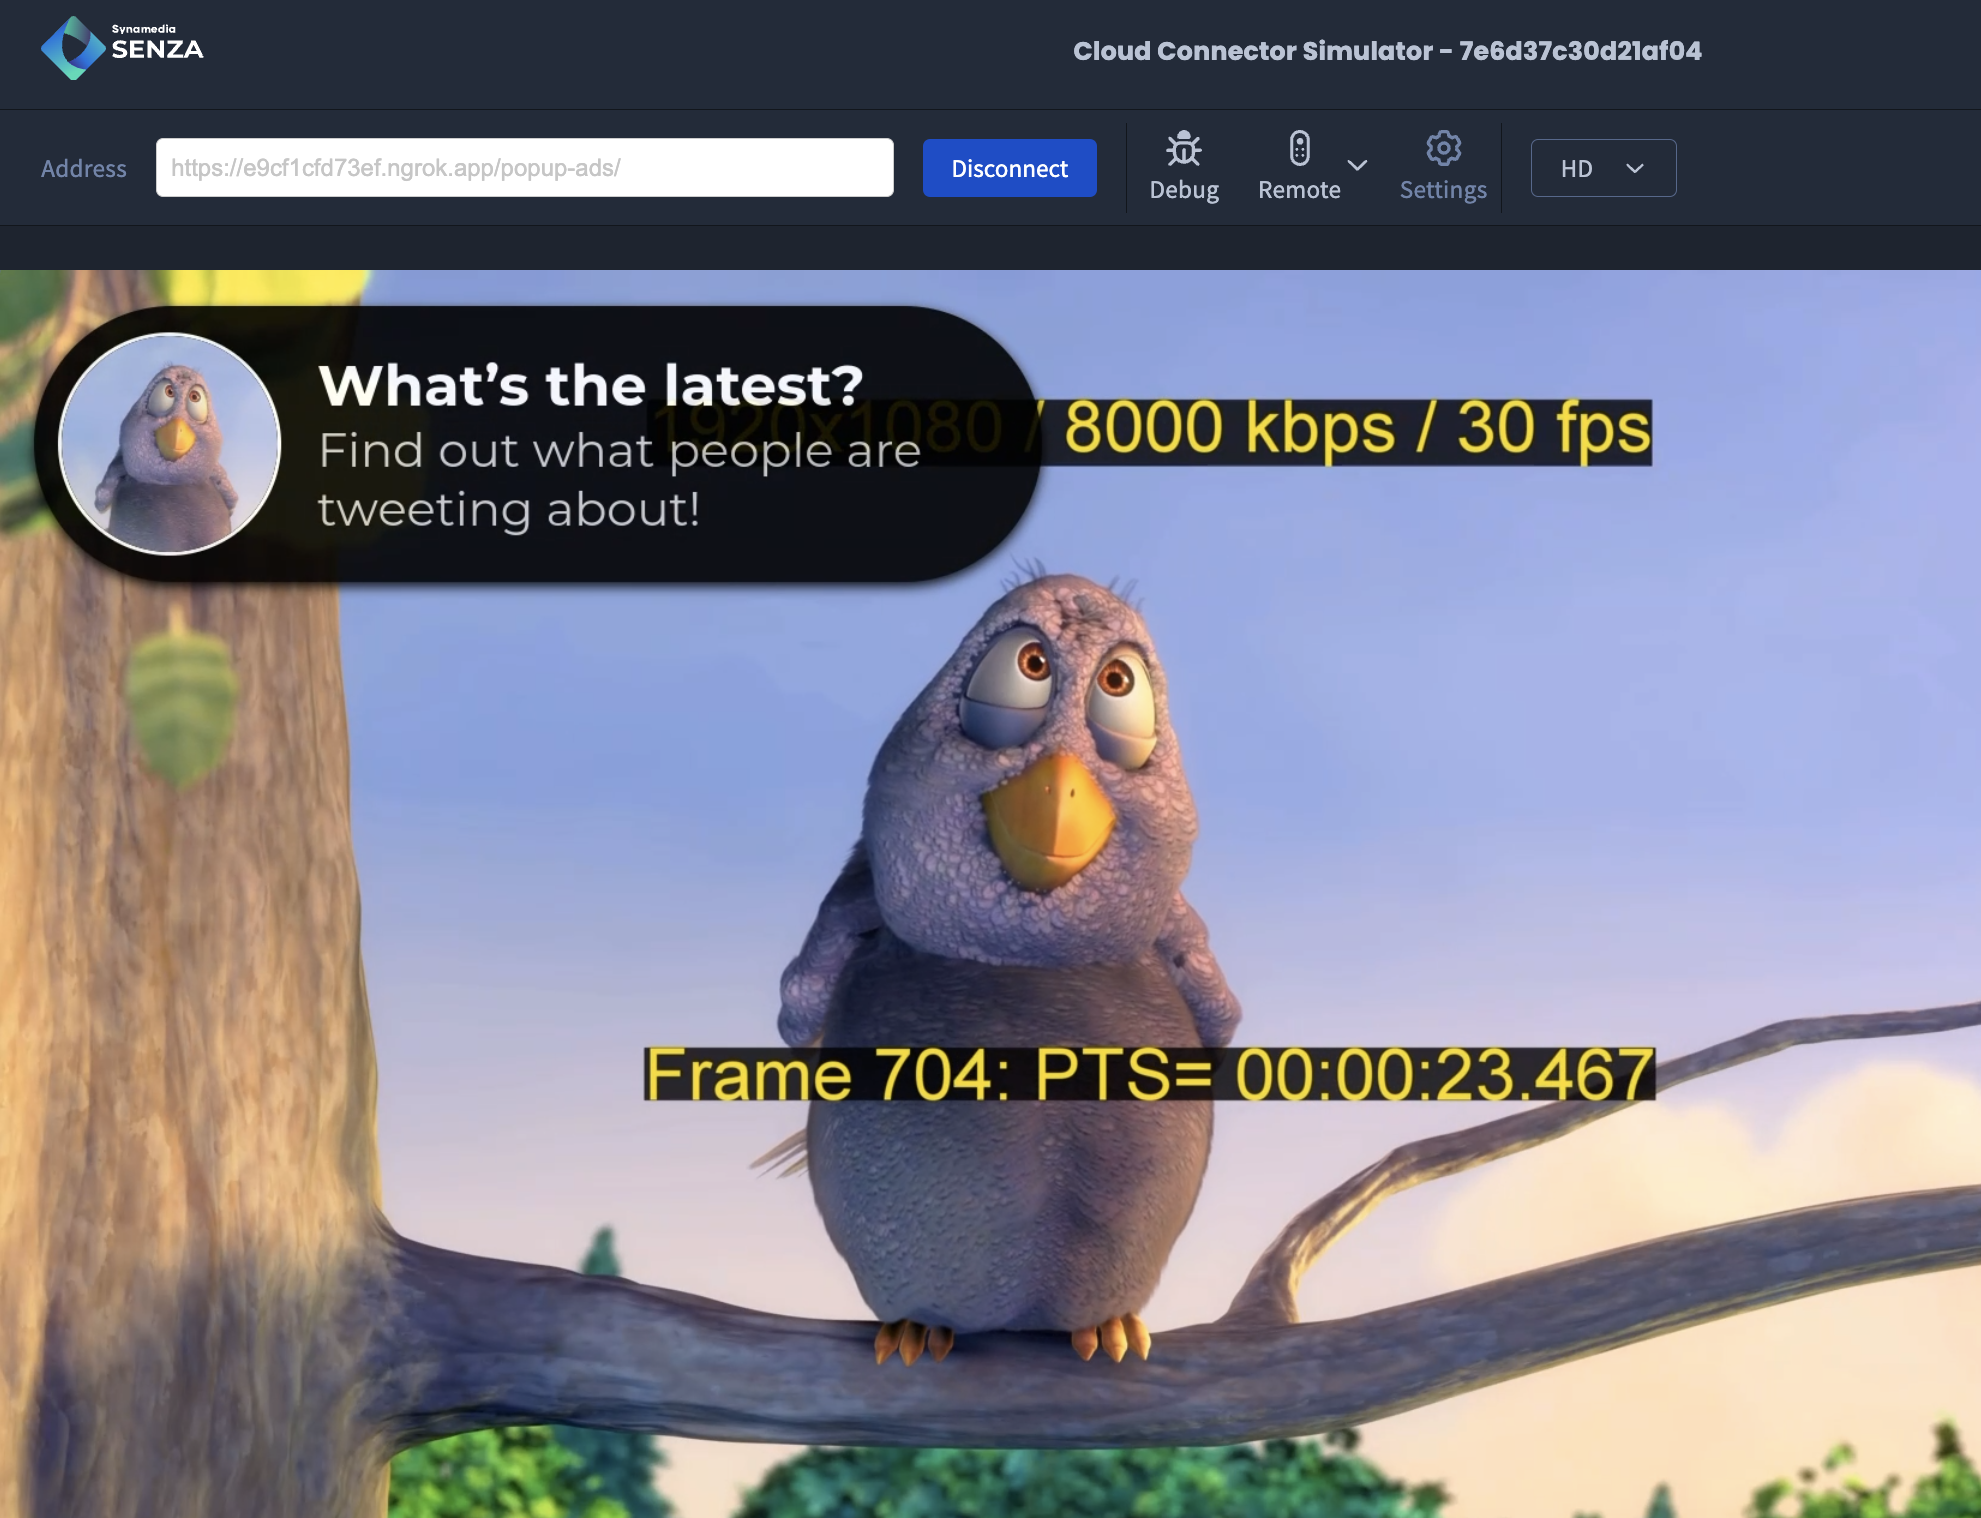
In the index.html file, we'll add a little bit of code for the popup. It's got an image and text fields for the title and subtitle.
<body>
  <div id="main">
    <video id="video" width="1920" height="1080" muted="muted"></video>
    <div id="popup">
        <img id="icon" src="images/bird.png">
        <div id="popup-text">
            <div id="title">What’s the latest?</div>
            <div id="subtitle">Find out what people are tweeting about!</div>
        </div>
    </div>
  </div>
</body>
The styles.css file includes styling information, including these transitions for animating in and out:
@keyframes dissolve-in {
  0% {
    transform: scale(0.7);
    filter: blur(4px);
    opacity: 0.0;
  }
  100% {
    transform: scale(1.0);
    filter: blur(0px);
    opacity: 0.9;
  }
}

@keyframes dissolve-out {
  0% {
    transform: scale(1.0);
    filter: blur(0px);
    opacity: 0.9;
  }
  100% {
    transform: scale(1.5);
    filter: blur(4px);
    opacity: 0.0;
  }
}
Timeline
The index.js file contains the main code for our app. Before we get started, we're going to define a helper function that converts the human readable time strings like "1:13"to timecodes in seconds. Then we'll iterate through all the popups and define numeric properties for each start and end time.
function calculateTimes() {
  popups.forEach(item => {
    item.startTime = timeToSeconds(item.start);
    item.endTime = timeToSeconds(item.end);
  });
}

function timeToSeconds(timeStr) {
  const [minutes, seconds] = timeStr.split(":").map(Number);
  return minutes * 60 + seconds;
}
Now, the first task is to show and hide the popups at the right times during video playback. The fundamental question we want to answer is, what should we do next? More specifically,
- Which popup is coming up next?
- Do we need to show or hide it?
- How many seconds from now should we do that?
We'll write a function that returns the next event. First it finds the next popup, specifically the first one whose end time is in the future. In the context of that popup, if the start time is in the future then we need to make a plan to show it, on the other hand if its start time is in the past then it should already be visible and we'll need to hide it.
We'll return an object that includes the name of the event, a callback function that we'll use to do the work, a detail that we'll use for the popup ID, and the number of seconds from now that we should schedule the event. We'll use objects in this format for scheduling events.
function getNextEvent(currentTime) {
  let item = popups.find(p => p.endTime > currentTime);
  if (item) {
    if (item.startTime > currentTime) {
      return {
        name: "showPopup",
        callback: showPopup,
        detail: item.id,
        seconds: item.startTime - currentTime
      };
    } else {
      return {
        name: "hidePopup",
        callback: hidePopup,
        detail: item.id,
        seconds: item.endTime - currentTime
      };
    }
  } else {
    return null;
  }
}
Next we'll write a function that schedules the next event. First it clears any events that have already been scheduled. Then it calls the function above to get the next event, and prints it to the console to you can see what's happening. If we found an event (i.e. unless all the popups are in the past), we'll go ahead and schedule it to run... more on that in a moment!
We'll use pretty animations when showing or hiding a popup according to the schedule. However if we're skipping around, we'll want to make sure that that the correct popup is visible or not immediately. If we're scheduling the next popup to be shown, then nothing should be visible now. If we're scheduling the next one to be hidden, then we should update the popup and make it visible.
function scheduleNextEvent() {
  clearEvents();

  let event = getNextEvent(video.currentTime);
  console.log(event);
  if (event) {
    if (event.name == "showPopup") {
      setVisible(false);
    } else {
      updatePopup(event.detail);
      setVisible(true);
    }
    scheduleEvent(event);
  } else {
    setVisible(false);
  }
}
Add a call to this function in the window load callback to schedule the first event so we can get started when the app loads.
Popup management
Here are a few functions that we'll use to manage the popups.
This function takes the ID of a popup and updates the HTML elements with the correct image and text.
function updatePopup(id) {
  let item = popups.find(p => p.id == id);
  if (item) {
    icon.src = `images/${item.id}.png`;
    title.innerHTML = item.title;
    subtitle.innerHTML = item.subtitle;
  }
}
These are the functions that we'll pass to the scheduler that show and hide the popups. They call the function above, and trigger the animations. Then after a one second delay they get the whole process started again and schedule the next event.
function showPopup(event) {
  updatePopup(event.detail);
  dissolveIn();
  setTimeout(scheduleNextEvent, 1000);
}

function hidePopup(event) {
  dissolveOut();
  setTimeout(scheduleNextEvent, 1000);
}
These functions control the visibility of the popup. The dissolve functions make it fade in and out, while the setVisible() function shows or hides it immediately for when we're skipping around.
function setVisible(visible) {
  popup.style.removeProperty("animation-name");
  popup.style.opacity = visible ? 0.9 : 0.0;
  lifecycle.autoBackground = !visible;
}

function dissolveIn() {
  popup.style.animationName = "dissolve-in";
  lifecycle.autoBackground = false;
}

function dissolveOut() {
  popup.style.animationName = "dissolve-out";
  lifecycle.autoBackground = true;
}
You'll notice that we turn the Lifecycle object's auto-background mode on and off depending upon whether the popup is visible. We don't want to transition to background mode while the popup is visible; HTML content is only visible in foreground mode so it would disappear! For more information on auto-background, see the Lifecycle Integration guide.
Scheduling events
Normally when you want to schedule an event to happen in the future you can use the setTimeout() function. However, on the Senza platform your app may be suspended while in background mode, so you can't rely on timeouts to always fire as expected.
The Client Library provides an easy to use solution with an object called the Alarm Manager, which will allow you to the same thing in a slightly different way. The basic usage is like this.
alarmManager.addEventListener("MyAlarm", (e) => {
    console.log("alarm MyAlarm arrived with data", e.detail);
});
alarmManager.addAlarm("MyAlarm", Date.now() + seconds * 1000, "MyData");
After the given number of seconds, the callback will called with an event like{"detail": "MyData"}. If the app is in background mode and the browser is not running, it will wake up again so the alarm can be delivered.
Now as you can see, we have two ways of doing the same thing that are mutually exclusive: we can't rely on setTimeout() if we are running on Senza, but Alarm Manager is not available unless we are running on Senza.
Let's see if we can find a best of both words solution, with a common interface that works in both cases! Have a look at the scheduleEvent.js module to see how the scheduleEvent()and clearEvents()functions work.
We'll use the isRunningE2E() function to check if we're running end-to-end on Senza, in other words whether we're running in the simulator or on a cloud connector. If so we'll use Alarm Manager, otherwise we won't.
If we are using Alarm Manager, the two tasks are to define an event listener and to add an alarm with the same name. Normally we only have to define the listener once in our app. To make the code a little more dynamic we'll do it on the fly, but keep track of which events we've added listeners for to make sure that we only do it once (otherwise the listener would be called several times). When we define the listener we'll wrap the event's callback in an anonymous function that moves to foreground if needed.
Adding the alarm is pretty simple, but there's a few things to note. While timeouts are scheduled using time intervals (a number of milliseconds from now), Alarm Manager schedules events using absolute times (a number of milliseconds since the epoch). Therefore you need to add the current time to the time interval in milliseconds.
Also note that we pass the event.detail as the last argument (in our app, that's the ID of the popup). The Alarm Manager will remember this value, which can be a string, array or object, and pass an event with this detail to the callback. In the callback, you can get the same value back by calling event.detail, as shown above in the showPopup() function.
All that being said, if we're not running on Senza we just call setTimeout()like in a normal app, passing the event to the callback, and triggering it after a given number of seconds. That makes it all work in a browser just as well as on Senza.
import { isRunningE2E, alarmManager, lifecycle } from "senza-sdk";

let timeout;
let eventNames = [];

// Schedules an event using AlarmManager if running on Senza, otherwise sets a timeout.
// The event should have the following properties:
//  - name: string
//  - callback: function
//  - detail: an event with this property will be passed to the function
//  - seconds: number
export function scheduleEvent(event) {
  if (isRunningE2E()) {
    if (!eventNames.includes(event.name)) {
      alarmManager.addEventListener(event.name, async (e) => {
        await moveToForegroundIfNeeded();
        event.callback(e);
      });
      eventNames.push(event.name);
    }
    alarmManager.addAlarm(event.name, Date.now() + event.seconds * 1000, event.detail);
  } else {
    timeout = setTimeout(() => event.callback(event), event.seconds * 1000);
  }
}
When we clear the events, if we're on Senza then we'll tell Alarm Manager to delete all the alarms, otherwise we'll call the traditional clearTimeout() function.
export function clearEvents() {
  if (isRunningE2E()) {
    alarmManager.deleteAllAlarms();
  } else {
    clearTimeout(timeout);
  }
}
This helper function checks if we're in background mode, and if so moves to foreground.
async function moveToForegroundIfNeeded() {
  if (lifecycle.state == lifecycle.UiState.BACKGROUND ||
      lifecycle.state == lifecycle.UiState.IN_TRANSITION_TO_BACKGROUND) {
    await lifecycle.moveToForeground();
  }
}
This is a useful module you can drop right into your app if you want all the benefits of using Alarm Manager, but don't want to commit to your app only working on the Senza platform. If you are only running on Senza, you can of course just use Alarm Manager directly.
Conclusion
In this tutorial you've learned how you can display contextual popups at specific times during video playback, whether or not your app is running on Senza. The app takes full advantage of the auto-background feature, switching to background mode automatically whenever it's been a few seconds since the user pressed a button on the remote as long as there's no popup on the screen, and switching to foreground mode immediately whenever the user presses a button or it's time to show a banner.
To get an idea of how that flow works in practice, you can try the app in your browser at https://senzadev.net/popup-ads, or viewing the app on Senza in the simulator or on a cloud connector. Or if you just want to lean back and watch, here's a video tutorial that has a full demo of the app experience on Senza. Enjoy!
Updated 2 months ago