Device Lookup
In this tutorial, we’ll build a small, clean Node.js script that talks to the Senza API to:
- list all the devices in a tenant
- get detailed information about each device
- update device descriptions when they’re missing
- geolocate the device’s last-connected IP
- show the device locations on a map
Project structure
You can clone the repo and follow along here:
The project contains the following files:
- device-lookup.js: functions for working with the Senza API
- geolocation.js: functions for geolocating devices by IP address
- input.json: list of devices with descriptions that we will upload
The script will output a JSON file containing the long form of all the device records, including a location object for all the devices that have been activated.
{
  "devices": [
    {
      "deviceId": "abc123",
      "...": "all the full device fields from the API ...",
      "location": {
        "city": "New York",
        "region": "NY",
        "country_name": "United States",
        "latitude": 40.7,
        "longitude": -74.0
      }
    }
  ]
}
Prerequisites
To call the Senza API, you'll need to create an API key for your tenant with the appropriate permissions.
- In the Senza Console sidebar, click API Keys.
- Then click the Create Application button.
- Fill out the form as shown below.
- Enter a name for your application.
- Select your tenant from the choices.
- Filter the permissions for the word
device, and check the boxes forsenza:device:readandsenza:device:write.
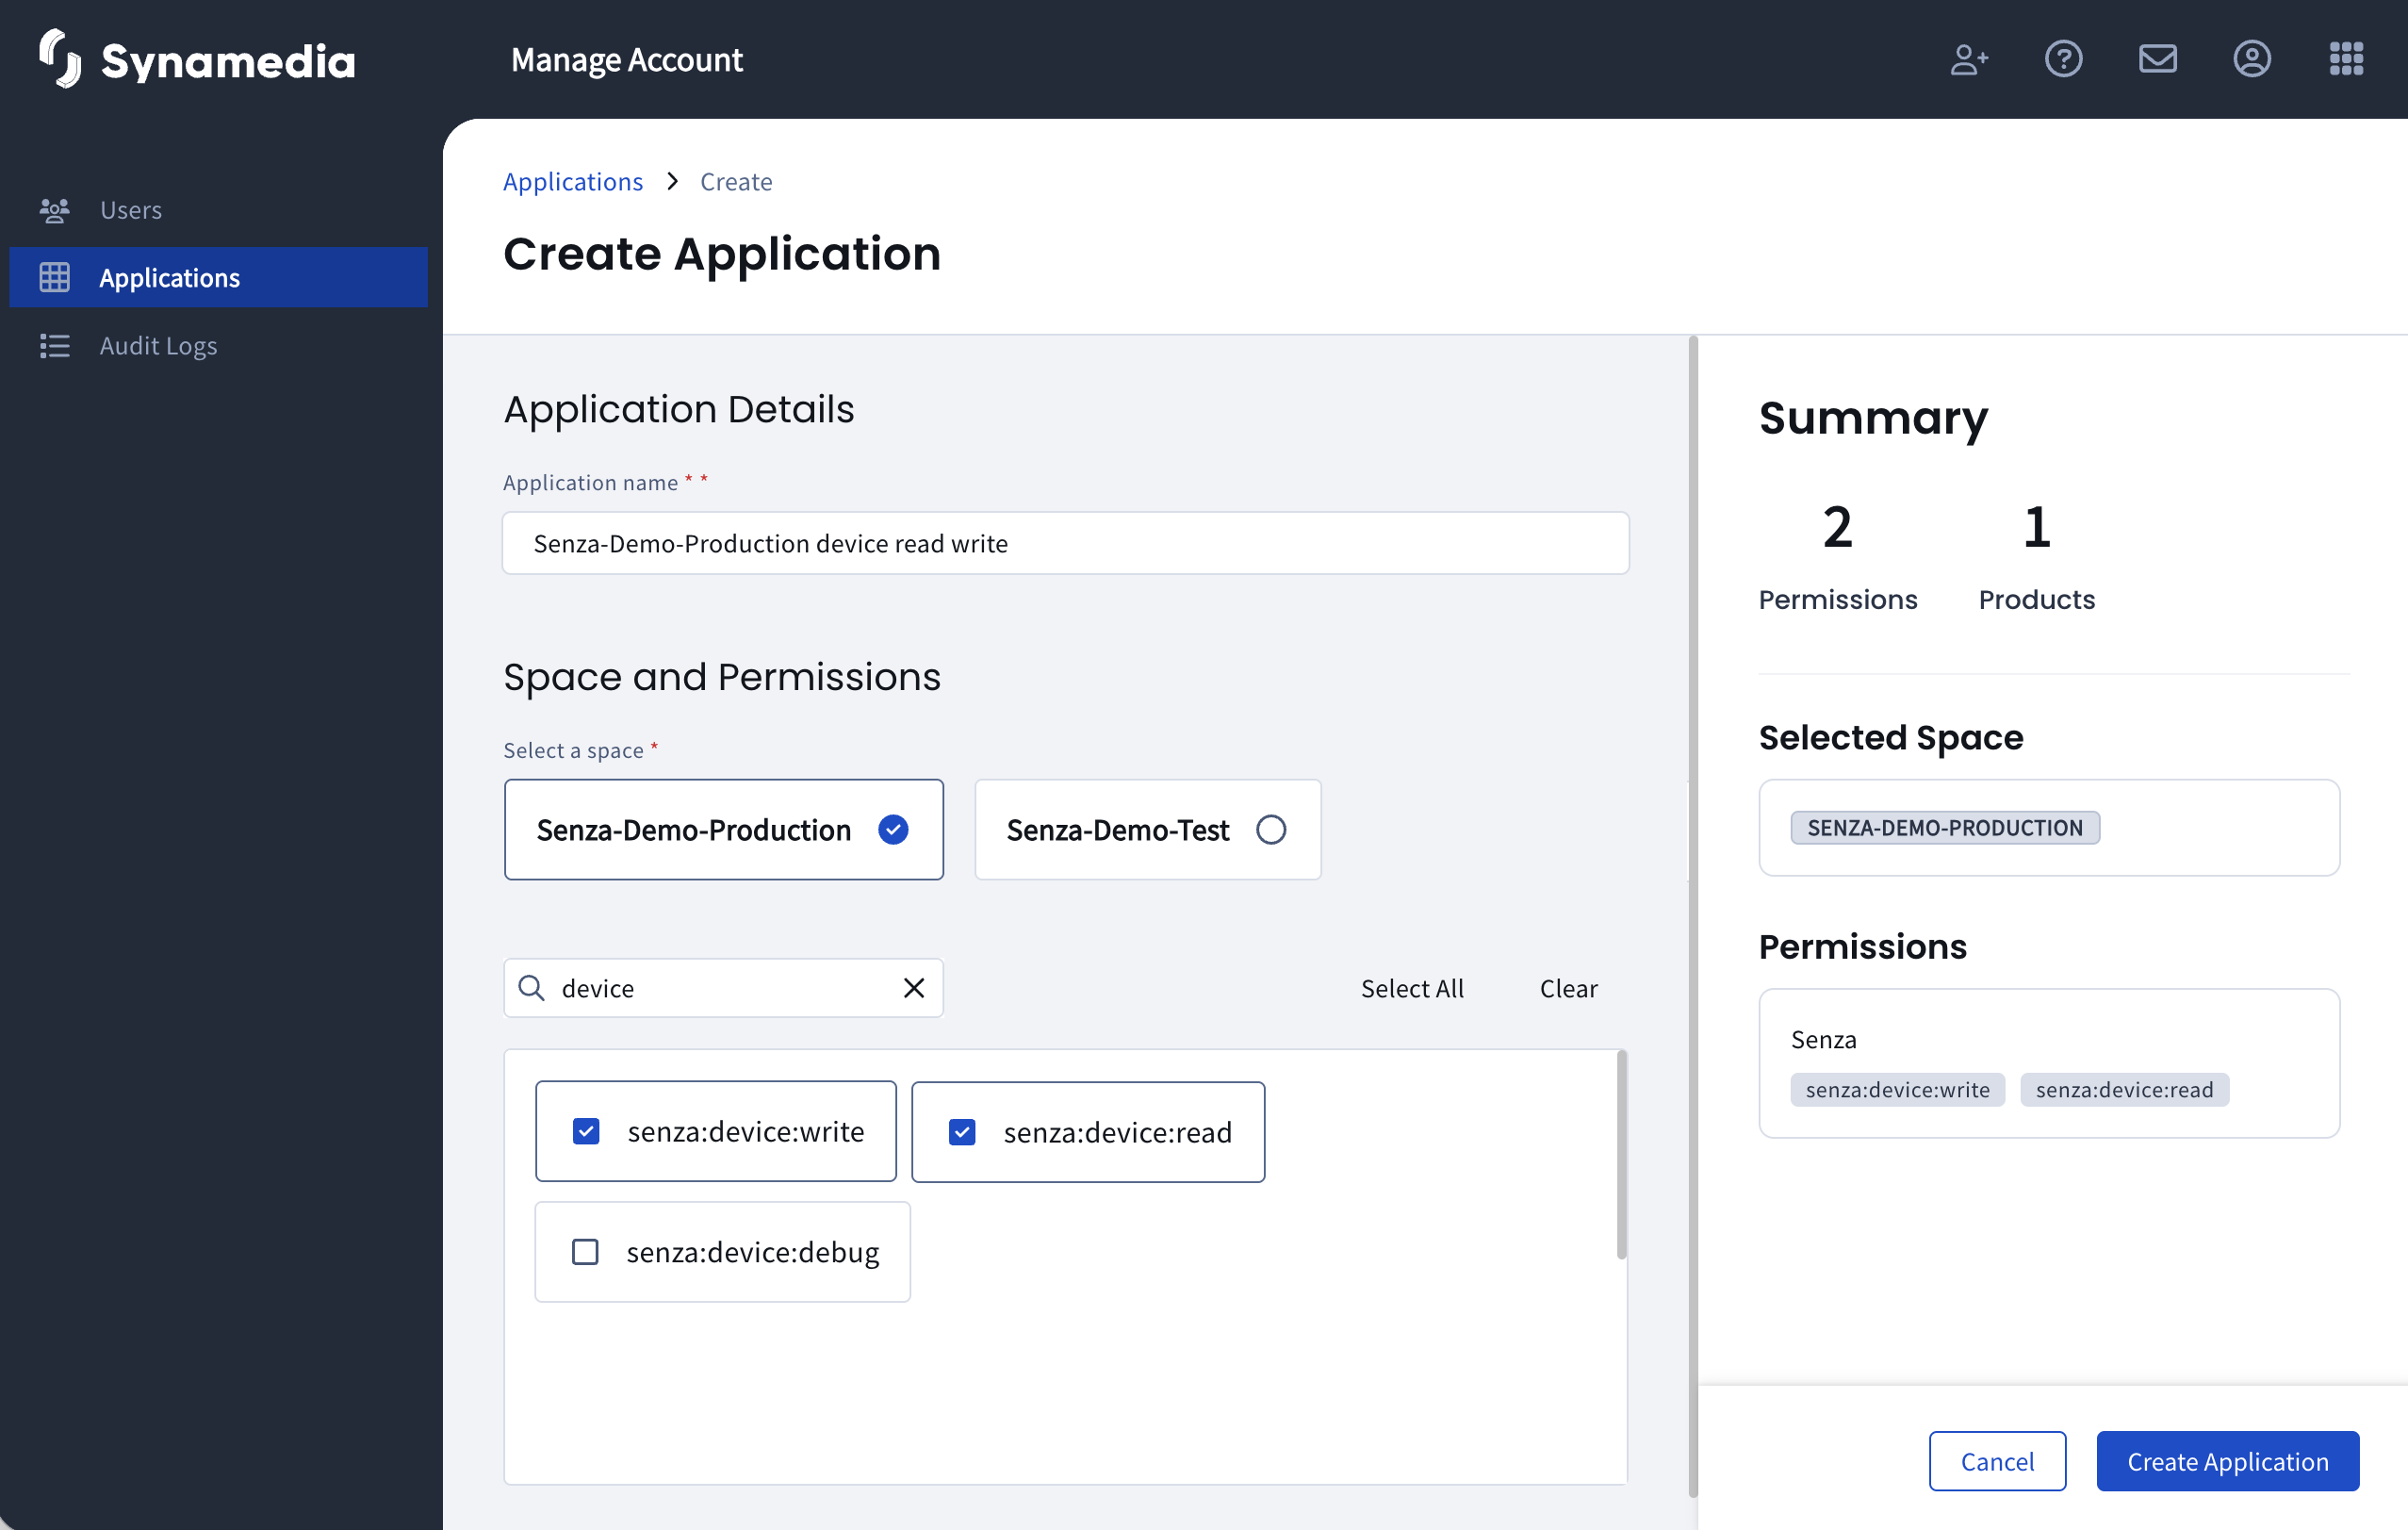
- Click Create Application, and make a note of the Client ID and Client Secret.
Note: API keys are scoped to a single tenant. If you want to work with devices in multiple tenants, you can create several API keys.
To call the IPData API for geolocalization, create an API key on https://ipdata.co. The free tier is fine for testing purposes.
Setup
1. Install dependencies
The script uses dotenv for loading the environment settings.
npm install2. Create .env
.envCreate a file named .env in your project root:
TENANT_ID=YOUR_TENANT_ID
CLIENT_ID=YOUR_CLIENT_ID
CLIENT_SECRET=YOUR_CLIENT_SECRET

# ipdata geolocation
IPDATA_API_KEY=YOUR_IPDATA_KEY
Paste in your tenant ID along with the client ID and client secret from the steps above.
For the geolocation, paste in your IPData API key.
Code walkthrough
The device-lookup.js file performs the following tasks:
Authentication
The getAccessToken() function uses the client ID and client secret to obtain an access token from the Auth Token endpoint. The access token is scoped with the permissions that you selected when you created the API key, so in this case we'll be able to read and write devices. The script will include the access token in the headers when making requests to the API.
List devices
We'll call the GET /tenants/1.0/{tenantId}/devices endpoint in the listDevices() function to get a list of devices in the tenant. To keep the API efficient, it only returns a short form of the device object—we'll need to request the devices individually in the following step.
Get device
Now that we have the list of devices, we'll use the getDevice() function to call the Get Device Details endpoint to get the full record for each device. This is important because we want to get the lastConnectedIp address so we can geolocate the devices.
Update devices
Let's say that you have your own database of information that is relevant for each device, such as where it is installed or who you gave it to. You can create an input JSON file with the deviceId and description for these devices. If the description of the device from the API is empty, and a description for the device is provided in the input file, then we'll update it.
In that case, in the updateDevice() function we'll call the Update Device endpoint, with a payload that includes just the description. This will insert that value into the device record.
Geolocation
If the device has been activated, the server will keep track of the IP address of the most recent connection. We'll call the geolocate() function in the geolocation.js file. This makes a simple request to the IPData API with the IP address in the URL, and returns a location object with the city, region, country name, latitude and longitude. This whole object will be merged into the device record.
Because this is a metered API, the script caches responses in a ipdata-cache.json file so that it doesn't need to look up the same IP address more than once.
Output
When all this is done, the script writes the list of full device records including the location data to the output file.
Running the script
- Update the
input.jsonfile with descriptions for a few devices in your tenant like this.
{
"devices": [
{ "deviceId": "abc123", "description": "Living Room" },
{ "deviceId": "xyz789", "description": "Master Bedroom" }
]
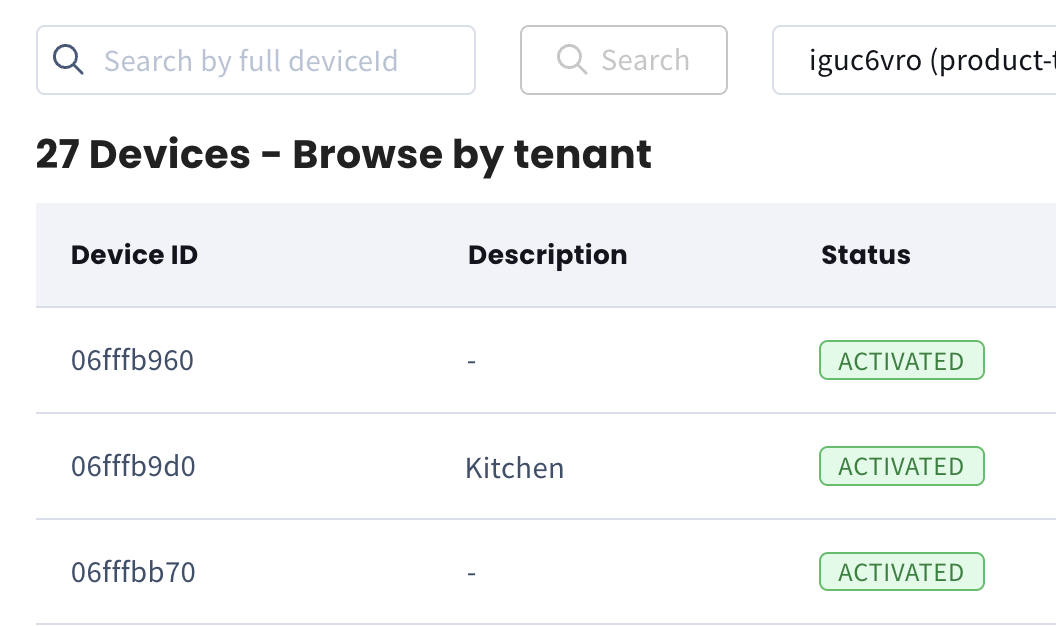
}You'll want to use some devices that don't have descriptions yet. For example, in this screenshot you can see that the descriptions are blank for some devices.
- Run the script like this:
node lookup-devices.js input.json output.json- When the script finishes, open the
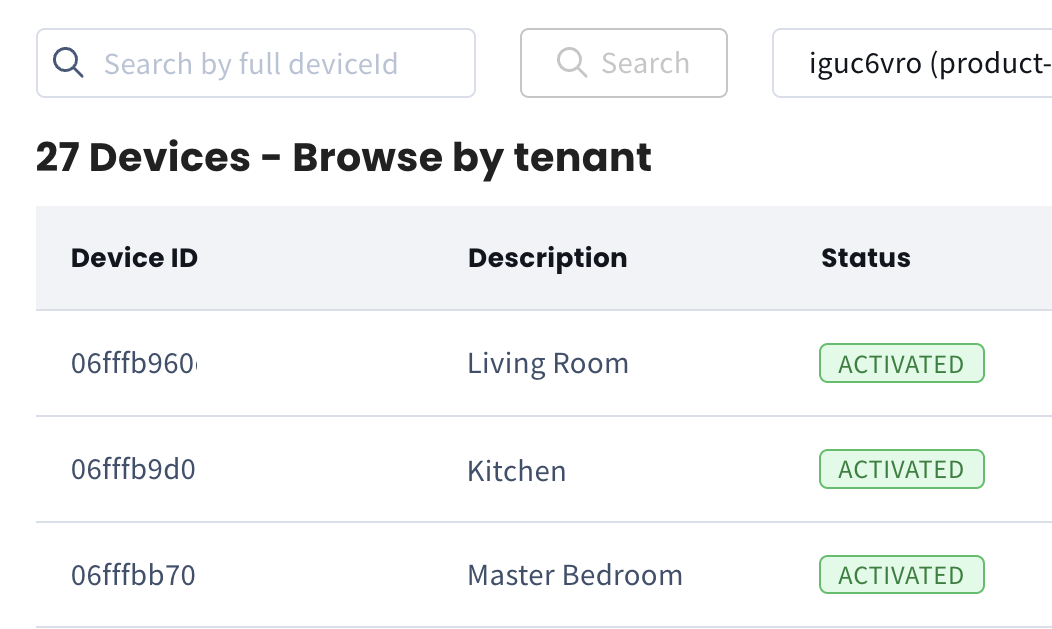
output.jsonfile to see the results. To check that updating the descriptions worked, reload the device list in the Senza Console and you'll see that the descriptions for the devices you selected have been filled in.
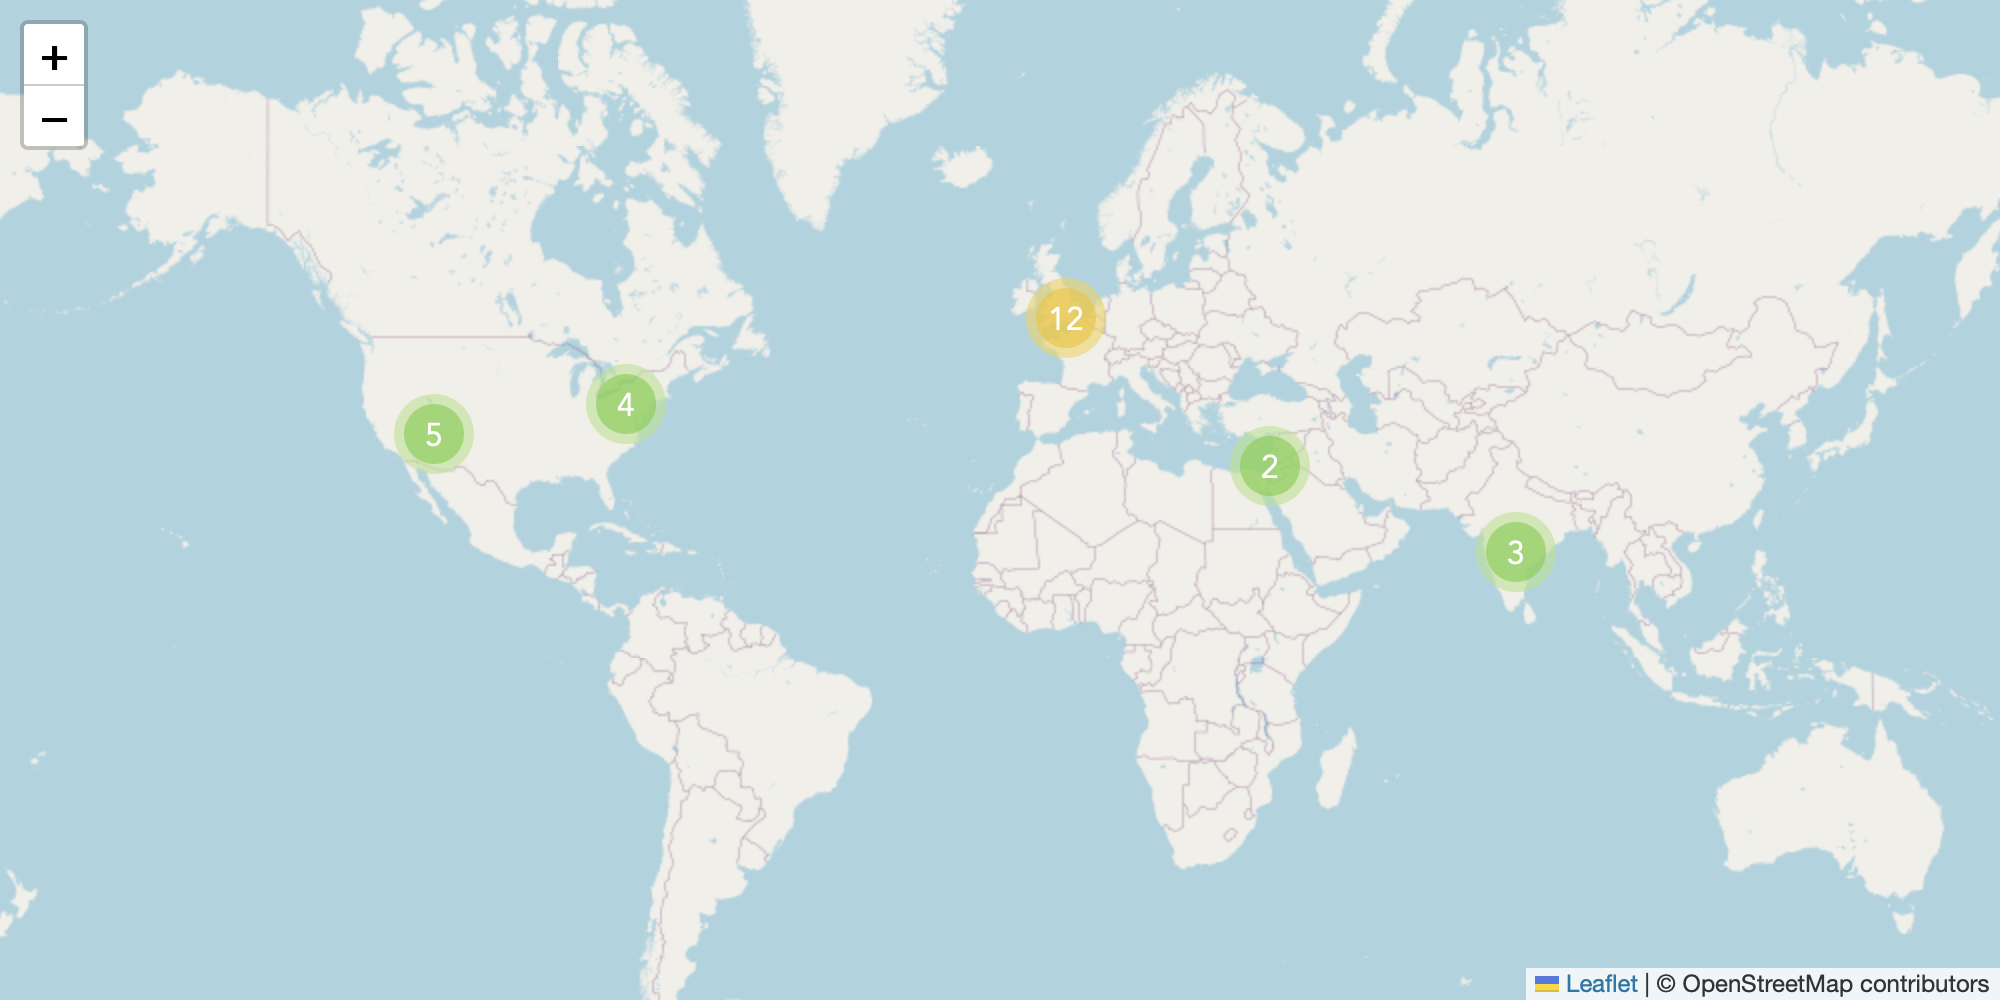
- Open the included map.html to see a map of the device locations. The map.js script reads the output file and uses Leaflet to draw a pretty map.
Note: you'll need to load the page over HTTP; it won't work from a file:// URL.
Summary
In this tutorial, you’ve learned how easy it can be to wire up a clean Node.js script that:
- authenticates with the Senza API,
- lists devices for a tenant,
- fetches full device details (including
lastConnectedIp), - enriches each device with geolocation data,
- and selectively updates device descriptions.
Once we have the location data, it's easy to draw it on a map.
See Also
- Devices MCP Server — chatbot version of this script
Updated about 2 months ago